
Puffy, Flat, or Fried? Here’s How to Fix Your Blowout Routine
Blowout hairstyles look effortless on TikTok, yet doing them at home often turns into arm day with meh results.
Hair ends up puffy, flat, or fried, and the salon price tags hurt.
A blowout is more than just drying your hair. It is a step‑by‑step styling method that uses heat, a brush, and product to create smooth, bouncy, long‑lasting hair. In this guide, we breaks down the main hair blowout styles, how to pick the right one for your length, how to keep your hair safe from heat, and how to stretch each wash for several days. When you learn to stretch each wash, you also give your hair a better chance to avoid unnecessary breakage.
If you want soft volume, shiny ends, and fewer wash days in a row, this guide is for you. If you want your shiny ends to actually stay that way, the condition of your hair matters just as much as the styling technique. You will learn how to pick your favorite blowout look, prep your hair the right way, and actually nail the finish you see on your feed.
Key Takeaways
-
Blowout hairstyles use a hair dryer, brush, and styling products to create an intentional shape, not just dry hair. One technique can give straight, wavy, curly, or super full looks by changing brush angles and products. That is why the method works across almost every hair type.
-
Hair length and cut decide which blowout style behaves best on your head. Short and shoulder‑length hair hold structure well, while mid‑length and long hair show the most drama and movement. Layers, fringes, and face‑framing pieces make every style look more alive.
-
Heat protectant is mandatory if you use hot tools, and small daily habits help a blowout last two to four days. Satin pillowcases, dry shampoo at the roots, and minimal touching keep volume, while weekly deep conditioning keeps strands strong for the next styling session.
As many stylists like to remind clients, “Your blowout starts in the shower, not when you pick up the dryer.”
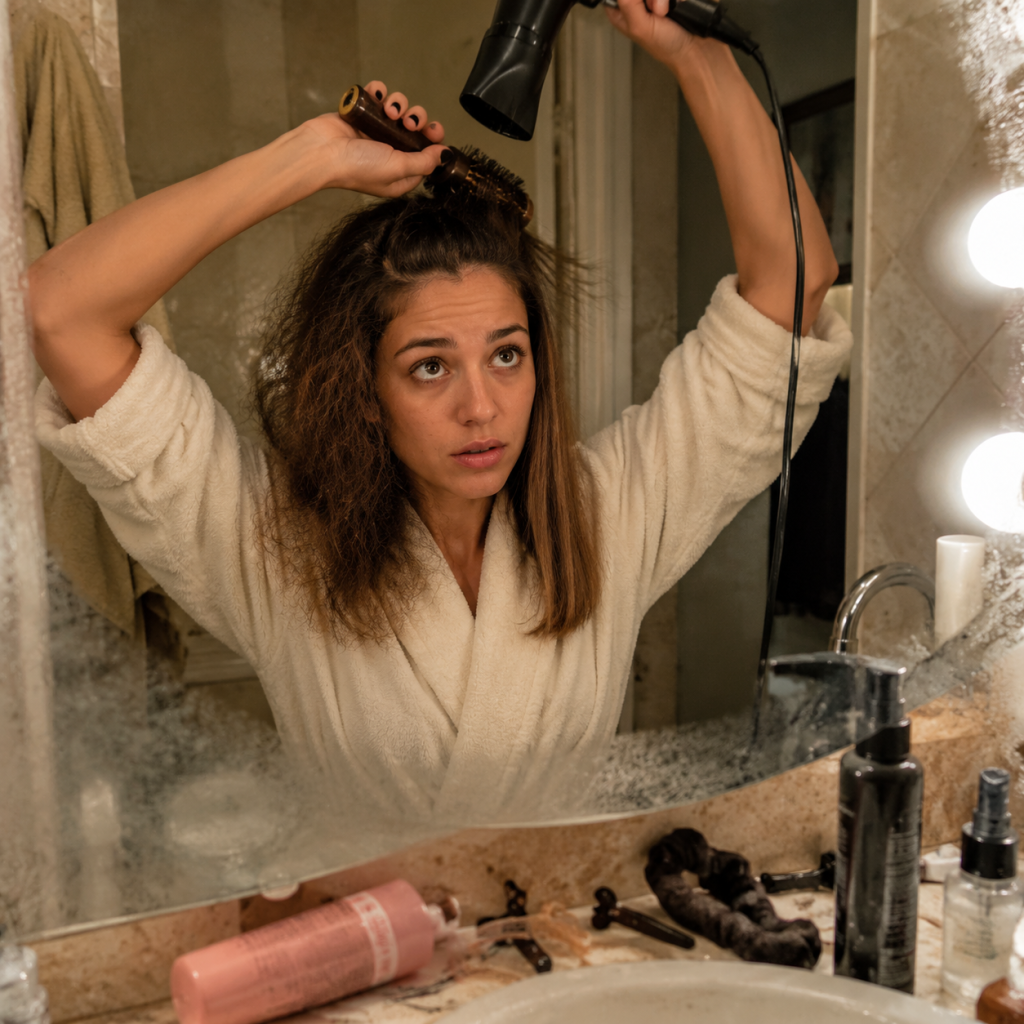
Table of Contents
- Introduction
- What Is a Blowout Hairstyle, Anyway?
- The Main Types Of Blowout Hairstyles And The Vibes They Give
- Blowout Hairstyles By Hair Length – What Actually Works For You
- The 90s Blowout Hair Revival – Why This Trend Is Everywhere Right Now
- Heat Protection And Hair Health – The Non-Negotiable Part Of Every Blowout
- Your Essential Blowout Toolkit – Tools And Products That Actually Matter
- How To Make Your Blowout Last 2–4 Days Because Rewashing Is Not The Vibe
- Frequently Asked Questions
- Frequently Asked Questions
What Is a Blowout Hairstyle, Anyway?
A blowout hairstyle is a wash‑and‑style routine where hair is dried and shaped at the same time to create smooth, polished volume. The dryer, brush, and product work together so your hair holds a specific look for days instead of hours. It is intentional styling, not random air‑drying.
During a classic blowout, hair is:
-
Washed and gently towel‑dried.
-
Covered with heat protectant.
-
Split into small sections.
-
Pulled over a round or paddle brush while the dryer follows from roots to ends.
This combo smooths the cuticle, adds lift, and sets the shape as the hair cools.
The cool part is range. According to Allure, salon blowouts can be straight, softly waved, curly, or mega voluminous, all from the same base method. That is why blowout hairstyles show up on every platform, from TikTok to Pinterest, across straight, wavy, curly, and coily textures.
The big difference from normal blow‑drying is intent. Regular drying just removes water. A blowout uses sections, brush tension, and styling products to target frizz, volume, and shine in a very specific way.
Main benefits of a blowout:
-
Smoother cuticle and less visible frizz
-
Longer‑lasting style compared with air‑drying
-
Custom level of volume for roots and lengths
-
Styling options for almost every hair type
One common stylist mantra is, “If you control the roots, you control the whole style.”
The Main Types Of Blowout Hairstyles And The Vibes They Give
The main types of blowout hairstyles share the same base routine but change the vibe with brush size, angles, and product choices. Once you understand each version, you can match your hair blowout style to your mood, outfit, or event instead of winging it.
This focuses on techniques you can repeat at home without a suitcase of products. Think of each look below as a recipe you can tweak for your own texture, from soft blowout hair to bold curly volume.
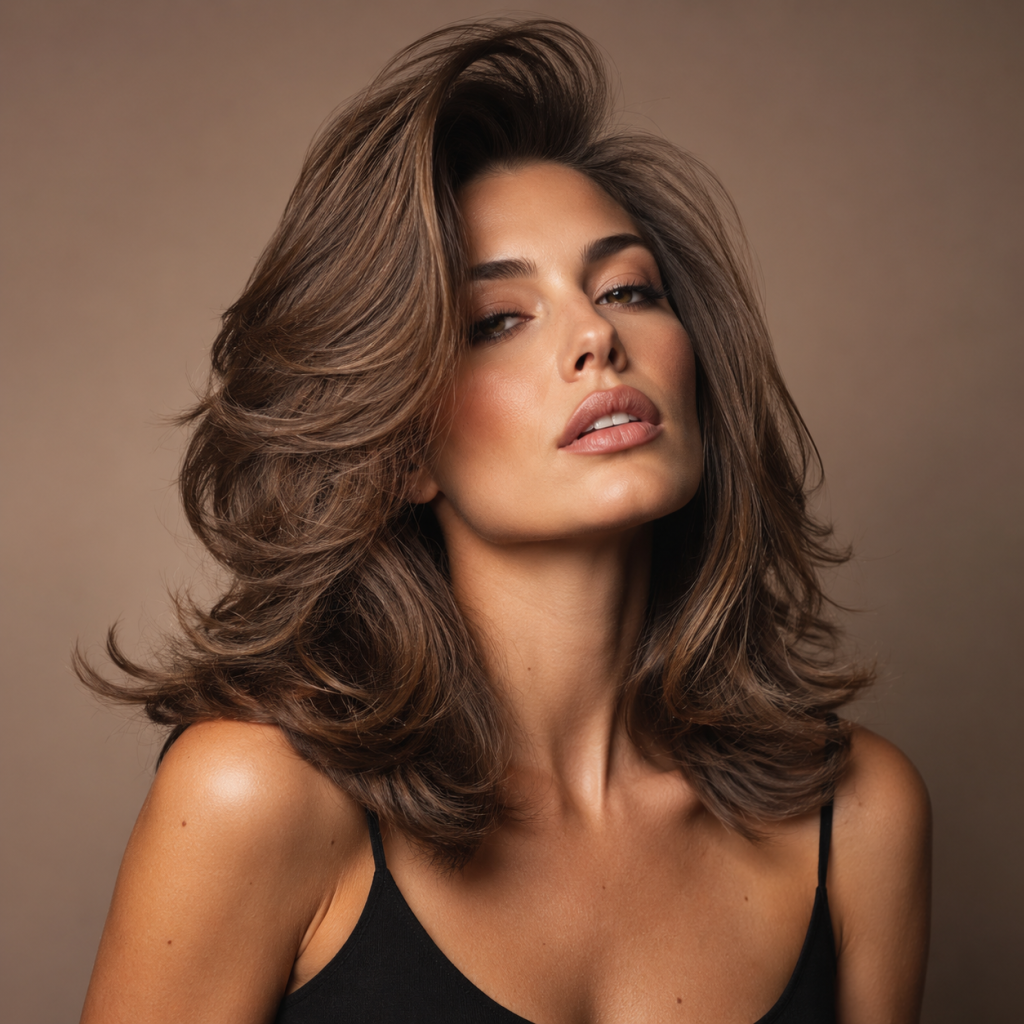
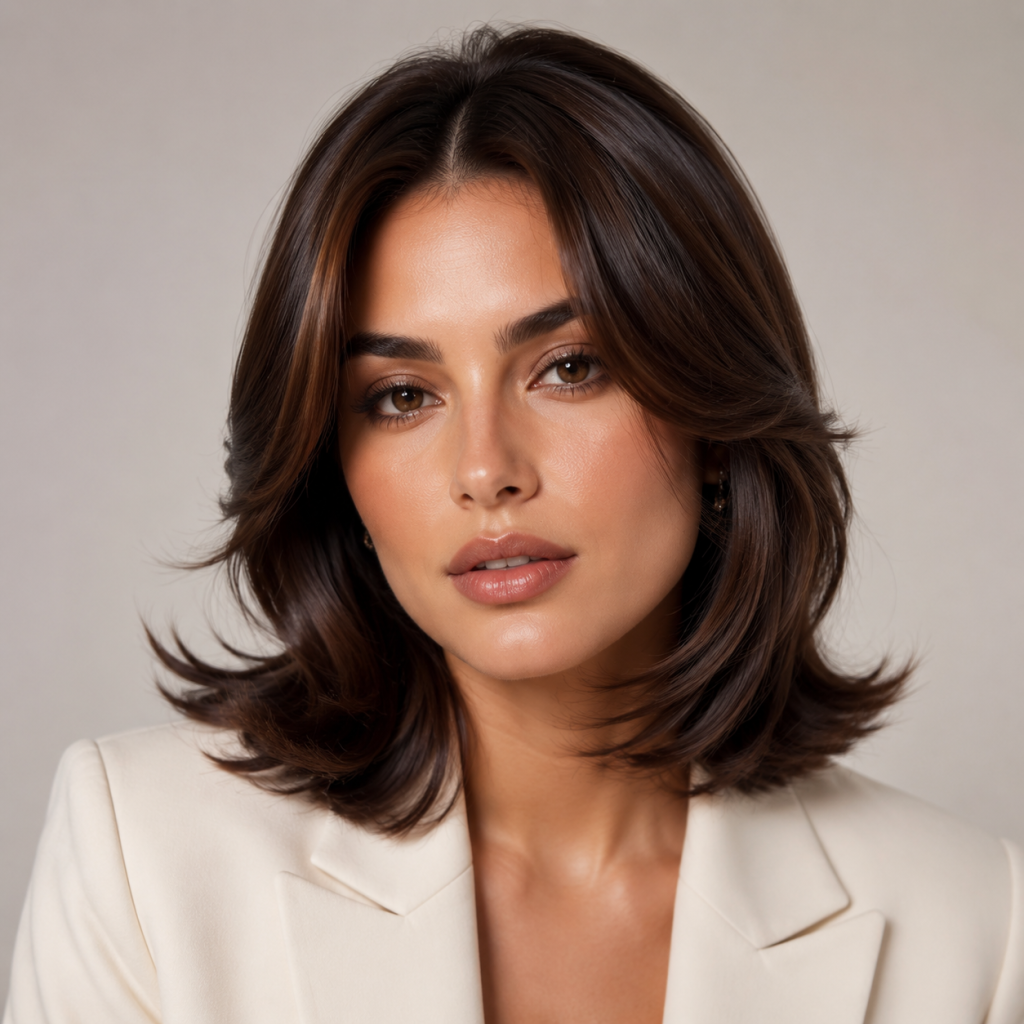
The Signature Blowout – The Classic That Always Delivers
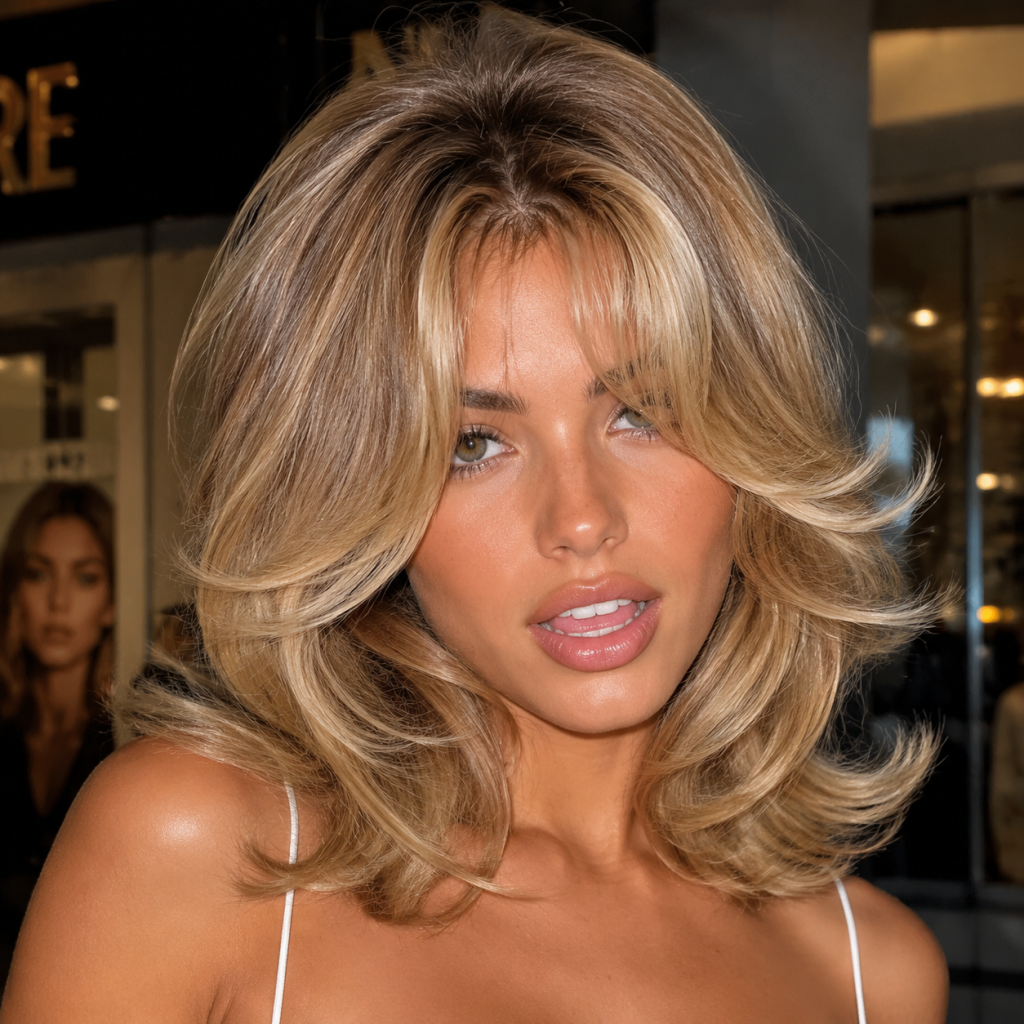
The signature blowout is what most people picture when they think salon hair. Roots sit smooth and lifted, mids stay sleek, and the ends flip into loose, airy movement. It works beautifully on a shoulder‑length blowout, mid‑length hair blowout, and very long hair.
To get it, you use a medium or large round brush plus a concentrator nozzle on your dryer. Sections near the crown are lifted up and back for volume, while the ends are wrapped around the brush and pulled through slowly for that soft bend. A light heat protectant keeps everything glossy instead of crispy.
This style fits almost any setting, from lectures to date night. It signals put‑together but not overdone. Finish with a light‑hold hairspray to keep the shape while still letting hair move when you walk.
Helpful tips for a signature blowout:
-
Aim the dryer down the hair shaft to boost shine.
-
Roll the brush away from your face around the front for a soft, open look.
-
Clip each finished section while it cools if your hair drops quickly.
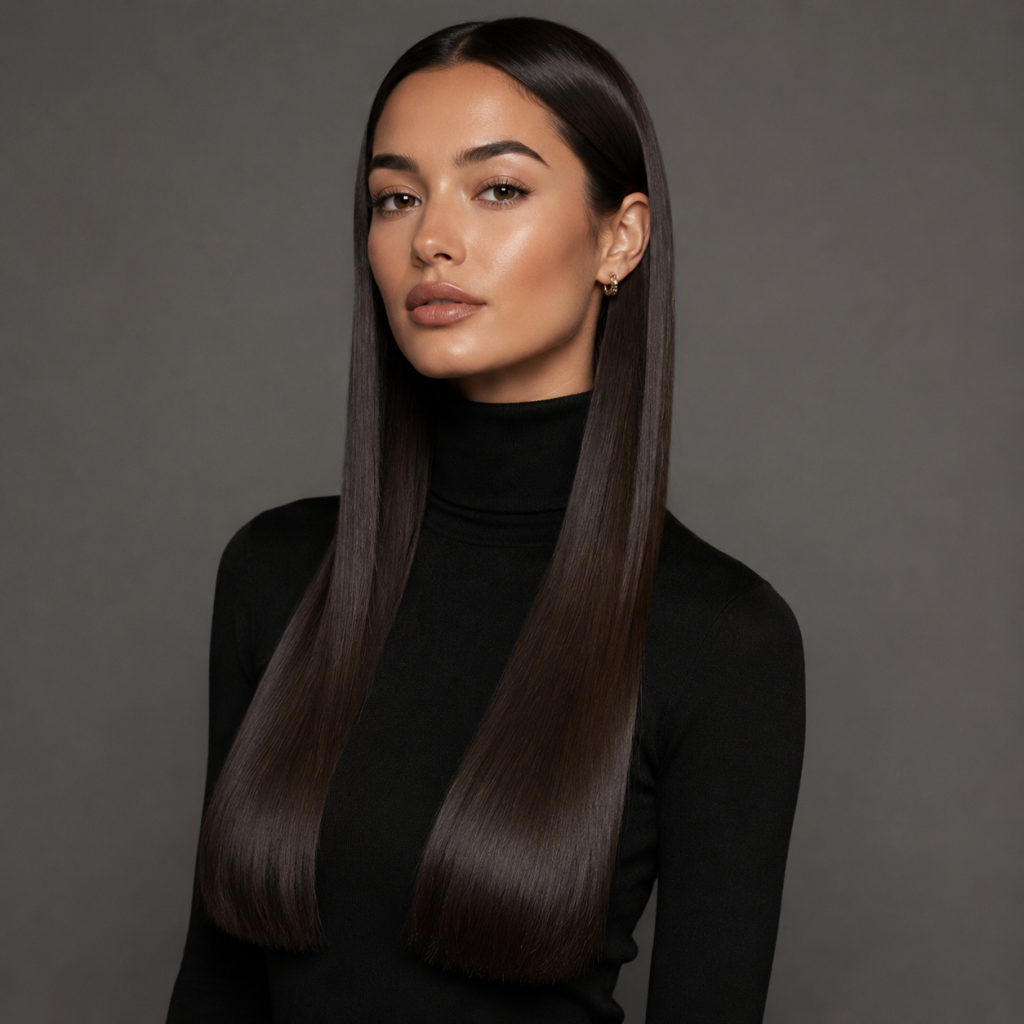
The Straight Hair Blowout – Sleek, Smooth, And Seriously Underrated
The straight hair blowout gives that glassy finish people often chase with a flat iron, but with less stress on the strands. According to the American Academy of Dermatology, using lower heat and fewer passes over each section helps limit breakage, which is exactly what a careful blowout does.
Research on the porosity and resistance of textured hair shows that chemical and physical damage can compound with repeated heat exposure, making a gentle blowout technique — like the straight method — a safer daily alternative; start on damp hair with a smoothing serum or anti‑frizz cream worked from mids to ends. Use a paddle brush and keep the dryer nozzle aimed down the hair shaft, never blasting straight at the roots from below. This closes the cuticle so light reflects cleanly.
Once dry, you can keep it loose, pull it into a sleek pony, or try a half‑up style for that sharp, minimal look. For blowout long hair, this straight version looks especially dramatic because of the length and shine. A pea‑size drop of hair oil on the ends adds extra polish without heaviness.
To keep a straight blowout from falling flat:
-
Focus product on mids and ends, not directly on the roots.
-
Use cool air at the end of each section to “set” the sleek finish.
-
Avoid heavy oils near the scalp, which can crush volume.
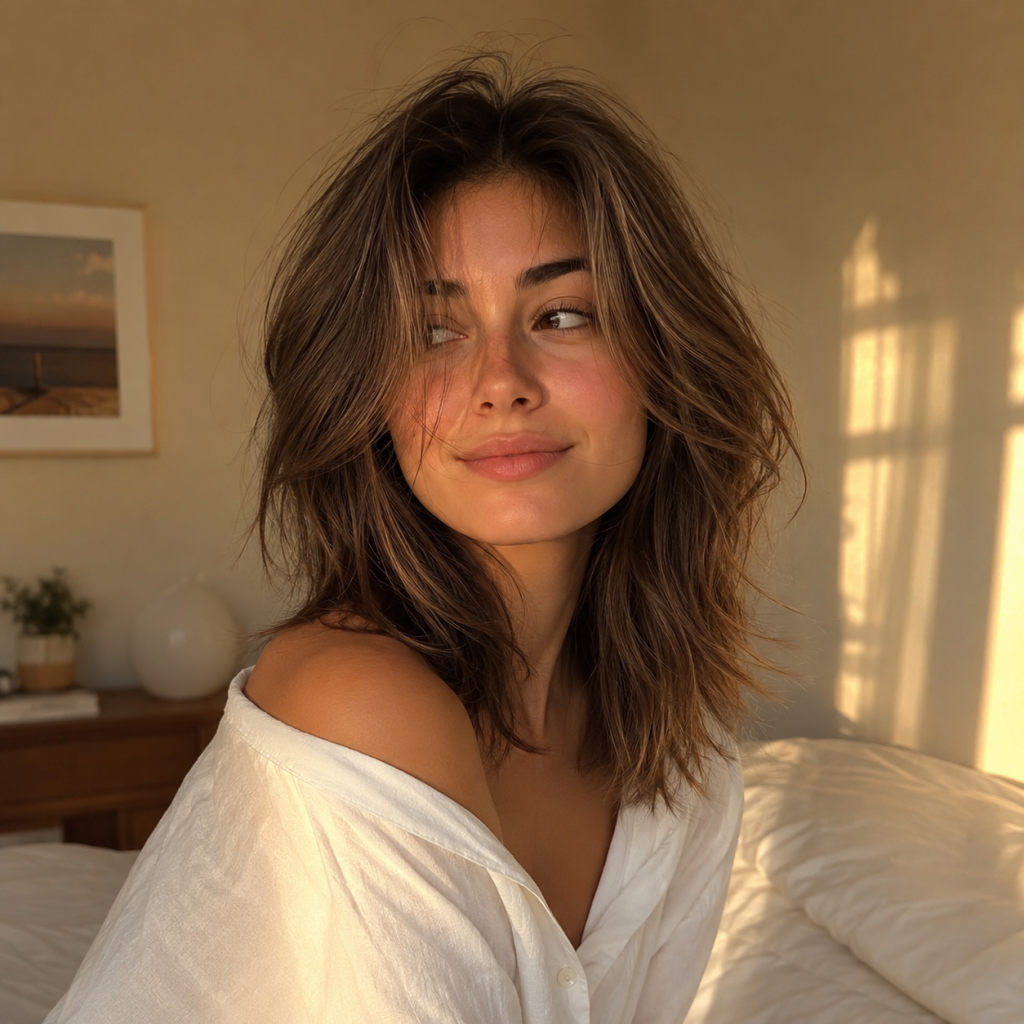
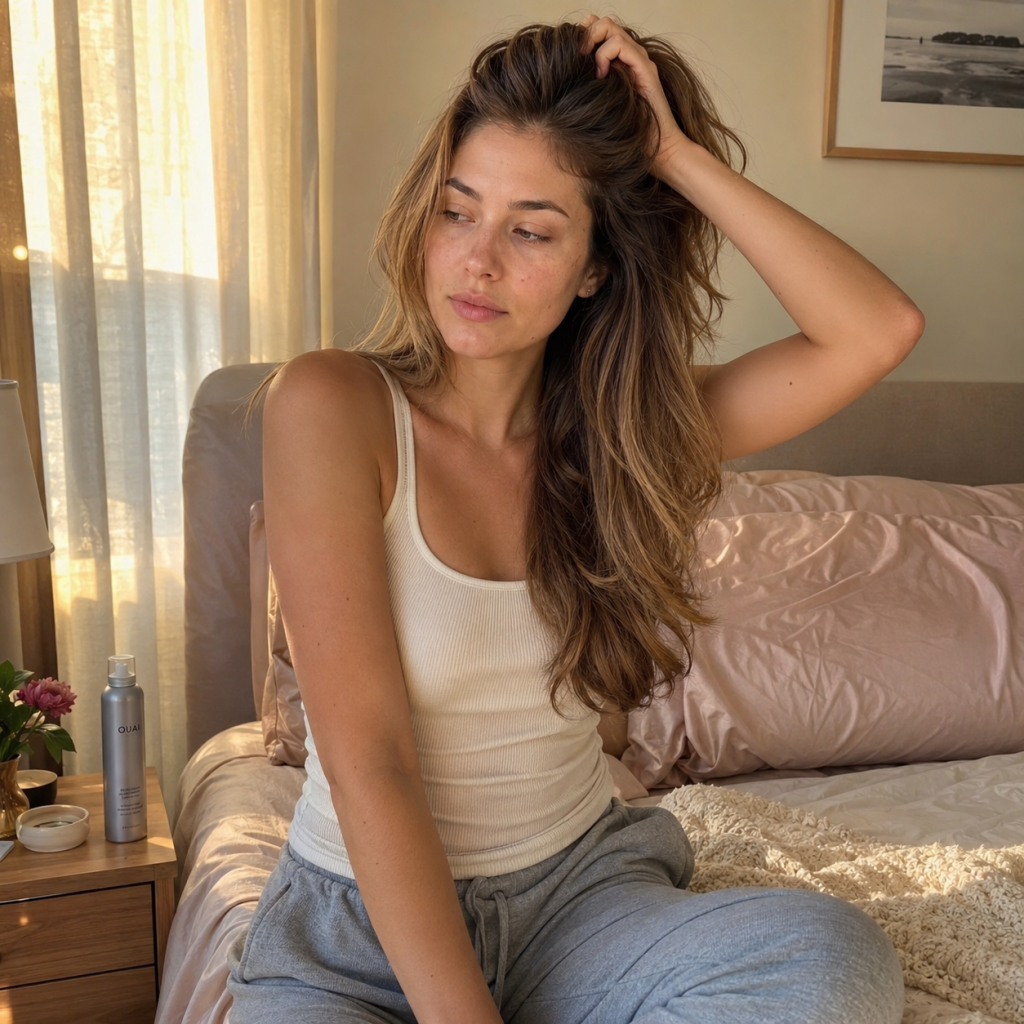
The Soft Blowout Hair Look – The I Woke Up Like This Edit
Soft blowout hair leans relaxed and textured, not stiff or super defined. Think lived‑in waves, movement through the mids, and fluffy ends that still look healthy. It sits between full beachy texture and the smoother signature blowout.
You build this look by adding grip before you dry. Work a light mousse, sea salt mist, or texturizing spray through damp hair, then rough‑dry a bit. Switch to a round brush for the top sections while using your fingers to scrunch the mids and ends as the dryer moves.
When hair is mostly dry, wrap a few random pieces around a curling wand away from your face. Leave the last inch or so of each section out of the iron for that undone finish. A quick mist of Oribe Dry Texturizing Spray, a favorite across stylists and editors at Byrdie, helps the wave pattern stay without turning stiff.
This style shines on:
-
Medium to thick hair that already has a little bend
-
Layered cuts that benefit from texture and movement
-
Anyone who wants “effortless” hair that still photographs well
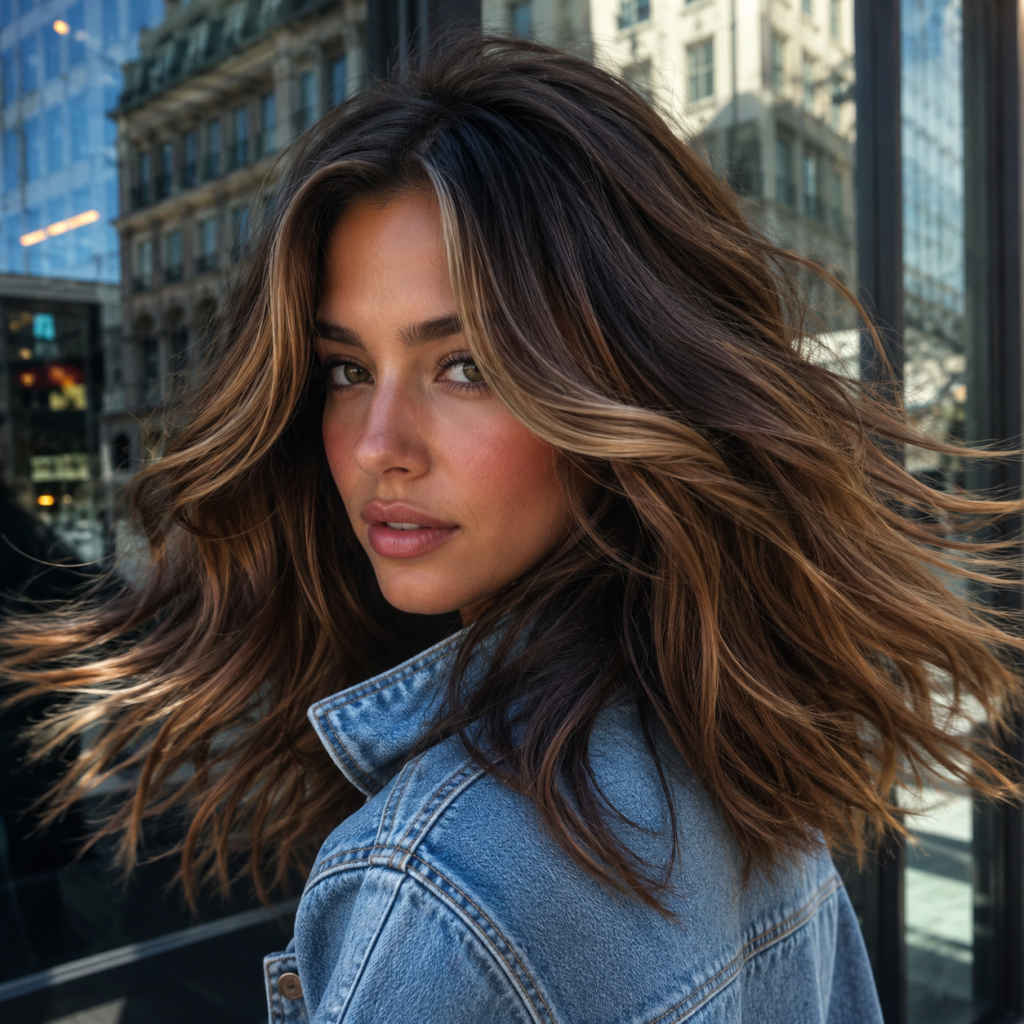
The Wavy Blowout – Volume And Movement In One
The wavy blowout doubles down on ripple and bounce while still feeling controlled. It is perfect if your hair already has some bend and you want to lean into it instead of forcing it straight. For blowout medium‑length hair and blowout long hair, this style looks especially full in photos and videos.
Use a medium round brush and decide which way you roll each section:
-
Rolling the brush inward toward your face creates a soft, romantic feel.
-
Rolling outward gives more model‑off‑duty energy, especially with a middle part.
Apply a lightweight mousse at the roots for hold, then focus your texturizing spray through the mids and ends once you are done drying. According to NaturallyCurly, products that add texture near the ends help waves last longer without weighing hair down near the scalp.
For extra staying power:
-
Alternate the direction of your waves through the back for a more natural pattern.
-
Twist sections lightly with your fingers as they cool so the wave pattern locks in.
-
Sleep with hair in a loose, low bun to keep waves intact overnight.
The Voluminous Blowout – Big Hair, Even Bigger Confidence
The voluminous blowout is for anyone whose hair flattens by lunch. Here, everything is about root lift and airy body through the mids. When done right, this look can visually double the fullness of fine hair without crunchy foam helmets.
On damp hair, apply a root‑lifting spray or volumizing mousse from scalp to mids. Work in sections and comb the product through with your fingers so it distributes evenly. Then flip your head upside down and start drying, directing the air from roots to ends while lifting sections away from your scalp.
Once hair is about eighty percent dry, flip back up and switch to a round brush for the top layers. Lift each section straight up, roll slightly at the roots, and pull through slowly. For days two and three, a small amount of dry shampoo at the crown refreshes lift. Statista reports that most people who use dry shampoo apply it at least once a week, which lines up with stretching blowouts between washes.
Pro tricks for more volume without stiffness:
-
Use a light, foamy mousse instead of heavy creams.
-
Focus hairspray under each section at the roots, not just on top.
-
Blow‑dry the crown in the opposite direction you plan to part, then flip it back.
The Blowout With Layers – When Your Cut Does Half The Work
A blowout with layers uses your haircut as the main styling tool. Short, medium, or long layers all create built‑in movement, which a blow dryer can really spotlight. This is where 90s blowout hair medium length looks, wolf cuts, and shag‑inspired shapes shine.
For this style, focus first on product application with your hands, not a comb. Finger application keeps sections slightly separated, which makes layered cuts look piecey and modern instead of helmet‑like. A light mousse or cream scrunched into the mids and ends of each layer works well.
During the blowout, switch between a round brush and your fingers. Use the brush to smooth the top and the fingers to flick or twist the ends of layers while the hair cools. On a layered bob, this feels chic and sharp. On a wolf cut, it looks full and chaotic in the best possible way.
To keep layered blowouts fresh:
-
Ask your stylist to keep the perimeter strong so ends never look stringy.
-
Use a texturizing spray only on the outer layers so the shape does not collapse.
-
Refresh the face‑framing pieces with a quick round‑brush pass on day two.
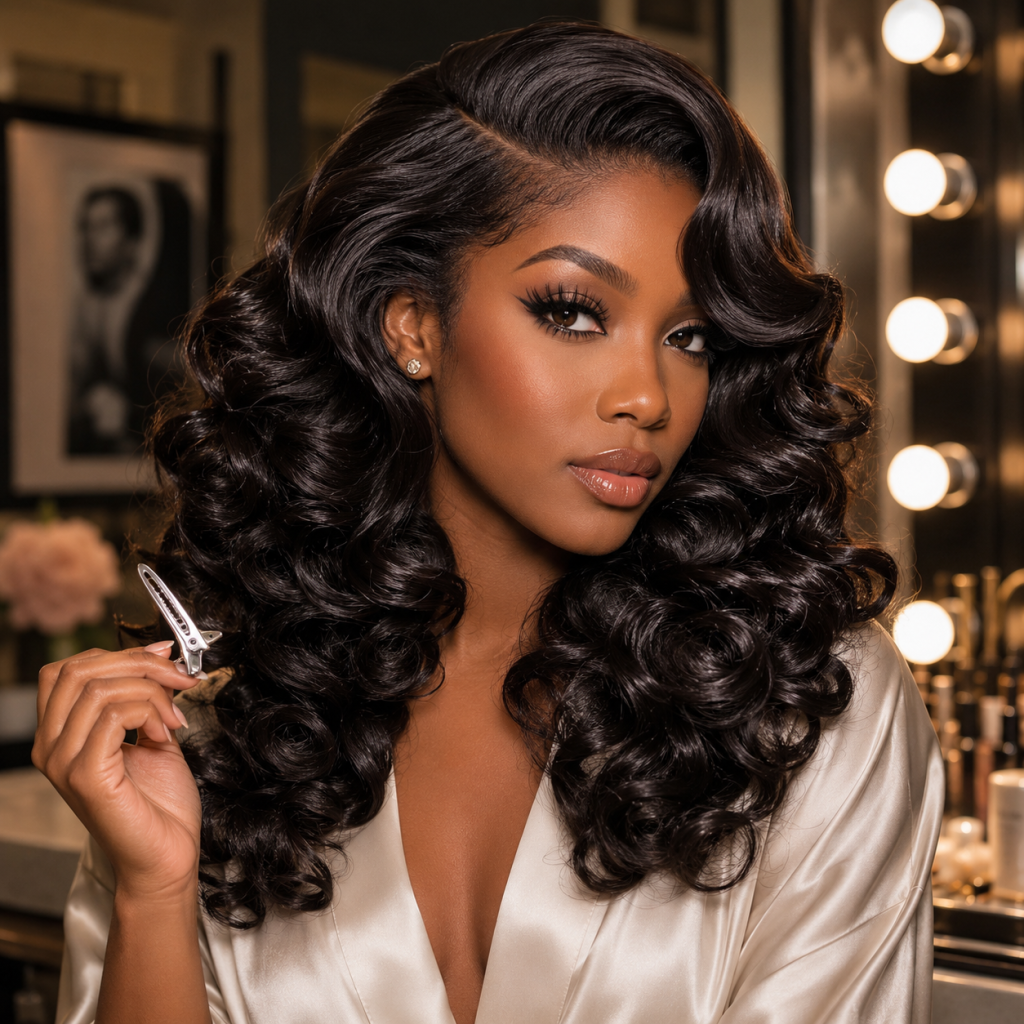
The Curly Blowout – Old Hollywood Drama For Your Tuesday
The curly blowout can mean two slightly different things, and both look amazing. One version uses a round brush to create big, structured curls that scream Old Hollywood. The other version uses a diffuser on natural curls to pump up volume and definition without changing the pattern.
For the brush version, wrap small sections fully around a round brush and pull them through slowly while the dryer follows. Pin each curl up with a clip while it cools, then release once your whole head is cold to the touch. According to the Journal of Cosmetic Science, hair holds its set best when it cools completely in shape, which is why this step matters.
For natural curl textures, attach a diffuser and use low or medium heat. Scoop sections gently into the diffuser and push upward toward your scalp, holding until each section feels mostly dry. Studies on the effects of plasma-activated water on hair structure across different hair types — showing that proper heat protectant can cut protein loss from hot tools by around fifty percent, which is especially important for textured hair that already tends to be drier.
Extra care for curly blowouts:
-
Apply curl cream and gel on soaking‑wet hair before diffusing.
-
Avoid touching curls while they dry; scrunch only once they are fully cool.
-
Sleep with a silk or satin bonnet or in a pineapple to keep shape between washes.
A saying many curl specialists use is, “Set the curl, then leave it alone.”
Blowout Hairstyles By Hair Length – What Actually Works For You
Blowout hairstyles look different on every length, even with the same products and brush. Short hair shows crisp shape, medium hair gives balance, and long hair brings the drama. Picking a style that matches your length makes everything easier.
Short cuts like pixies and bobs benefit from controlled volume that keeps them from collapsing or puffing out. Shoulder‑length and mid‑length cuts are the most flexible, since they can swing between straight, wavy, and curly with less effort. Very long hair often needs more time and sectioning, yet rewards you with the most movement and bounce.
Here is a quick guide to match your hair length to the best type of blowout.
| Hair Length | Best Blowout Styles | Key Technique Tip |
|---|---|---|
| Short pixie or bob | Signature, voluminous, angled bob | Use a round brush to roll ends under or outward |
| Shoulder length | Soft waves, straight, signature | Pick a medium round brush for hold and control |
| Mid length | Wavy, layered, voluminous | Treat it as a blank canvas for almost any style |
| Long hair | Curly, Hollywood waves, voluminous | Split into many sections and use larger barrels |
Medium‑length hair holds shape the longest, since it is heavy enough to stay put but light enough to move. For blowout long hair, patience and clips are your best friends. Sectioning makes the process feel slower in the moment but actually speeds up the total time because each pass works better.
Quick tips by length:
-
Short hair: Use less product than you think; a dime‑size amount is often enough.
-
Shoulder to mid‑length hair: Try different partings (deep side, center) during the blowout to see which gives more lift.
-
Long hair: Work in horizontal sections starting from the nape and clip away finished pieces so they do not tangle.
The 90s Blowout Hair Revival – Why This Trend Is Everywhere Right Now
The 90s blowout hair medium length comeback blends nostalgia with modern color and styling. Think chunky layers, fluffy volume, and face‑framing pieces that fall just right on camera. Social feeds are full of these looks because they photograph well and still feel casual.
On TikTok and Instagram, tags for 90s hair, Pamela Anderson hair, and Rachel Green hair rack up millions of views. According to Pinterest trend reports, searches for 90s blowouts and layered cuts keep climbing with Gen Z users. That mix of retro and current makes the style an easy choice for content photos, events, and daily life.
Modern versions often mix old shapes with new shades. Balayage, money pieces, and lived‑in blonde color bring depth that older single‑process color could not match. Blowouts show off that dimension by separating light and dark strands as the hair moves.
If you want to try a 90s‑inspired blowout at home:
-
Ask for layers that start around the cheekbones or jaw.
-
Focus the strongest bend on the ends and around the face.
-
Use large Velcro rollers or a large round brush at the crown for that fluffy top.
The Style References Driving The 90s Revival
Several pop culture reference points sit behind this whole wave. Jennifer Aniston on Friends gave us the layered, mid‑length blowout with flipped ends that still shows up in salon mood boards. The cut works especially well for shoulder‑length blowout hair because the layers swing without leaving the ends thin.
Pamela Anderson brought a different energy, with high‑volume roots, messy bangs, and tousled blonde lengths. Her look feels like soft blowout hair taken to its wildest setting. TikTok creators copy that style with hot rollers, Velcro rollers, and round‑brush blowouts for party nights.
Then there is the wolf cut, which TikTok pushed into mainstream. It mixes shag and mullet vibes, then behaves like a 90s blowout when you dry it with a round brush and texturizing spray. All these references now blend with modern color work from brands like Redken, Wella, and Olaplex‑treated blondes, giving classic shapes a fresh twist for the 2020s.
Think of the 90s blowout as “statement hair that still moves” — big, bouncy, but never frozen.
Heat Protection And Hair Health – The Non-Negotiable Part Of Every Blowout
Heat protection is the safety net under every good blowout. A pretty style is pointless if the routine slowly fries your ends. The goal is hair that looks good now and still feels soft in six months.
Research — including findings on polyphenol–inorganic sulfate complex-enriched straightening formulas — shows that using a heat protectant with film‑forming ingredients can cut protein loss from hot tools by roughly fifty percent. That is a huge difference over time. Protectant is not a bonus product; it is the first one that should touch damp hair.
Temperature also matters. The American Academy of Dermatology notes that using the lowest heat setting that still works for your hair type helps reduce dryness and breakage. Color‑treated hair, especially blonde shades, needs extra caution because lightening already weakens the cuticle.
Healthy blowout routines look at the full picture, not just the dryer. That includes how you wash, how often you trim, and whether you replace moisture with masks or bonding treatments between styles. This is where brands like Olaplex and K18 come in for many people, although treatments make sense instead of pushing endless bottles.
Simple heat‑safety rules:
-
If your tool has numbers, try to stay under about 350°F (177°C) for most hair types.
-
If you hear sizzling or smell burning, the setting is too high or the hair is too wet.
-
Do not pass over the same section with hot tools again and again; one slow pass is better than five quick ones.
A stylist saying worth remembering: “If you can smell your hair, the heat is too high.”
How To Protect Your Hair Before, During, And After Every Blowout
Good hair health around blowouts starts in the shower. Rinse with lukewarm water instead of steaming hot water, since very high temperatures swell the cuticle and can make hair feel rough. Apply conditioner from mid‑lengths to ends, leave it on for at least two minutes, and gently squeeze out extra water before adding any styling products.
A simple structure many people follow:
-
Before drying
-
Blot hair gently with a microfiber towel or soft T‑shirt.
-
Detangle with a wide‑tooth comb or your fingers, starting from the ends.
-
Apply heat protectant from roots to ends and comb it through for even coverage.
-
-
During the blowout
-
Keep your dryer on medium heat and high airflow when possible.
-
Use the concentrator nozzle for smoother finishes and more control.
-
Keep the dryer moving; do not park it on one spot.
-
-
After styling
-
Seal the style with a cool‑shot blast to help close the cuticle.
-
Apply a tiny amount of oil or serum only to the ends if they feel dry.
-
Avoid tight elastics that can dent freshly smoothed hair.
-
According to the American Academy of Dermatology, keeping tools at moderate heat settings reduces split ends and dullness. We suggest extra support for color‑treated hair. Bond repair masks, regular trims every eight to ten weeks, and occasional toning help color stay bright without rough texture — a regimen especially important given that studies on porosity and resistance of textured hair confirm that cumulative chemical and physical damage degrades structural integrity over time. After styling, swap one normal conditioner day each week for a richer mask that sits for ten minutes. That habit restores moisture pulled out by heat and keeps future blowouts smoother with less frizz.
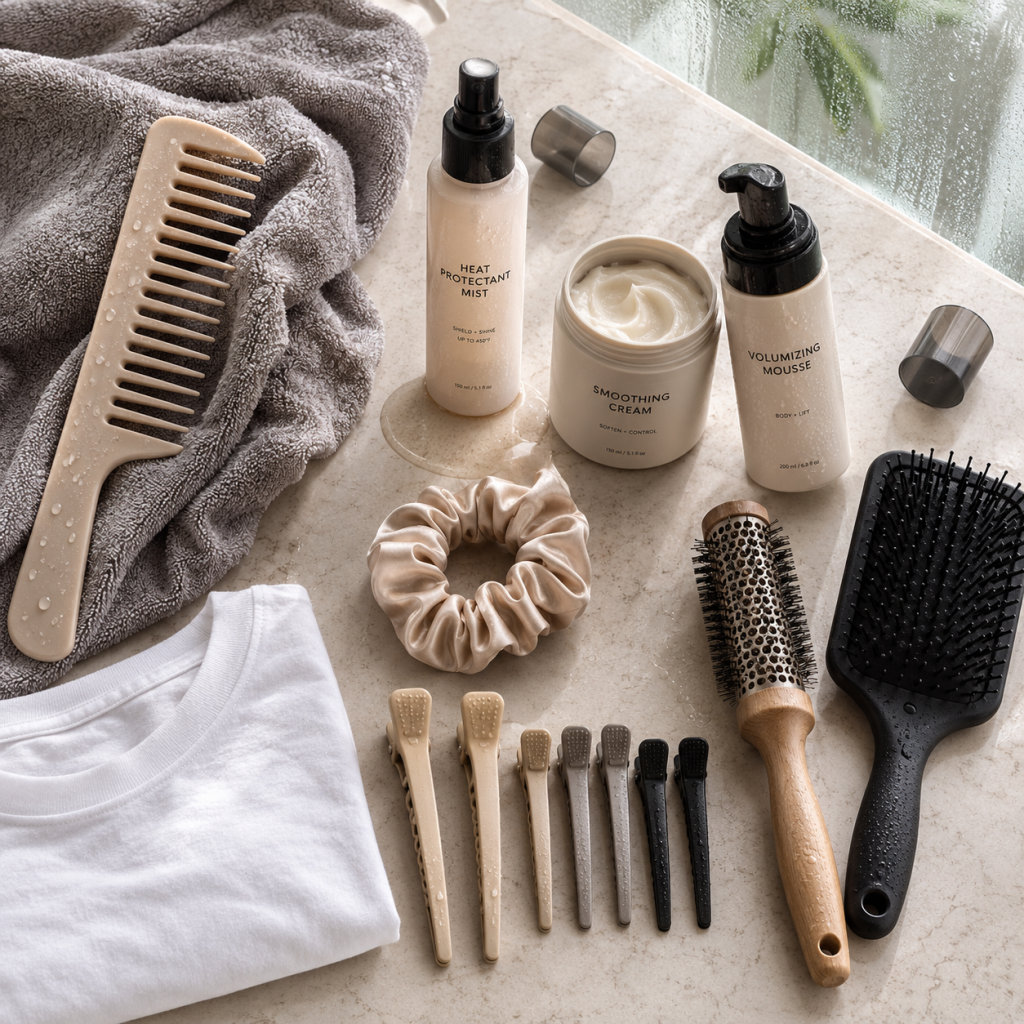
Your Essential Blowout Toolkit – Tools And Products That Actually Matter
You do not need a bathroom cabinet full of random sprays to get great blowout hairstyles. What you truly need is a small set of tools and products that match your hair type and the finish you want. A tight lineup is easier to use and easier on your wallet.
A solid dryer, one or two brushes, and three or four products can cover almost every style in this guide. Ionic dryers from brands like Dyson, ghd, or BaByliss help reduce frizz and cut drying time, and research from L Oréal Professionnel notes that faster drying can lessen surface damage compared with long sessions under weak dryers. The exact brand matters less than having decent power and heat control.
Brush choice shapes the final look more than most people realize. Round brushes build lift and wave, while paddle brushes flatten and smooth. Diffuser attachments are heroes for curls and coils, since they spread airflow gently instead of blasting one spot.
Do not forget the small tools that make a big difference:
-
Sectioning clips to keep hair organized
-
A heat‑resistant mat if you use irons or wands
-
A microfiber towel to reduce frizz before you even start styling
Think of your tools as your styling “team” — each one has a job, and you do not need more players than the style requires.
The Streamlined Blowout Product Lineup
-
Heat protectant spray or serum should always go on first when hair is damp. Look for formulas that mention silicones, proteins, or polymers, since these ingredients form a light shield on the surface. According to Cosmetics & Toiletries, these protective films help reduce water loss and breakage during styling.
-
One main styling product sits at the heart of your routine, either a volumizing mousse or a smoothing cream. Pick mousse if your main goal is lift and bounce, especially for fine hair. Reach for cream or serum if you want fewer flyaways and a sleek finish on thicker or naturally frizzy hair.
-
Dry texturizing spray works like magic dust for beachy and wavy finishes. Oribe Dry Texturizing Spray is a long‑time favorite mentioned by editors at Allure and Byrdie, but many brands make similar products. Use it sparingly through mids and ends for grip and piecey separation, not at the roots.
-
Light‑hold hairspray is the quiet closer that keeps everything in place. Choose formulas that promise movement instead of freeze, and mist from a distance so you do not soak any one area. We often prefer matte clays and pastes over shiny gels for extra texture, applied with fingers for natural movement.
What you can usually skip:
-
Very heavy oils on fine hair, which tend to flatten the style
-
Strong gels for soft or wavy blowouts, since they can make hair crunchy
-
Layering too many products at once; start with less and add if needed
The Tools You Actually Need
-
A hair dryer with both a concentrator nozzle and a diffuser attachment covers nearly every style. The concentrator focuses air so you can smooth cuticles in straight and signature blowouts. The diffuser spreads air for curls, waves, and natural textures, protecting patterns from frizz.
-
A round brush with a large barrel helps create volume and loose waves, while a smaller barrel carves out tighter bends and curls. Boar‑bristle or mixed‑bristle brushes from brands like Olivia Garden or Denman are favorites among stylists because they smooth while they shape.
-
A paddle brush is your best friend for a straight hair blowout. The wide surface area keeps sections flat, and the bristles glide down the shaft without grabbing too hard. This tool pairs well with smoothing creams and serums.
-
Optional hot tools like curling wands or irons help refine beachy waves, Hollywood waves, or curly blowouts. Use them after the main blowout on lower heat, and always layer them over heat protectant that you already applied before the dryer.
How To Make Your Blowout Last 2–4 Days Because Rewashing Is Not The Vibe
A well‑done blowout should last more than one afternoon. With smart aftercare, many people comfortably stretch blowout hairstyles for two to four days. According to Byrdie, most salon blowouts last around three days when paired with satin pillowcases and dry shampoo.
Sleep habits come first. Swap your cotton pillowcase for satin or silk to cut down friction that ruffles the cuticle. The Sleep Foundation notes that smoother fabrics pull less on hair, which helps styles stay intact and reduces tangles. For wavy or curly blowouts, gather hair loosely on top of your head in a pineapple or braid it softly before bed.
Oil control comes next. On day two or three, spray a small amount of dry shampoo at the roots, let it sit for a minute, then massage it in. This absorbs oil that collapses volume and brings back lift. Try to avoid touching your hair all day, since oils from your hands break down hold quickly.
When waves or curls start to soften, do not redo the entire blowout. Wrap a few key sections around a wand or curling iron on low heat to refresh shape in ten minutes. A tiny mist of hairspray afterward sets everything again so you can squeeze one more day from your style.
If you work out or live in humid weather:
-
Tie hair in a loose, high bun before exercise to keep sweat mostly at the roots.
-
Use a sweatband at the hairline to protect shorter pieces.
-
Afterward, dry your roots on cool or low heat while lifting them with your fingers.
A practical rule: “Style once, maintain often.” The better your nightly routine, the fewer full restyling sessions you need.
Frequently Asked Questions
What Is The Difference Between A Blowout And Just Blow-Drying Your Hair?
A blowout is a full styling routine, while regular blow‑drying just removes water. During a blowout, you work in sections, use brushes and product, and shape the hair while it dries. The goal is smooth, long‑lasting volume, not simply getting your hair from wet to dry.
How Long Does A Blowout Hairstyle Last?
Most blowouts last two to four days, depending on your hair type and habits. Fine hair often loses height sooner, while thicker or textured hair holds shape longer. Sleeping on satin, using dry shampoo at the roots, and staying away from humidity help stretch each style.
Can You Get A Blowout On Naturally Curly Or Textured Hair?
Yes, curly and textured hair work great with the right blowout method. A diffuser blowout supports your natural curl pattern instead of fighting it. By using curl creams, low heat, and scrunching upward into the diffuser, you get defined curls, less frizz, and more controlled volume.
Is A Blowout Damaging To Hair?
A blowout can be gentle when done with heat protectant and moderate temperatures. It usually harms hair less than daily flat‑ironing, since the heat is more spread out. Using protectant, keeping tools under about 350 degrees Fahrenheit, and doing weekly deep conditioning all help keep damage low.
What Blowout Style Works Best For Medium-Length Hair?
Medium‑length hair is extremely flexible and supports almost every blowout style. Signature, soft wave, and voluminous looks all sit nicely at this length. The shoulder‑length blowout and mid‑length hair blowout usually hold shape longer than very short or super long cuts, often with less product.
What Products Do I Actually Need For A Blowout At Home?
You only need a few items for solid results at home. Use a heat protectant, one styling product such as mousse for volume or serum for smoothness, and a light‑hold hairspray. A dry texturizing spray is helpful but optional. We always prefer a tight routine over a crowded shelf.
How Often Is It Safe To Do A Blowout?
For most hair types, doing a blowout one to three times per week is reasonable if you use heat protectant and add moisture back with masks or conditioners. Very fragile, highly lightened, or already damaged hair may do better with fewer heat‑styling sessions and more air‑dry days.
What Size Round Brush Should I Use?
As a rough guide:
-
Short hair or bangs: small to medium barrel
-
Shoulder to mid‑length hair: medium barrel
-
Long hair or big waves: large barrel
Larger barrels give looser bends and more volume, while smaller barrels create tighter curls or flips.
Can I Do A Blowout Without A Round Brush?
Yes. For straighter styles, a paddle brush plus a concentrator nozzle works well. For soft waves, you can rough‑dry with your fingers, then use a curling wand on a few sections to mimic a wavy blowout. A round brush gives the most classic result, but it is not the only option.
Conclusion
Blowout hairstyles are not a mysterious salon secret. They are a repeatable mix of clean hair, the right products, a focused dryer, and a bit of patience. Once you match the style to your hair length and texture, the whole process feels less like guesswork and more like a simple routine.
Our approach keeps everything clear and honest, from heat safety to product choices. You now know how to build volume, keep curls defined, or lean into a glassy straight finish while still taking care of your strands. With heat protectant, satin pillowcases, and a streamlined toolkit, each wash day can give you two to four days of hair that actually cooperates.
Save this guide, experiment with one blowout style at a time, and pay attention to what your hair likes. With a little practice, your at‑home blowouts can look and feel a lot closer to the salon — without the salon bill every week.