
Easy Christmas Paintings Anyone Can Do (Step-by-Step Tutorial)
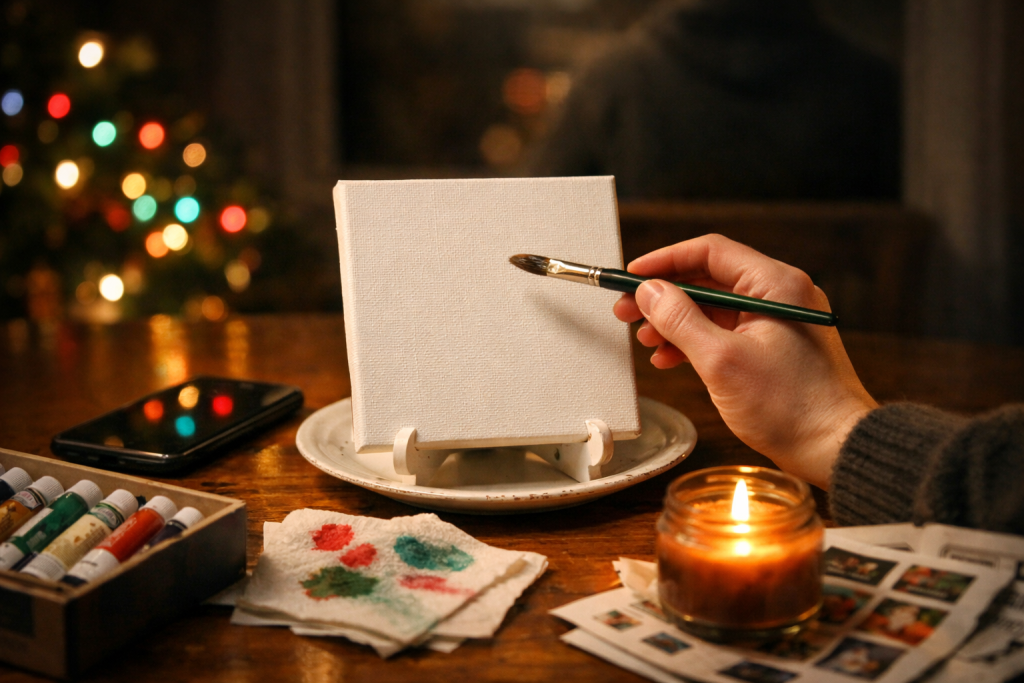
Holiday music is playing, a candle smells like sugar cookies, and a blank canvas is staring back. The phone is full of screenshots of easy Christmas paintings, but the hand holding the brush suddenly feels shy. There is that tiny voice saying, “What if this looks nothing like the video?”
The word artist can feel heavy. Scroll through Pinterest or TikTok and every DIY seems effortless, aesthetic, and perfectly lit. It is easy to forget how it felt as a kid to glue cotton balls onto Santa beards, splash paint on paper plates, and proudly hang every wobbly snowman on the fridge without a second thought.
Christmas painting can bring that feeling back. It is less about producing a flawless piece and more about the calm of brushstrokes, the comfort of familiar colors, and the joy of seeing something appear where there used to be nothing. With the right guidance, easy Christmas paintings become a cozy ritual, not a test.
In this guide, everything is broken into small, doable steps. You will gather simple supplies, learn five beginner-friendly techniques, follow a full step-by-step “grinchy” tree tutorial, and get three more project ideas to try next. There is also a whole section on fixing mistakes, plus tips for showing off your art at home or online. By the end, that blank canvas will feel less like pressure and more like an invitation.
“We don’t make mistakes, just happy little accidents.”
– Bob Ross
What Makes Christmas Paintings Perfect For Beginners
Holiday art is one of the easiest ways to start painting because the expectations are different from a regular art class. Christmas pieces are supposed to feel cozy, handmade, and a little bit rustic. That means a crooked star or a slightly lopsided tree often makes easy Christmas paintings more charming, not less.
These projects also help beginners because:
-
The color palette is forgiving. Reds, greens, and bright whites have strong coverage, so they hide a lot of small errors.
-
Most classic holiday icons use simple shapes like circles, triangles, and gentle curves, so there is no need for advanced drawing skills.
-
The emotional pull of the season gives extra motivation to finish, since your painting can hang on a wall, sit on a shelf, or become a heartfelt gift.
-
Fast-drying acrylic paint lets you see progress in a single evening instead of waiting days.
Another reason Christmas themes are beginner-friendly is the emotional side. Acrylic paint dries quickly, so you can see results fast, and there is something very satisfying about turning a quiet night into a finished decoration. Plus, the viral “whimsical” style that fills social feeds right now actually wants wavy lines and exaggerated curves. With holiday art, success is not about impressing a gallery. It is about feeling proud every time you walk past your creation and remembering how relaxed you felt while making it.
“Every artist was first an amateur.”
– Ralph Waldo Emerson
Essential Supplies: Your Beginner’s Shopping List
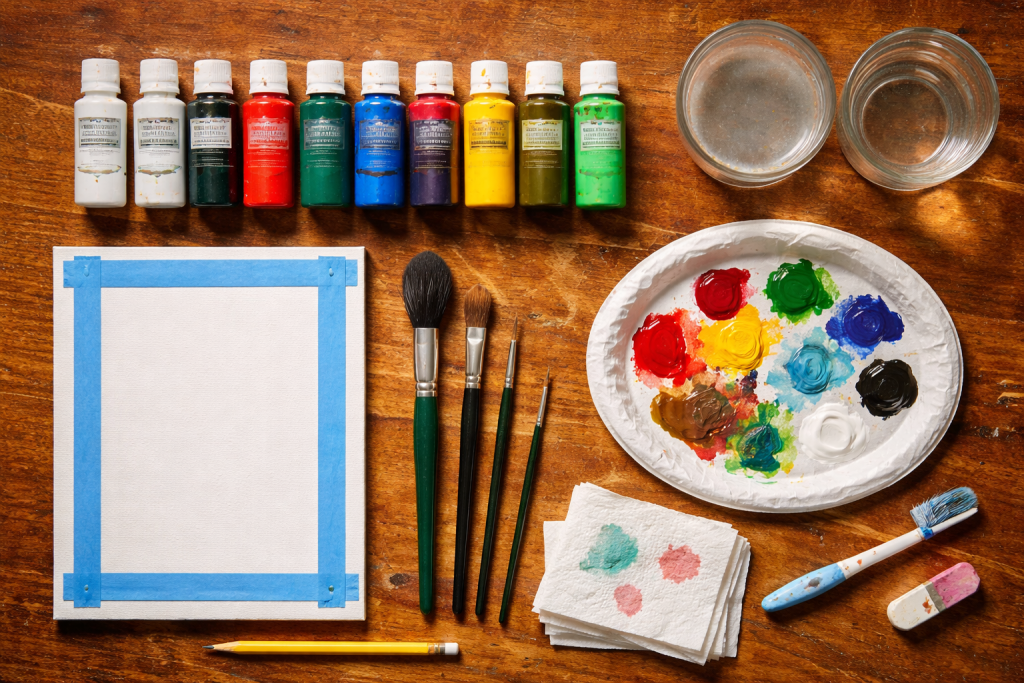
Getting started does not mean buying an entire art store. For easy Christmas paintings, a handful of budget-friendly items is more than enough. Think of this as a starter kit that you can build on later if you fall in love with painting.
The list below is split into must-haves and nice extras. If all you grab is the must-have group, you are still completely ready for the “grinchy” tree tutorial and the other projects in this guide.
Must-Have Supplies
Acrylic craft paints are the star of the show. Look for basic bottles labeled acrylic craft paint and aim for colors such as:
-
Titanium white
-
Mars black
-
Primary or cadmium red
-
Phthalo green
-
Ultramarine blue
-
Primary yellow
-
Burnt umber
These mix into almost anything you need, and they dry fast, are water-based, and give opaque coverage that makes corrections simple. For Christmas themes, it also helps to pick up ready-made teal blue, light green, and dark green, so you do not have to mix every shade yourself.
You only need a few brushes:
-
A soft mop brush for blending backgrounds smoothly (a clean makeup blush brush can pinch-hit if needed).
-
A size 6 round brush for most of the work, from tree branches to medium details.
-
A tiny detail brush in size 0 or 1 for snowflakes, thin branches, and lettering.
With those three, most easy Christmas paintings in this guide are totally doable.

For surfaces, grab either:
-
A stretched canvas
-
A canvas board
-
A square piece of textured cardstock around twelve inches
If you choose cardstock, tape it to a piece of cardboard so it does not curl when wet. A simple paper plate or a scrap of cardboard covered in foil makes a great palette for mixing colors. Two water cups help keep colors clean, because one is for rinsing and the other holds clear water for thinning paint. Keep a roll of paper towels nearby for blotting brushes and quick cleanups when paint goes where it should not.
Optional Game-Changers
Once the basics feel comfortable, a few extra tools can make your projects faster and more satisfying:
-
Small pouncer sponges for ornaments, because they stamp out perfect circles that are hard to freehand.
-
A fan brush that spreads into thin bristles and mimics pine needles, so trees look fuller with only a few quick flicks of the hand.
-
Glitter paint brushed over ornaments, snow, or stars to catch the light and make even very simple easy Christmas paintings feel special.
-
Metallic gold and silver paint for stars, halos, and lettering that stands out against dark skies.
-
Paint pens in white, gold, and silver so shaky handwriting becomes clean, confident text without wrestling a tiny brush.
A few cheap household items pull everything together:
-
Painter’s tape for clean borders or sharp shapes.
-
An old toothbrush for the perfect snow-splatter effect across a finished scene.
-
A regular pencil and eraser so you can sketch lightly before you commit to paint, turning that scary blank surface into a simple outline you can relax into.
Mastering Five Simple Techniques That Look Impressive
Most easy Christmas paintings online use the same handful of tricks over and over. Once these click, it becomes much easier to guess how any tutorial pulled off a certain effect. Think of the techniques below as a tiny toolbox you can reuse in different combinations for trees, snowmen, ornaments, and more.
Each one is simple, but the way they stack gives your art serious depth. You will also see how to avoid common issues, like muddy colors or harsh streaks.
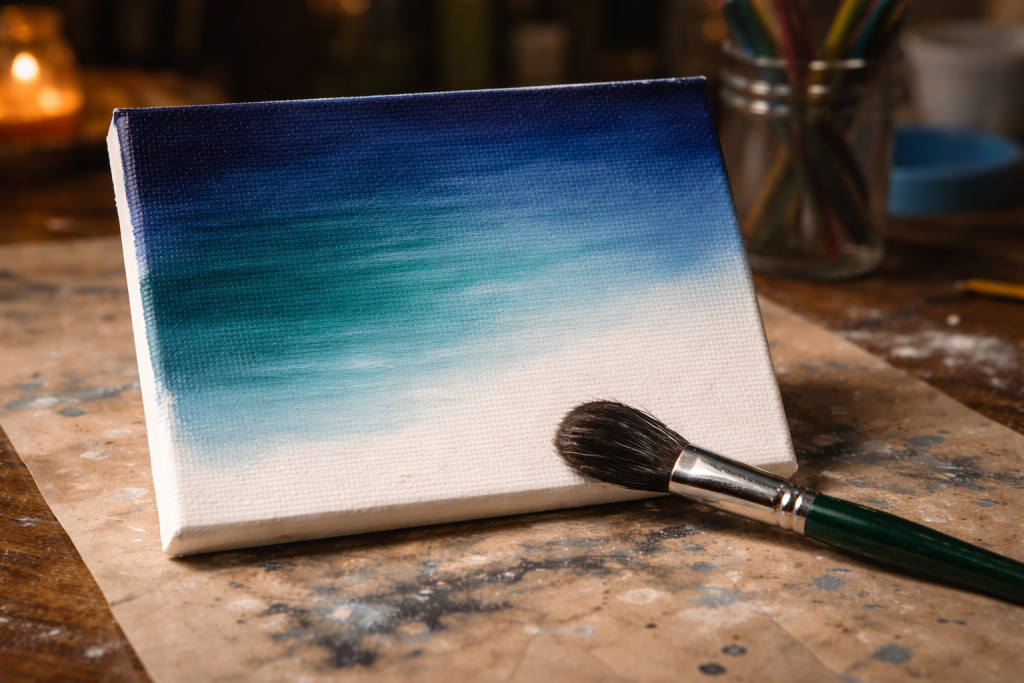
The Blended Background Gradient
A soft gradient background instantly makes your main subject stand out, whether it is a tree, a snowman, or a string of lights. Start by choosing two or three colors that feel wintry, such as dark blue, teal, and white for a cold sky or deep purple fading into pink for a cozy sunset. Place small dabs of the darkest color at the top of the canvas, medium tones in the middle, and the lightest toward the bottom.
Use a slightly damp mop brush and move it left to right across the canvas, gently sweeping through the places where colors meet. Work quickly while the paint is wet so the edges soften instead of drying in stripes. The goal is not a perfect, machine-smooth blend; a few visible shifts in color give more interest and mood.
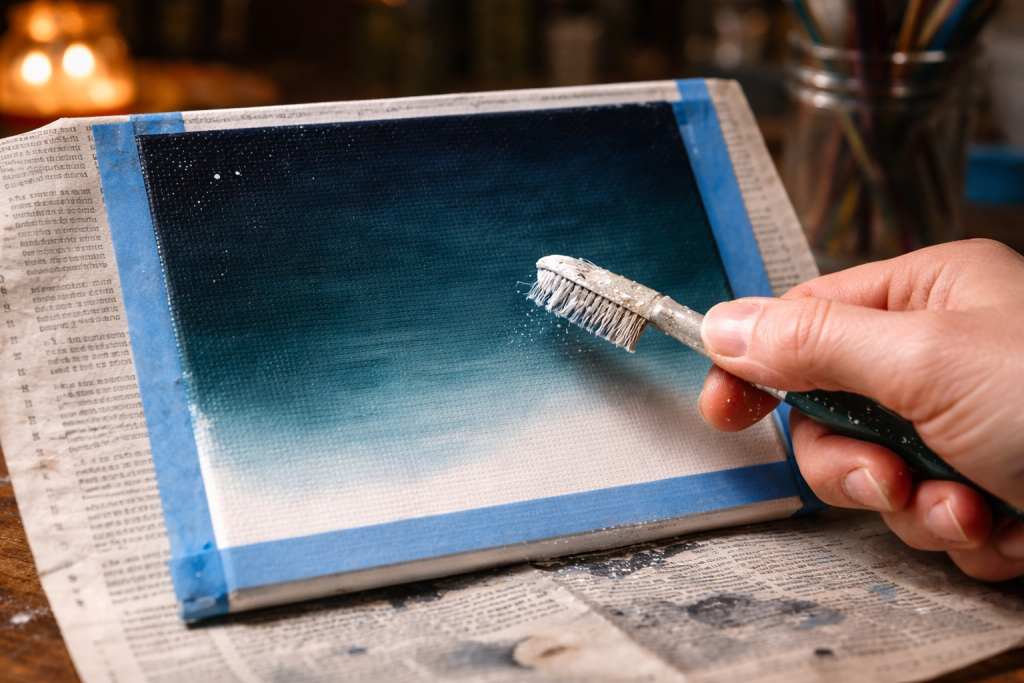
Snow Splattering For Magical Realism
Splatter snow is the fastest way to add life to a winter scene. Water down a little white paint until it drips easily from the brush but is not fully transparent. Dip an old toothbrush or stiff brush into the mixture, then hold it a few inches from the canvas.
Run your thumb across the bristles so the paint flicks forward in tiny dots. Move closer for larger flakes and farther away for fine snow and soft stars. This same technique works for both falling snow and glowing stars in a night sky, so you will use it again and again in your easy Christmas paintings. Just cover the table with newspaper or an old bag first, because splatter travels farther than expected.
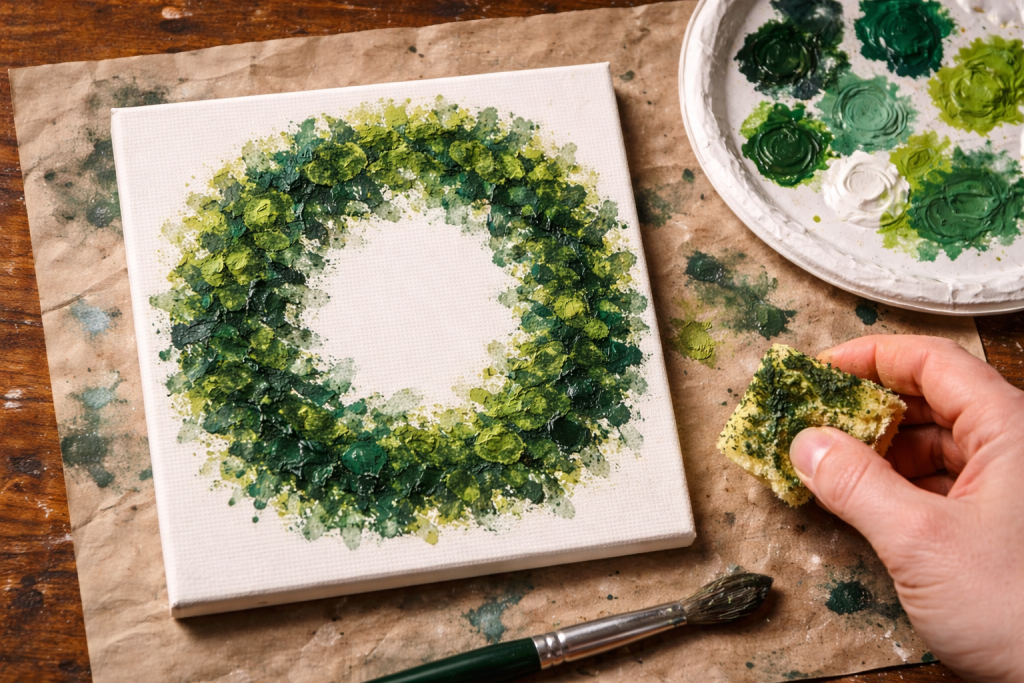
Dabbing And Sponging For Texture
Brushstrokes can look flat when you want fluffy snow or leafy wreaths. That is where dabbing comes in. Lightly dip a sponge, pouncer, or crumpled paper towel into paint, then tap off extra paint on a palette so the tool is not dripping.
Use a gentle pouncing motion on the canvas instead of dragging. Each tap leaves a soft, irregular mark that mimics real textures much better than smooth lines. Try layering lighter and darker versions of the same color, such as several greens for a wreath or a mix of whites and pale blues for snowbanks. The stacked layers create depth without needing any complicated drawing.
The Magic Of Layering
Layering is the quiet secret that makes beginner work look planned and polished. Acrylic paint dries fast, which means you can build scenes in the order that makes the most sense: background first, big shapes next, and small details last. Let every stage dry before moving to the next one so colors do not smear or mix into gray-brown.
Start with your gradient sky or background and wait until it is fully dry to the touch. Then paint main shapes like trees, hills, or snowmen. After that dries, add details like ornaments, snow, lettering, and highlights. If patience is hard, a hairdryer on the low, cool setting can speed up drying between layers without warping the canvas.
Paint Pen Lettering
Words like Joy, Peace, or Merry instantly turn a simple picture into holiday decor. For many beginners, though, writing with a brush is stressful. Paint pens solve this problem by giving marker-style control while still looking like proper paint.
Lightly sketch your word in pencil first so you can adjust spacing and style. Then trace over the lines with a paint pen in white, gold, or silver after the background is fully dry. Paint pens glide smoothly, resist dripping, and work on canvases, wood slices, and ornaments. The clean letters they create add a professional touch to even very simple easy Christmas paintings.
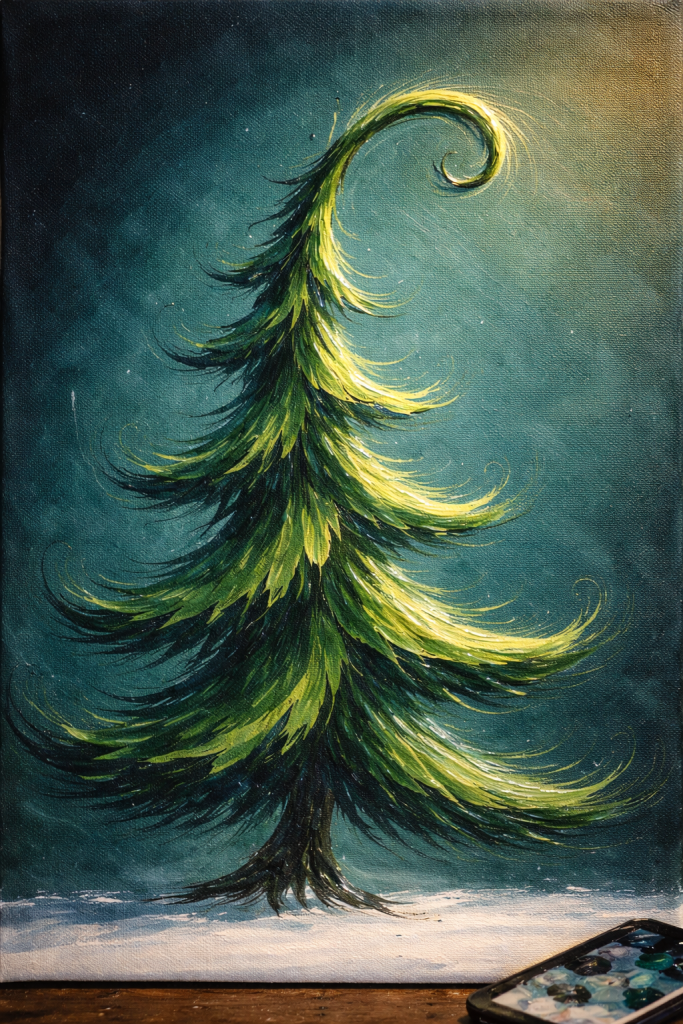
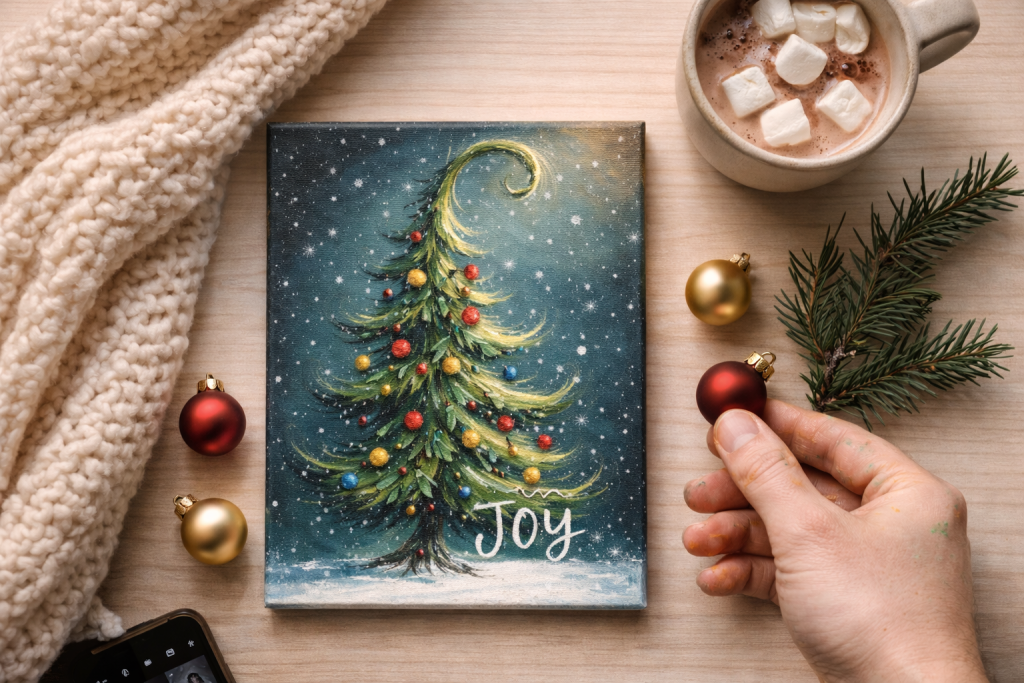
Step-by-Step Tutorial: The Viral “Grinchy” Whimsical Tree
Now it is time for the main project: a swoopy, “grinchy” tree that loves being imperfect. This style is all over social media because it is playful and leans into exaggerated curves, which makes it perfect for beginners. The branches do not need to be straight, and the top of the tree is supposed to curl dramatically.
Set aside about an hour of active painting time. You will use the techniques you just learned, plus basic supplies from your shopping list.
Step 1: Creating Your Moody Winter Background
Pick a dark teal blue as your main background color, with a tiny bit of black if you want an even moodier look, and white to soften part of the scene. Using your mop brush or a large flat brush, cover the whole canvas in teal blue with wide, side-to-side strokes. While the paint is still wet, tap a few small dabs of white near the center or lower third of the canvas.
Blend those white areas gently into the teal by brushing horizontally through them without pressing too hard. Stop while you can still see lighter and darker patches instead of a single flat color. Let this layer dry for around twenty to thirty minutes, or use a hairdryer on a cool setting for a quicker five-minute dry. The finished background should feel like a twilight sky with a soft glow in the middle.
Step 2: Painting Your Swoopy, Characterful Tree
Once the background is dry, switch to your size 6 round brush and load it with dark green. Paint a thin, slightly curvy line upward from near the bottom center of the canvas. Let it lean a bit to one side so the tree feels like it has attitude rather than standing stiff and straight.
From that trunk, build branches using swooping C-shaped strokes instead of straight lines. Make the lowest branches the widest and have them gently angle downward. As you move up, keep each new branch shorter and more upturned, as if the tree is flipping its hair. Without rinsing the brush, dip into light green and brush it over the tops of the branches for highlights. Then pick up a little of the teal from the background and swipe it along the lower parts of the branches to create cooler shadows. Let the colors mix slightly right on the canvas so the tree looks rich and full. Finish with a long, exaggerated curl at the very top for that “grinchy” flair, then let the tree dry for about fifteen to twenty minutes.
Step 3: Adding Snow To Your Branches
Pour a bit of titanium white onto your palette and grab a small flat brush or a small piece of sponge. Use a soft dabbing motion along the upper edges of each branch where snow would naturally rest. Some branches can have just a thin dusting, while others can carry a thicker patch for variety.
Add a rounded pile of white at the base of the trunk so the tree looks like it is standing in snow instead of floating. If you want extra depth, mix the tiniest hint of blue into a bit of white and tap that into the deeper areas of the snow. That touch of color helps the white sections feel less flat.
Step 4: Decorating With Perfectly Round Ornaments
Now for the fun pops of color. Choose classic ornament shades such as bright red and dark yellow, or pick any bold tones you like. Dip a small pouncer sponge straight into the paint so the bottom is coated but not dripping. Press it onto the branches to stamp clean, round ornaments in different spots on the tree.
Place some circles fully on top of branches and let others overlap the edges so they look tucked into the needles. When the ornaments are dry, use a detail brush and a tiny bit of white to paint a small C-shaped mark on one side of each ball. That tiny highlight makes them look shiny and three-dimensional. Do not worry about perfect spacing; a slightly random layout feels more natural and playful for easy Christmas paintings like this.
Step 5: Adding Your Festive Word
Decide on a short holiday word that fits the mood of your painting, such as Joy, Peace, Merry, Snow, Jolly, or Noel. Lightly write it in pencil in a blank area of the canvas, often near the bottom or along one side where it does not compete with the tree. Adjust the letters until the size and placement feel good.
Trace over the pencil with a paint pen in white or metallic gold or silver. Move slowly and breathe out as you draw each stroke to help keep your hand steady. Paint pens give a smooth, even line that looks like brush lettering without the stress of controlling a tiny brush.

Step 6: Making It Snow
To tie the whole scene together, add a gentle snowfall. Thin a bit of white paint with water until it is a little runny but still bright. Dip an old toothbrush into the mixture and aim it toward your canvas.
Run your thumb across the bristles so the paint sprays forward in fine dots. Keep the brush close for bigger flakes and pull back for softer specks. Let the snow fall across the background, over the tree, and even over your word for a dreamy, wintery effect.
Step 7: The Optional Sparkle Finale
When everything is dry, you can add glitter paint as a final touch. Use a small brush to sweep a thin layer of clear glitter over the ornaments so they catch the light when the painting is on display. You can also tap a bit onto the snow on the branches or along a few letters in your word.
Give the painting one to two hours to dry fully before moving or wrapping it as a gift. Once the glitter sets, your whimsical tree is ready to shine on a wall, a mantel, or an Instagram feed.
Three More Easy Christmas Painting Ideas To Try Next
After finishing the “grinchy” tree, the fear of the blank canvas starts to shrink. This is a great time to try more easy Christmas paintings that use the same tricks in slightly different ways. The three ideas below cover modern abstract vibes, clean minimal style, and cute character art.
Each one is simple enough for a relaxed evening and flexible enough to tweak for your own style or color scheme.
Dreamy Bokeh Christmas Lights
This design looks like a close-up photo of glowing Christmas lights out of focus. Begin by painting the entire canvas a deep color such as black, navy, or dark purple, and let it dry. Mix yellow with white until it turns soft and pale, then use a pouncer or the bottom of a wine cork to stamp large, faint circles across the surface.
Create a second round of circles with slightly richer versions of the same colors, overlapping some of the first layer and making them a bit smaller. Finish with tiny, saturated circles in pure red, green, blue, and yellow, stamped in fewer spots so they look like the brightest lights. The layered circles give that dreamy bokeh depth without any need for detailed drawing. This project is fast, fun, and fits perfectly with modern Christmas decor.
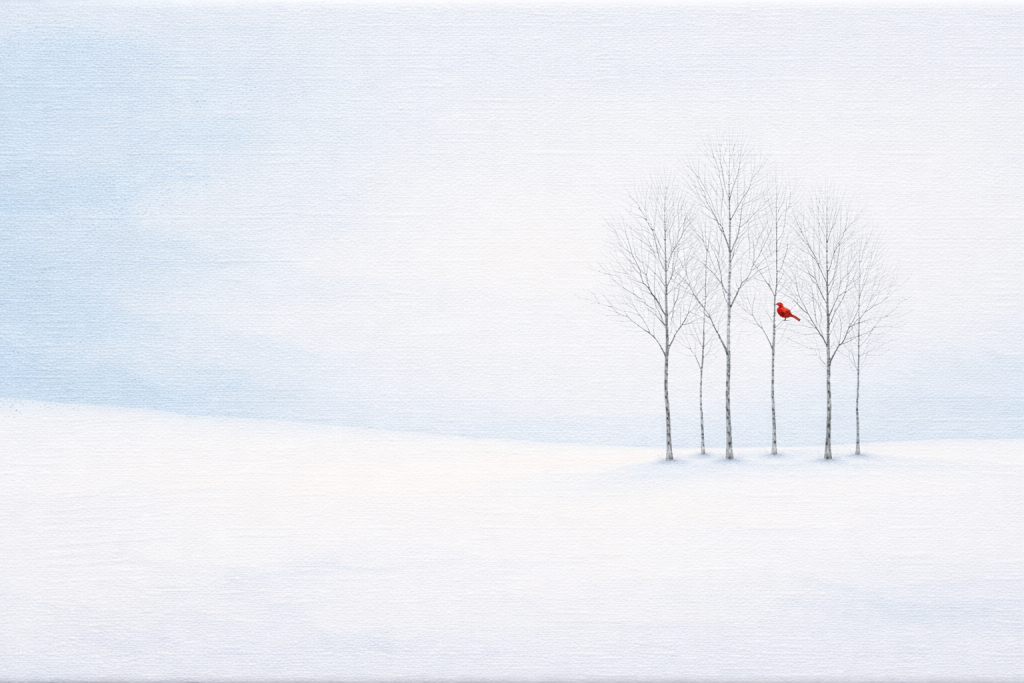
Minimalist Winter Landscape
For a calm, Scandinavian-inspired look, paint a very simple snowy scene with lots of open space. Start with a soft gradient sky using pale blue at the top fading into almost white at the bottom, keeping your brushstrokes gentle and horizontal. While it is still slightly damp near the bottom, add smooth curved lines of nearly white paint to suggest rolling snowy hills.
Once the background is dry, pick up a fine detail brush and use black or dark brown to draw thin tree trunks reaching up from the hills. Flick the brush outward in small, light strokes to create delicate bare branches. To add a focal point, dot a tiny red bird on one branch, using a speck of orange for the beak. The large areas of quiet space around these few elements make the whole piece feel calm and stylish.
Cute Character Snowman
A snowman is one of the most classic easy Christmas paintings and works well for all ages. Paint three stacked circles in white for the body, making the bottom one biggest and the top one smallest. Add a hint of very light blue or gray on one side of each circle and blend it slightly so the snowman looks round instead of flat.
Dress your new snowy friend with a red scarf, a black top hat, and an orange carrot nose. Use the back end of a brush dipped in black paint to dot on coal buttons, eyes, and a smile, since the round handle naturally makes neat circles. Place the snowman in a simple snowy setting and finish with a splatter of white paint for falling snow. You can change scarf colors, hat styles, and facial expressions to create a whole family of characters.
Common Mistakes And How To Fix Them (So You Don’t Panic)
Every painter, beginner or not, has moments where a canvas looks “ruined.” The trick is knowing that almost nothing in acrylic is truly permanent until you decide to stop. Think of this section as your calm friend who says, “Take a breath, here is what to do next.”
These fixes apply to all the projects in this guide and will keep your easy Christmas paintings from ending up in the trash.
“Creativity takes courage.”
– Henri Matisse
“My Colors Are Turning Muddy And Brown!”
Muddy colors usually appear when wet paints mix together on the canvas before they have time to dry. This happens a lot when putting a light color right next to a dark one or layering without a break. The best cure is patience, even if that feels boring.
Give each section or layer time to dry completely before adding new paint nearby or on top. Rinse your brush well between colors and dab it on a paper towel until the water runs mostly clear. If waiting feels too long, use a hairdryer on low and cool to speed up the process. You can also bounce between different parts of the painting, working on an area that is dry while another one sets.
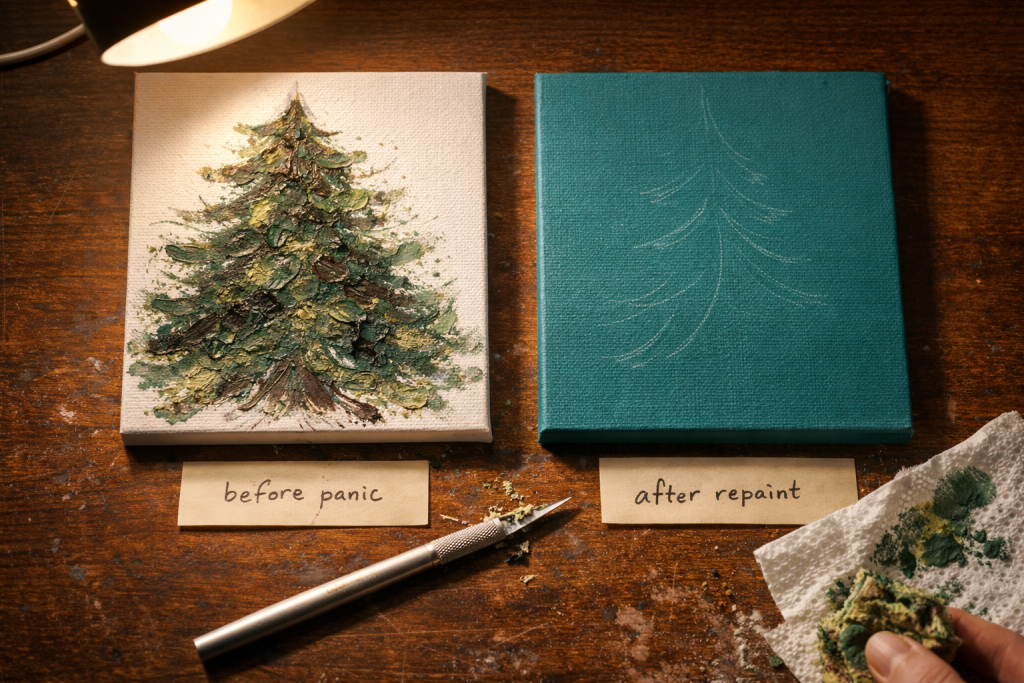
“I Made A Huge Mistake!”
Acrylic paint is very forgiving, even when something looks awful at first. If a shape went wrong or a color choice feels off, stop touching it and let it dry all the way. Once it is dry, treat that area like a fresh mini canvas and paint right over it with new colors or shapes.
For thick blobs of dried paint that leave a bump, carefully scrape or slice off the excess with a craft knife, then gently paint over the spot. Many times, the place that scared you most turns into the most interesting part of the piece after a redo. That is the real-life version of a “happy accident.”
“My Lines Are Shaky And Wobbly”
Shaky lines are normal, especially when trying to paint letters or long curves in easy Christmas paintings. To steady your hand, rest the side or heel of your painting hand lightly on a dry part of the canvas. You can also use your non-dominant hand as a support under the wrist that is holding the brush.
Using the right brush helps a lot. Liner or script brushes have long, thin bristles designed for smooth, flowing lines. For edges that truly need to be crisp, such as borders or simple shapes, painter’s tape can mask off sections so the line stays sharp even if your hand wobbles a little.
“My Paint Consistency Is Off”
Sometimes paint feels too thick and drags across the canvas, leaving rough marks. Other times it runs like colored water and refuses to cover anything. For thick paint, dip just the tip of your brush into clean water and mix it into the paint on your palette a little at a time until it moves smoothly but still looks solid. For paint that is too watery, add more straight from the bottle and mix until it thickens.
Craft acrylics usually work well straight from the bottle, so only adjust when you need smoother flow for fine details or splatter. Testing on a scrap of paper or the edge of your palette before touching the canvas can save you from unwanted surprises.
How To Display And Share Your Masterpiece
Once the paint dries, do not just shove your art into a closet. Displaying and sharing your easy Christmas paintings is part of the fun and reminds you that your time and creativity matter. Seeing your own work in your space can quietly boost confidence every time you walk past it.
There are many low-effort ways to turn a simple canvas into part of your holiday setup or your social media feed.
Decorating Your Space
A fireplace mantel is a perfect stage for Christmas art. Lean your canvas against the wall, then surround it with garland, fairy lights, and a couple of ornaments to create a cozy mini scene. Even if the rest of the mantel is simple, that one handmade piece becomes a focal point.
If you do not have a mantel, try an entryway table or a bookshelf. Prop the painting behind a bowl of ornaments, pinecones, or a small nativity set so guests see it the second they walk in. You can also:
-
Swap one item on an existing gallery wall with your seasonal painting during December.
-
Use small canvases or painted wood blocks as centerpieces on coffee tables or dining tables.
-
Tie a ribbon or bow around one corner of an unframed canvas to make it look display-ready with almost no effort.
Many stretched canvases do not need a frame at all, especially when they are part of a casual holiday setup.
Sharing On Social Media
If you want to post your easy Christmas paintings online, good photos make a big difference. Try taking pictures near a window during the day, with the lights in the room turned off so there are no harsh yellow glares. Position the canvas so natural light falls evenly across it, then take a few shots from different angles.
For extra style, stage a flat lay around the painting. Lay it on a table and place a mug of hot cocoa, a cozy blanket, some ornaments, or sprigs of pine around the edges. Capture at least one straight-on photo, one angled shot, and one close-up of your favorite detail, such as glittery snow or the highlight on an ornament.
In the caption, share a tiny piece of your process or admit that you were scared to start but glad you did. Use a mix of broad and more specific tags, such as #ChristmasPainting, #EasyPainting, #AcrylicPainting, #DIYChristmasDecor, #PaintWithMe, #HolidayCrafts, #BeginnerArtist, and #FestiveVibes. Tag friends who might want a calm creative night, and enjoy connecting with others who are also learning.
Frequently Asked Questions
How Long Does A Beginner Christmas Painting Take To Complete?
Most simple beginner Christmas pieces take about forty-five minutes to an hour and a half of actual painting time. When you add drying between layers, the full process usually fits into a two- to three-hour window. You can split that across a whole day or a couple of evenings if you prefer. The “grinchy” tree often fits into roughly one focused hour once you get moving. After your first few easy Christmas paintings, you will naturally work faster.
Do I Really Need An Actual Canvas, Or Can I Use Paper?
You do not have to use a stretched canvas if that is out of budget. Traditional canvases look nice and are ready to hang, but they usually cost more. Heavyweight textured cardstock or thick watercolor paper is a great alternative for easy Christmas paintings, especially when taped to cardboard for stability. Canvas boards sit in the middle, giving a firm, paintable surface that still feels solid. Wood slices add a rustic touch and are perfect for ornaments. All of these options play well with acrylic paint.
What If I Have Zero Artistic Ability Or Experience?
This whole guide is built for people who feel exactly that way. Christmas themes work well for beginners because they welcome a slightly rustic, handmade style instead of demanding perfect realism. Techniques like splattering, dabbing, and using pouncers rely more on simple motions than on fancy drawing skills. You are following clear, step-by-step directions for each of these easy Christmas paintings, not inventing everything from scratch. The “grinchy” tree style even celebrates wonky lines, so what you might call a flaw is usually part of the charm.
Can Kids Do These Paintings Too, Or Is It Adults Only?
Most of the projects here can be made kid-friendly with a few small tweaks. Splattering snow and dabbing with sponges are especially fun and easy for younger artists. For children, an adult can lightly sketch the main shapes first and limit the number of colors on the palette to keep things simple. Grownups should stay nearby to handle paint containers, help with cleanup, and keep brushes away from furniture. When the goal is shared time and memories instead of perfect results, easy Christmas paintings become a great family tradition.
tl;dr
That blank canvas from the beginning does not seem quite so scary anymore. Once the first brushstroke goes down, the fear of messing up starts to fade, replaced by curiosity about what the next layer will do. With each small step, easy Christmas paintings change from “I could never” to “Wait, I actually made this.”
The real win is not just the finished tree, snowman, or string of lights on your wall. It is the calm hour spent listening to music, the quiet focus of blending a sky, and the little jolt of pride when glitter on your canvas catches the light. No store-bought print can carry the same story, because none of them remember the moment you decided to try instead of scroll.
You do not need perfect supplies or perfect skills to start. One brush, a few colors, and a bit of time are enough for your first piece. Think of beginner as another word for learning, not a label that says what you cannot do. The Christmas season moves fast, and so does paint, so this is a perfect moment to set up a small space, put on a favorite carol, and make your first mark.
The more you paint, the easier it gets to trust your hand and your ideas. This first project can be the start of many cozy creative nights, each one leaving behind a little snapshot of who you were that year. Pick a canvas, grab your colors, and let your next holiday memory begin with that simple first swipe of the brush.