
You want the makeup to make someone pause. Not because it took six hours, but because they have not just seen the same face three times on the way to the party.
The strongest Halloween makeup styles often start with one odd idea and give it space: a ghost made of stained glass, a portrait being swallowed by its garden, a moon that has started to tarnish. For even stranger visual logic, borrow from surrealist fashion ideas and let one familiar object behave unexpectedly on the face.
These are original design directions to adapt, with a simpler version for each. Use cosmetics intended for the exact area you are painting, especially around the eyes. The colors and linework can do the storytelling; you do not need elaborate prosthetics to look wonderfully unsettling.
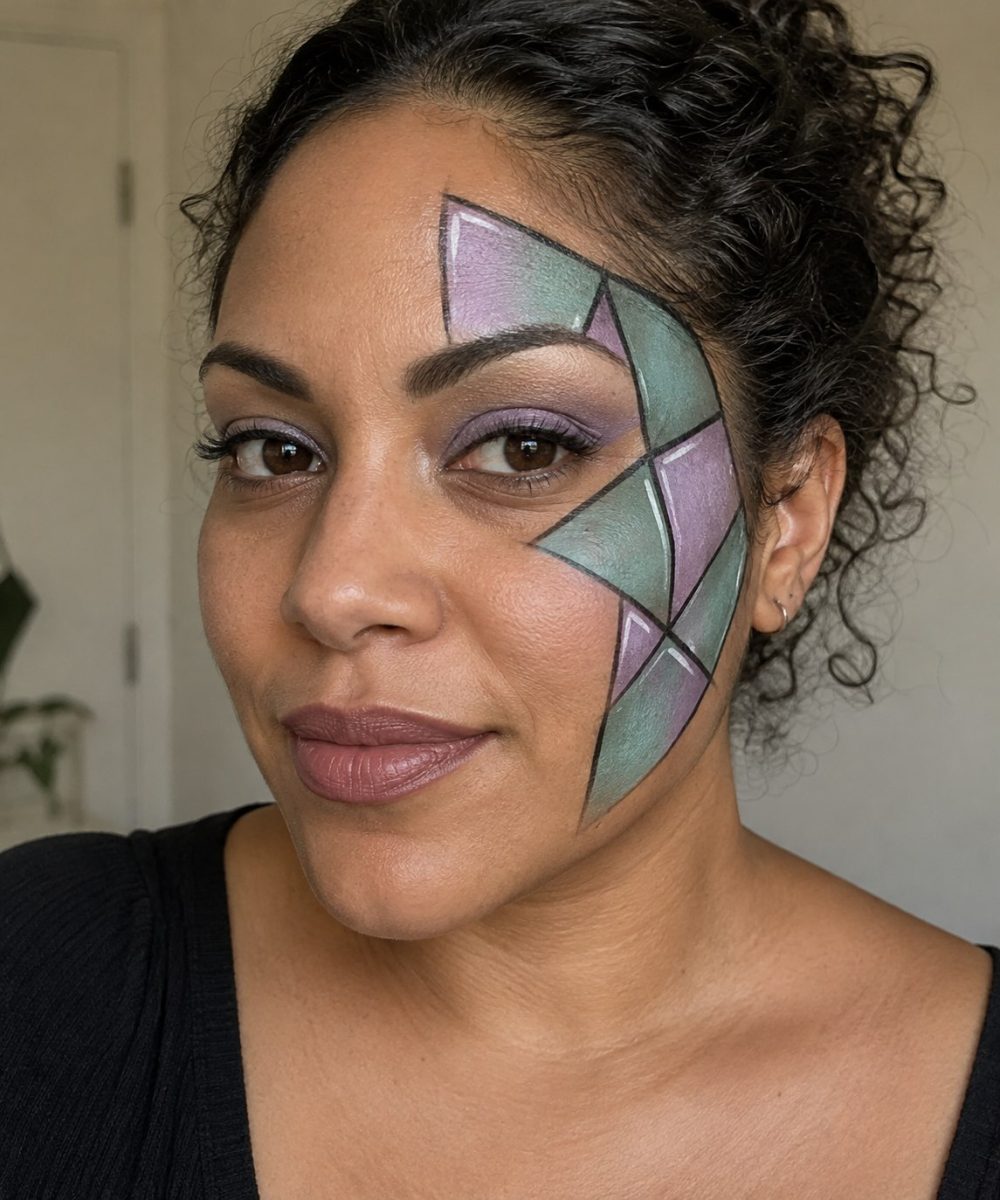
1. The stained-glass ghost
Paint a small cluster of lilac, pale teal and smoky gray shapes across one temple and cheek. Outline them with thin black lines and add a few white highlights. Keeping the other side of the face quieter makes the painted side look like a fragment of a ghostly window.
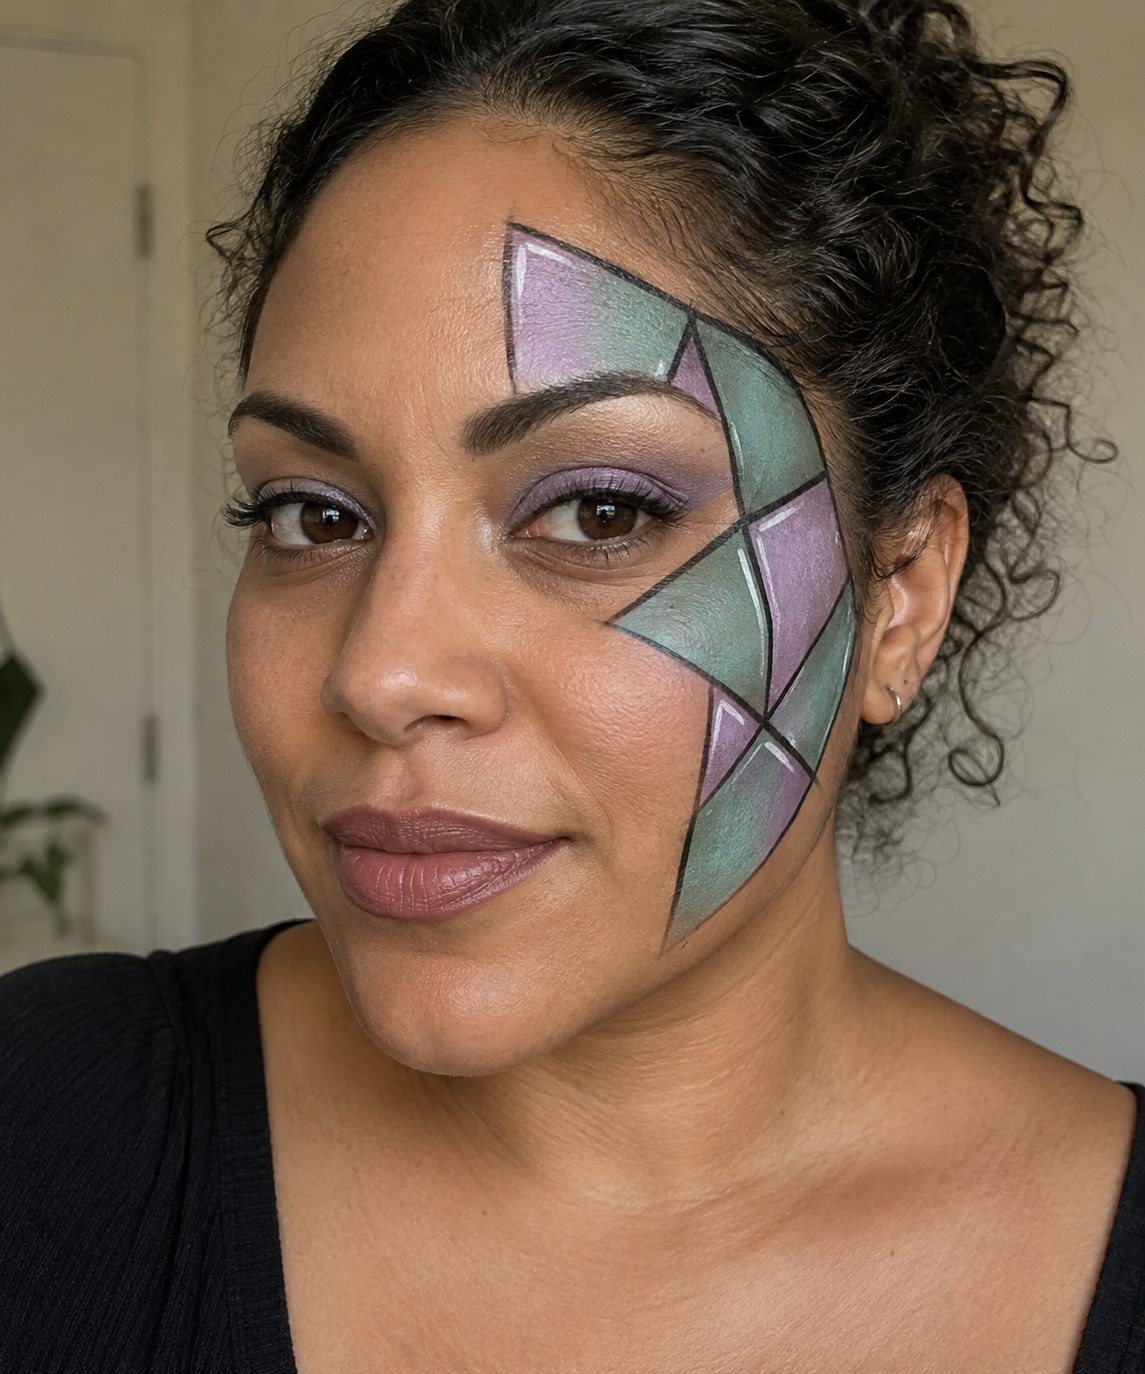
Sketch the outside shape first, then divide it into a few large sections. Fill the colors before adding the dark outlines so you are not endlessly correcting edges. Work with face cosmetics on the cheek and products labeled for eye use anywhere the design reaches the eye area.
This is a patient-linework look rather than a complicated shading exercise. For the easy version, stop at three panes on one cheek. Keep the lips muted and let the little window be the strange thing.
2. The midnight moth
Use cocoa, charcoal and ivory to suggest moth wings extending toward the temples. One oval eyespot on each outer wing gives the design a clear identity. It feels quieter than bright butterfly makeup, which is precisely why it can look a little eerie.
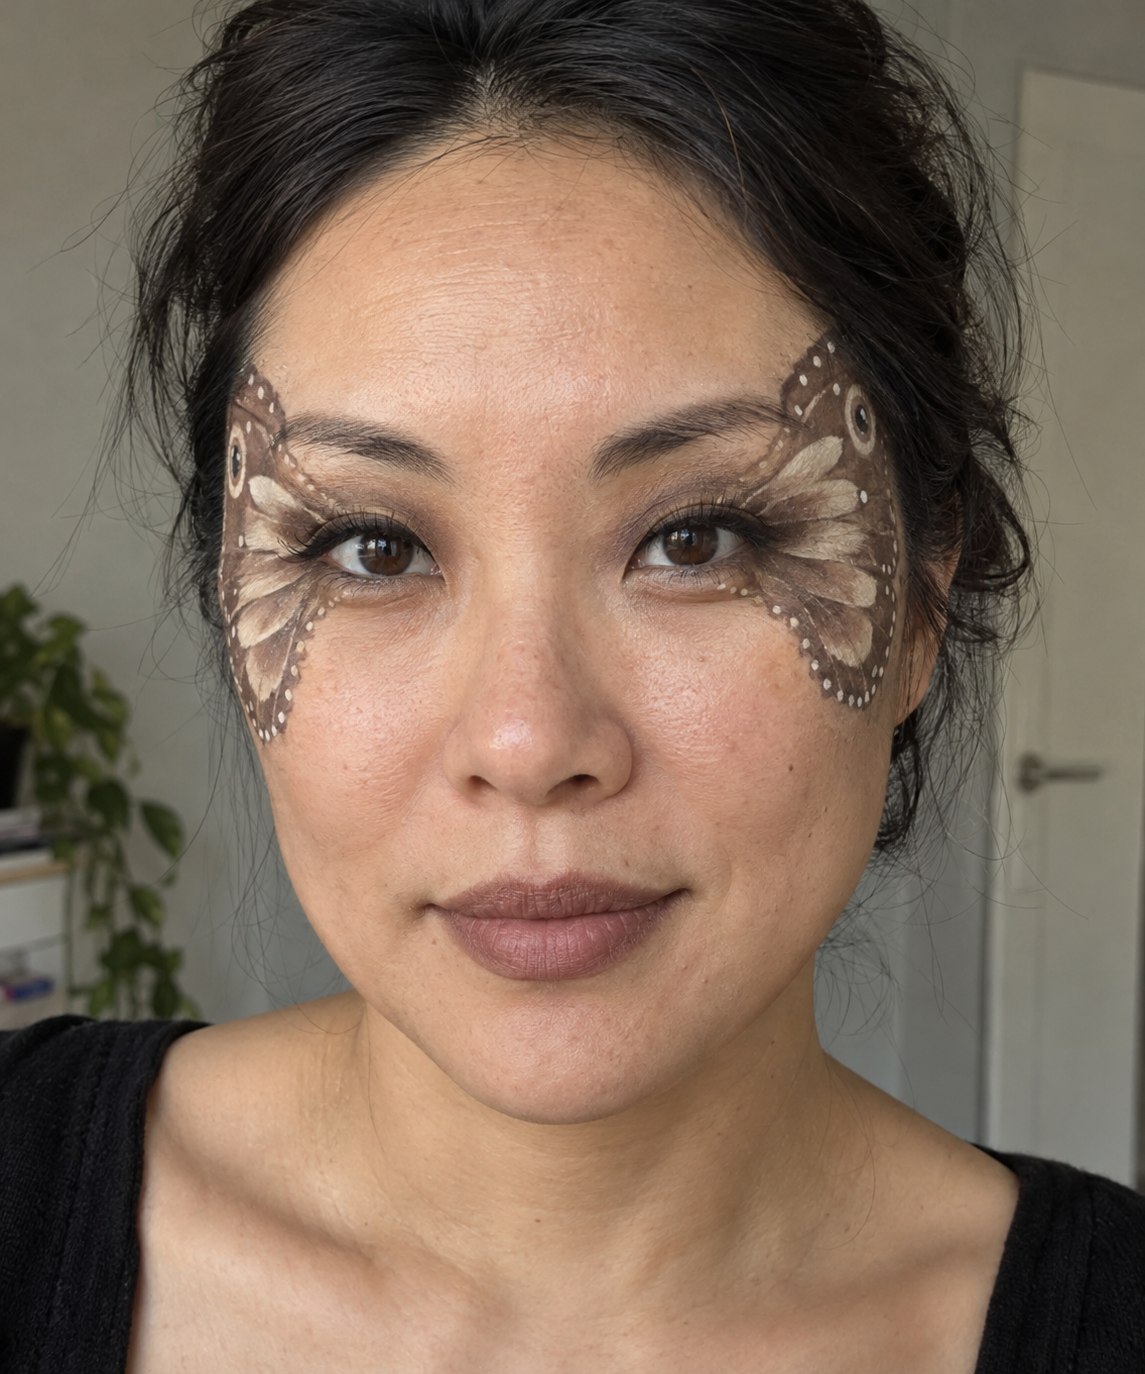
Start with the wing outline and keep it outside the actual eye opening. Fill a soft brown base, then add a darker outer edge and a small ivory oval. A few tiny dots along the edge suggest a wing without requiring you to paint every vein.
For a simpler version, make one small wing at each outer corner using eye-area cosmetics and leave the rest of the face alone. A dark brown lip and a plain black top can finish the look. Pair the winged design with a dramatic vampire haircut if you want the whole look to feel more theatrical. The palette does not need sparkle to have presence.
3. The tarnished-moon face
Paint a silver crescent at one temple, then stipple small patches of muted teal and gray into it. The effect should resemble an old moon-shaped object that has spent too long in a forgotten room. Keep the surrounding skin visible so the crescent stays readable.
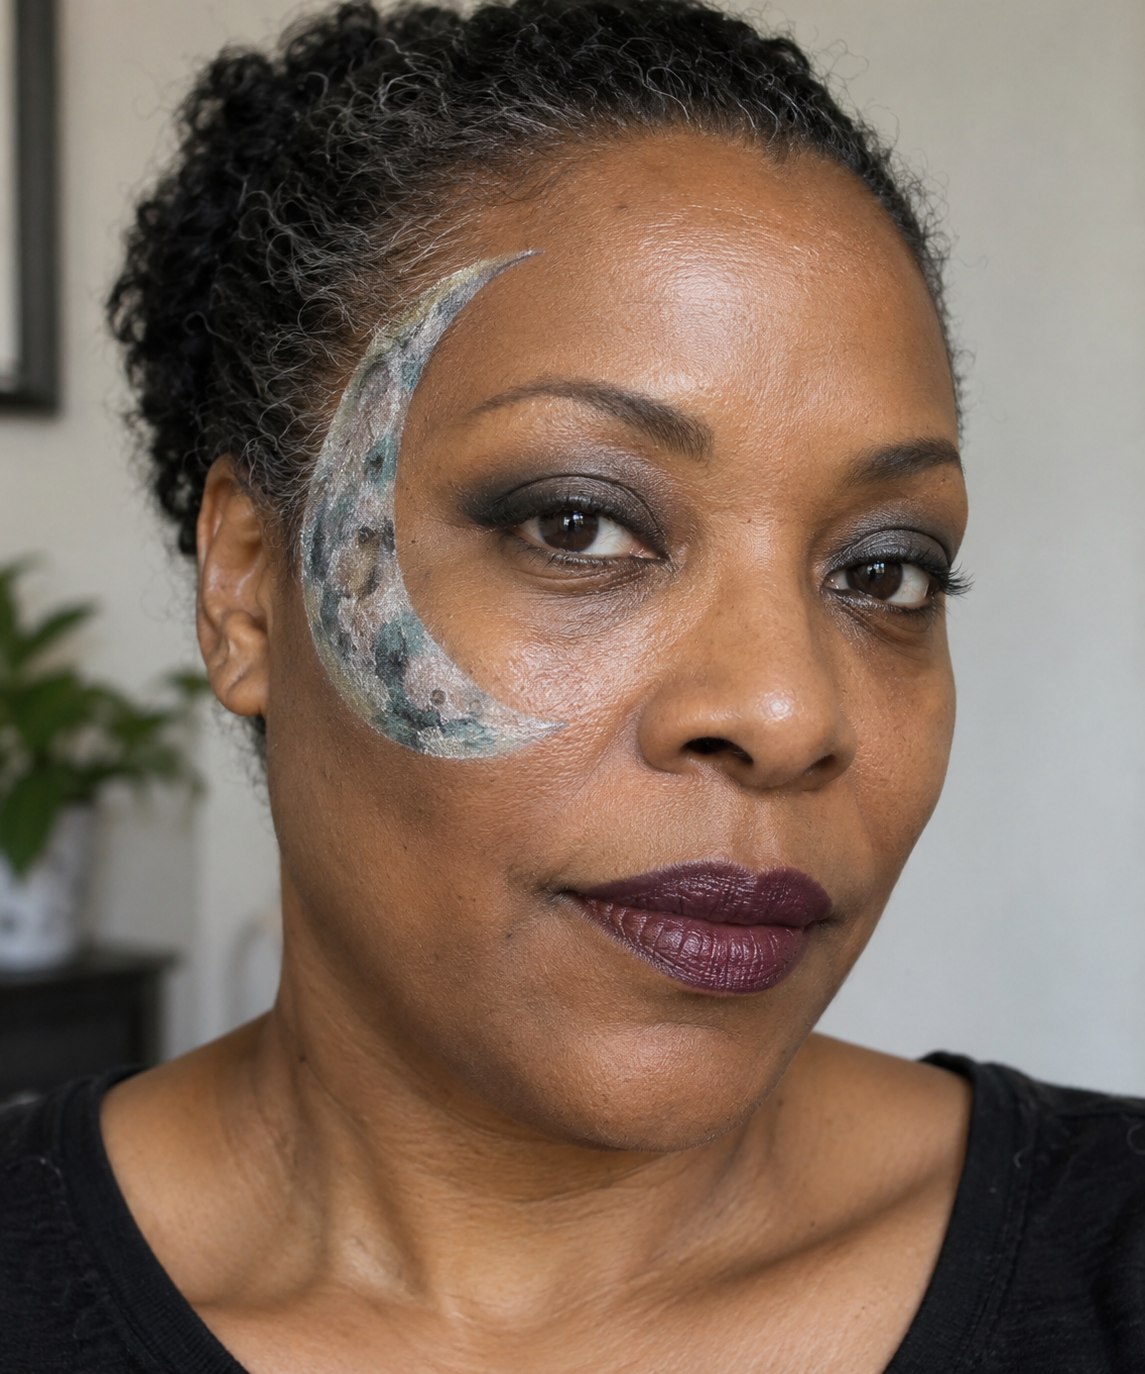
Make the crescent shape first and let that layer settle as directed by the product. Add the darker marks with a small brush or sponge, leaving some silver untouched. A few irregular spots are more convincing than an evenly dotted pattern.
The beginner version is a smaller crescent on the cheekbone with three tarnished patches. Add soft charcoal eye makeup if you want more depth. Choose metallic cosmetics meant for skin, not craft metallic paint; the finish comes from the product and the shading, not real metal dust.
4. The overgrown portrait
Draw part of an antique-gold frame along one side of the face, then let dark green vines creep over it. A tiny painted moth or two faded plum leaves makes the story feel specific: the portrait has been left alone long enough for the room to reclaim it. The same botanical, celestial, and nocturnal mood appears in dark feminine tattoo ideas, which can suggest more motifs without crowding the face.
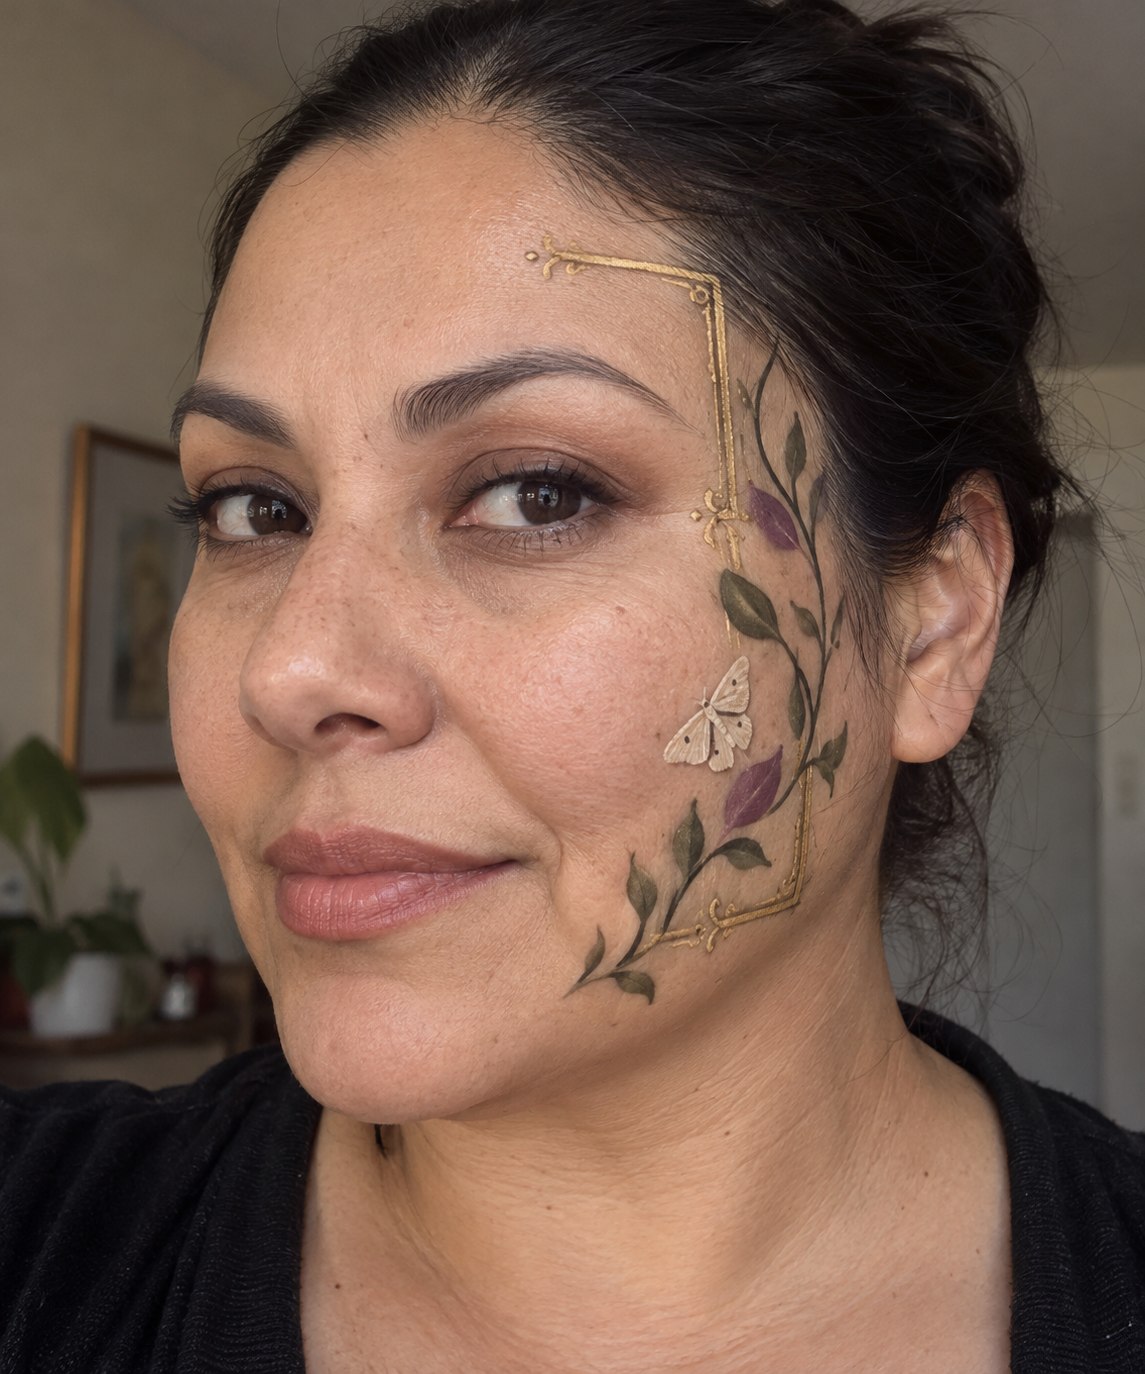
Keep the frame incomplete. Two corners can suggest the whole object while leaving space for the vines. Paint the main stem first, add a few leaves, then place one small highlight on the gold edge. If you want the frame to feel more ornate, Rococo outfit ideas can suggest romantic gold, lavender, and botanical pairings.
For the easy version, skip the frame and paint a single vine from the jaw toward the temple. Use a brown lip and softly shaded eyes rather than adding more motifs everywhere. The design works because one part of the face appears to belong to an abandoned painting.
5. Candlewick tears
Paint three rounded ivory drips on one cheek, then add a soft gray shadow along one edge and a small white highlight on the other. Warm amber eye makeup completes the candlelit mood. It is a painted illusion, so keep actual wax well away from your face.
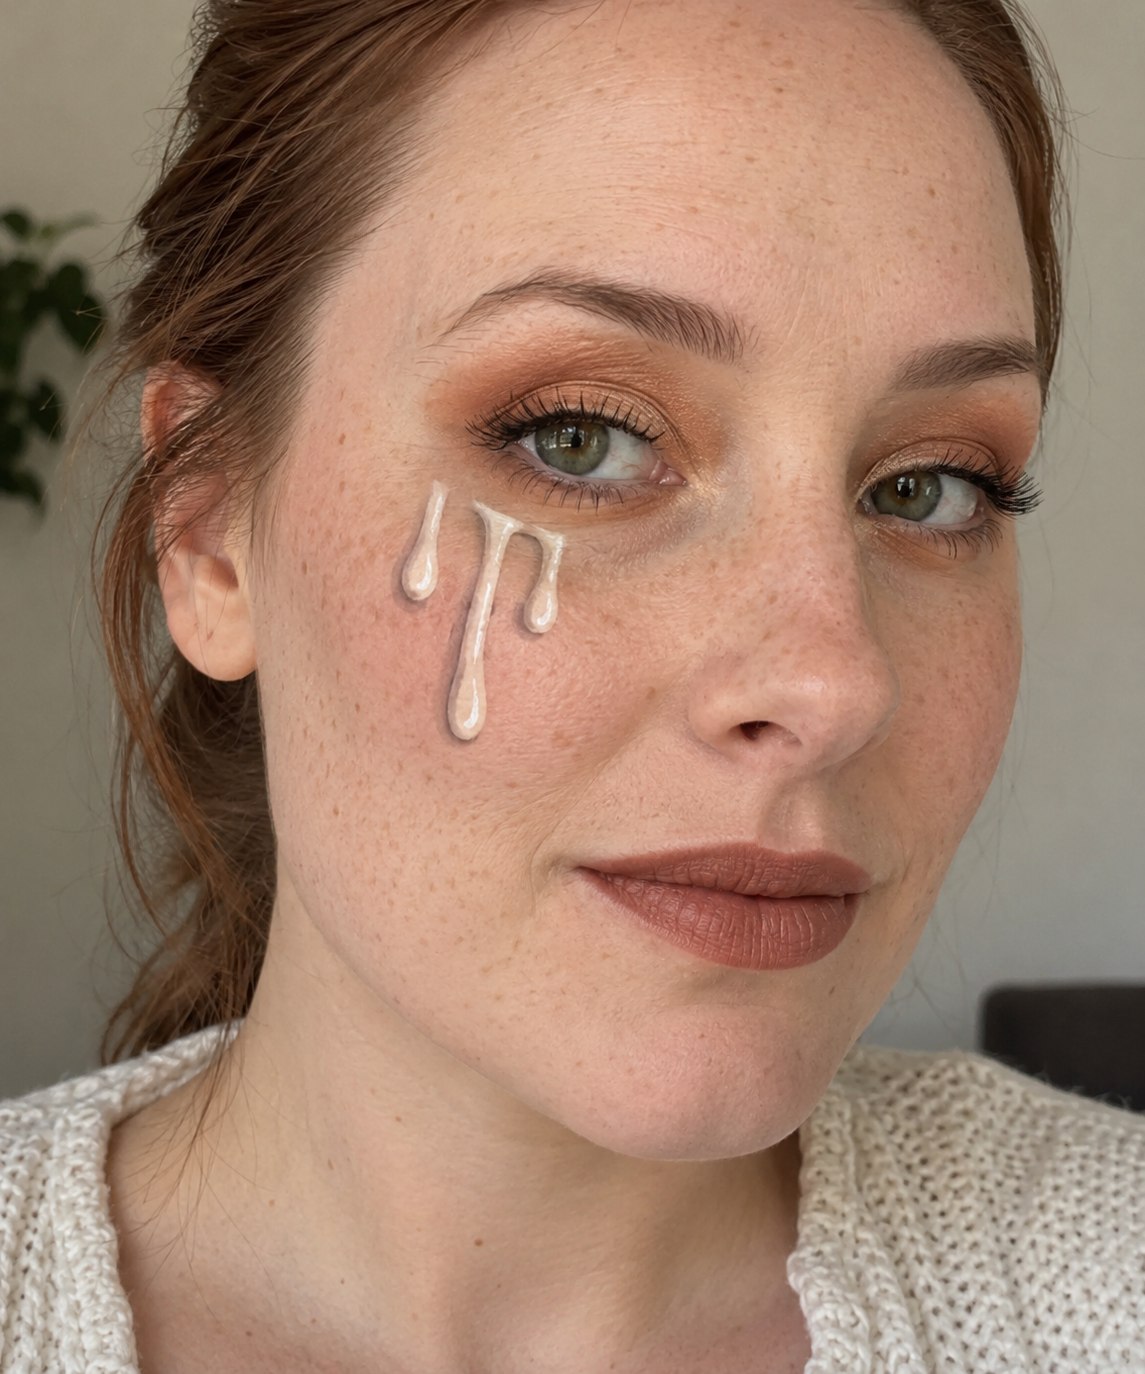
Vary the length of the drips and leave space between them. Identical parallel lines can look like stripes; slightly different curves suggest something that has slowly run downward. Place the design on the cheek, leaving clear space beneath the lash line.
The quick version uses one drip and a little shadow. You can also paint it at the temple instead of under the eye. Keep the rest of the face simple so the little dimensional trick remains visible in ordinary room light.
6. The torn-paper phantom
Paint an off-white patch with a jagged edge across one cheek and temple. A thin gray shadow along the lower edge makes it look like a torn piece of paper resting on the face. Add two or three charcoal sketch marks inside, as if the phantom is only partly drawn.
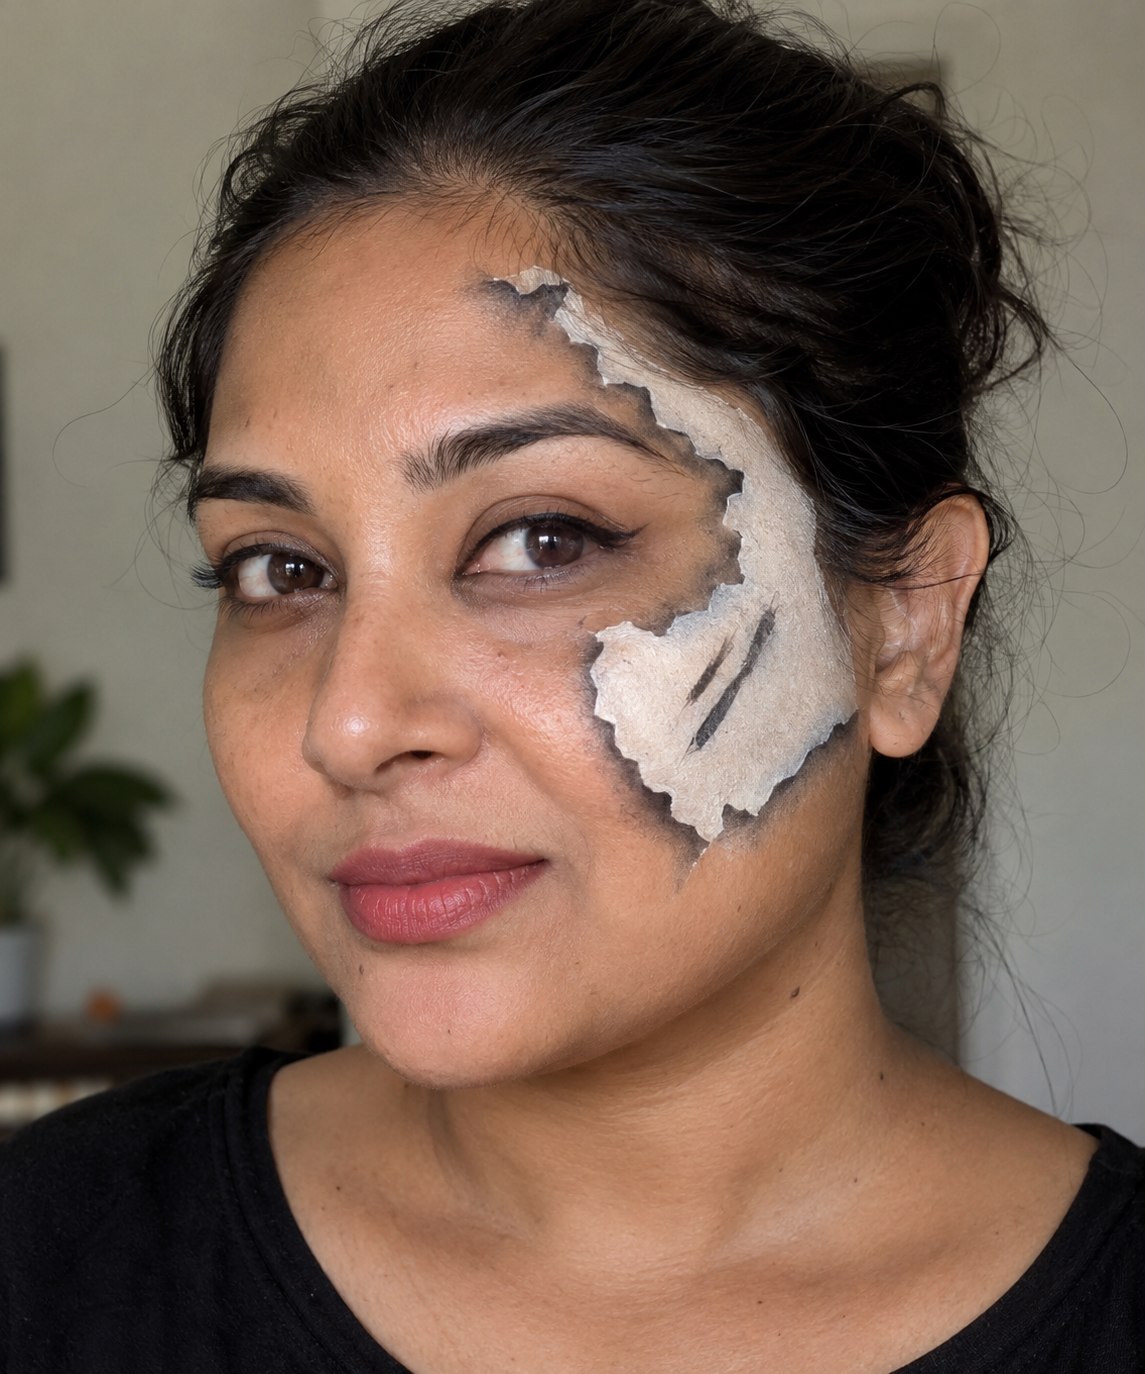
Keep the shape broad and the edge irregular. Tiny repeated triangles can make it look like a zigzag pattern; a mix of longer and shorter tears reads more naturally. This effect uses paint only, with no paper or glue attached to the skin.
For the easy version, put a small torn patch on one cheek and skip the inner drawing. The contrast between the flat white shape and your natural skin does most of the work. It is strange without asking for a whole-face transformation.
7. The deep-sea ghost
Blend slate blue and gray at the outer eyes and cheeks, then add a few curved pearl-white lines like ripples seen underwater. Tiny pale dots can suggest reflected light. Use a deep plum lip if you want the design to feel more ghostly than mermaid-like.
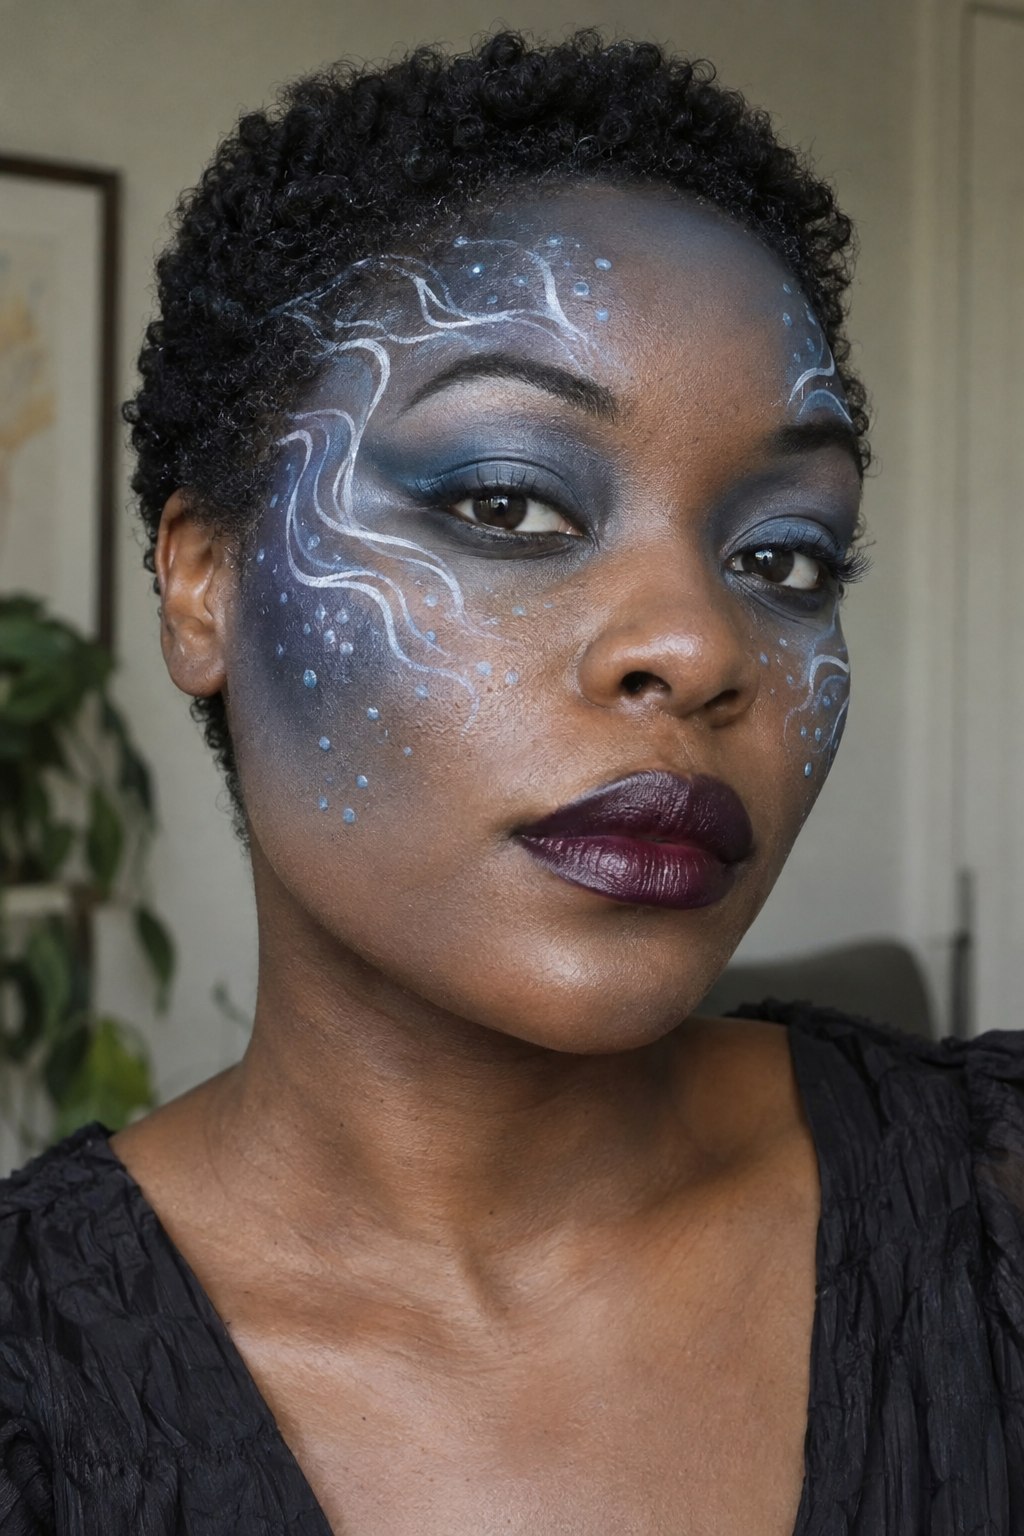
Build the blue slowly so the skin still shows through in places. Then choose three or four ripple lines, keeping their curves loose. Too many evenly spaced lines can turn the face into a contour map when you wanted an ocean.
For a quicker version, keep the blue to the eyelids with suitable eye cosmetics and paint just two ripples at each temple. The design does not need glow paint, gems or contact lenses. Its mood comes from the cool color and quiet, uneven movement.
8. The clock that stopped at midnight
Paint a partial clock dial at one temple with muted gold, four dark ticks and two hands pointing upward. Let three small gold fragments drift down the cheek. It suggests a clock breaking apart at midnight without needing an entire mechanical face.
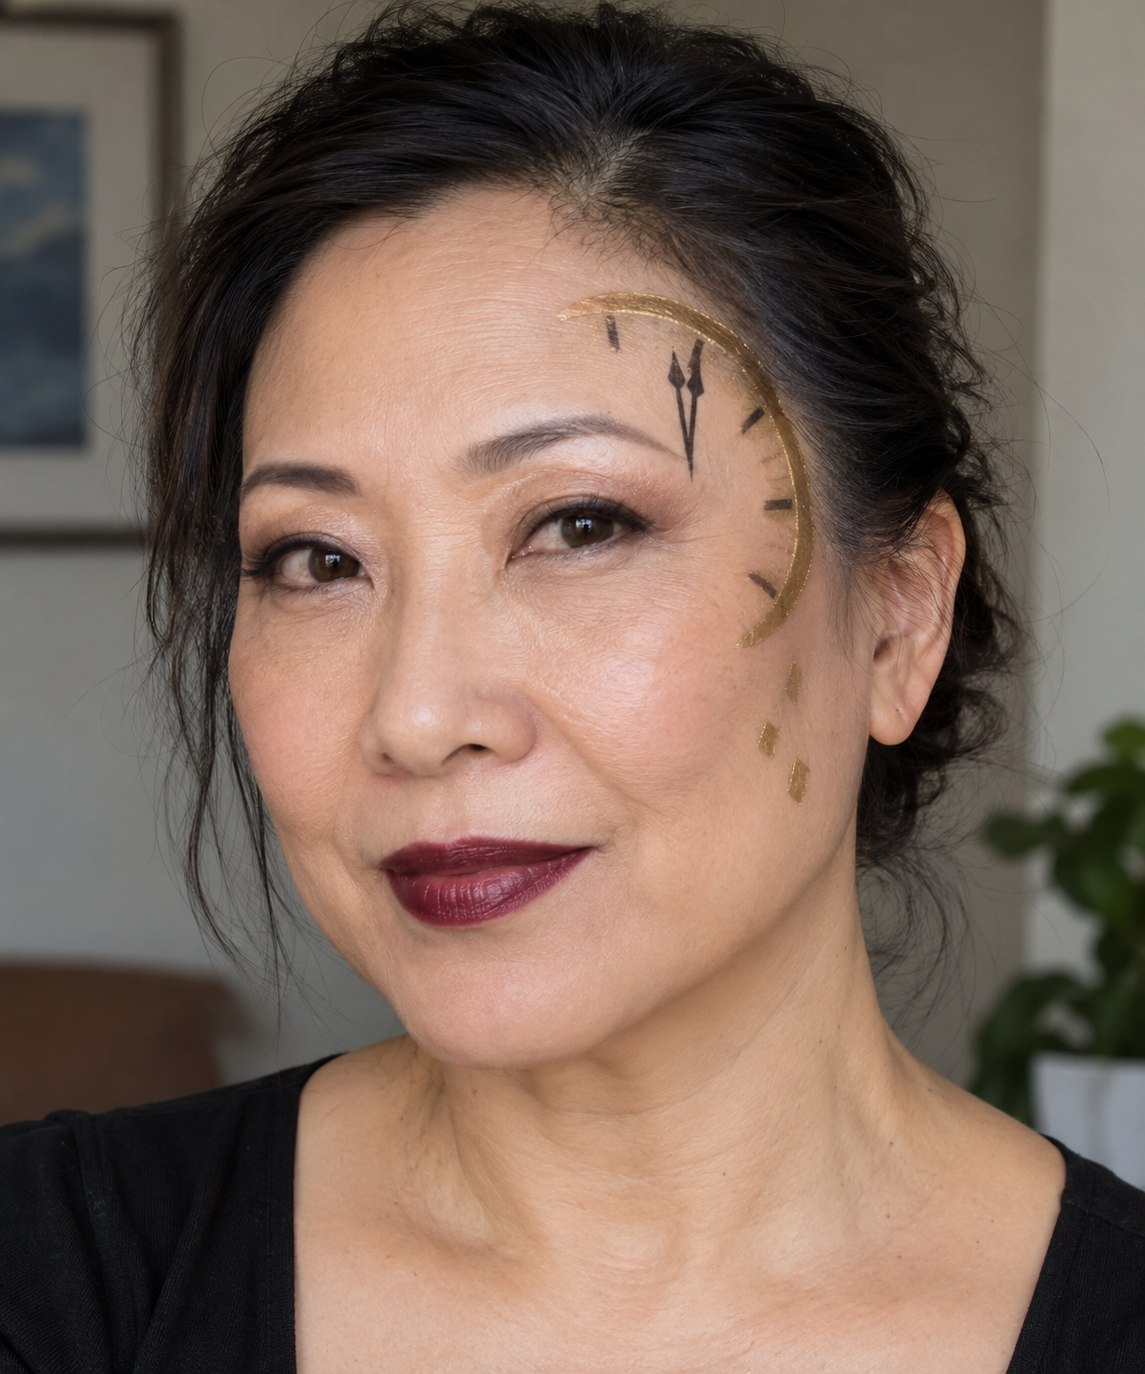
Place the arc first, then use a fine brush for the ticks. Keep the hands bold enough to read from a little distance. You can skip numbers completely; the arc, ticks and hands already explain the idea.
The beginner version is a tiny dial on the cheekbone with no fragments. Add a dark berry lip or a simple gold earring if you like. Avoid attaching real gears or heavy objects. Flat painted details are lighter, easier to remove and more than enough to tell this story.
Rehearse the detail, then plan the removal
Practice the trickiest detail on paper before the main session. Then test a small version with your actual cosmetics so you know how the colors layer and how the lines behave. You can simplify the design before the clock starts judging you.
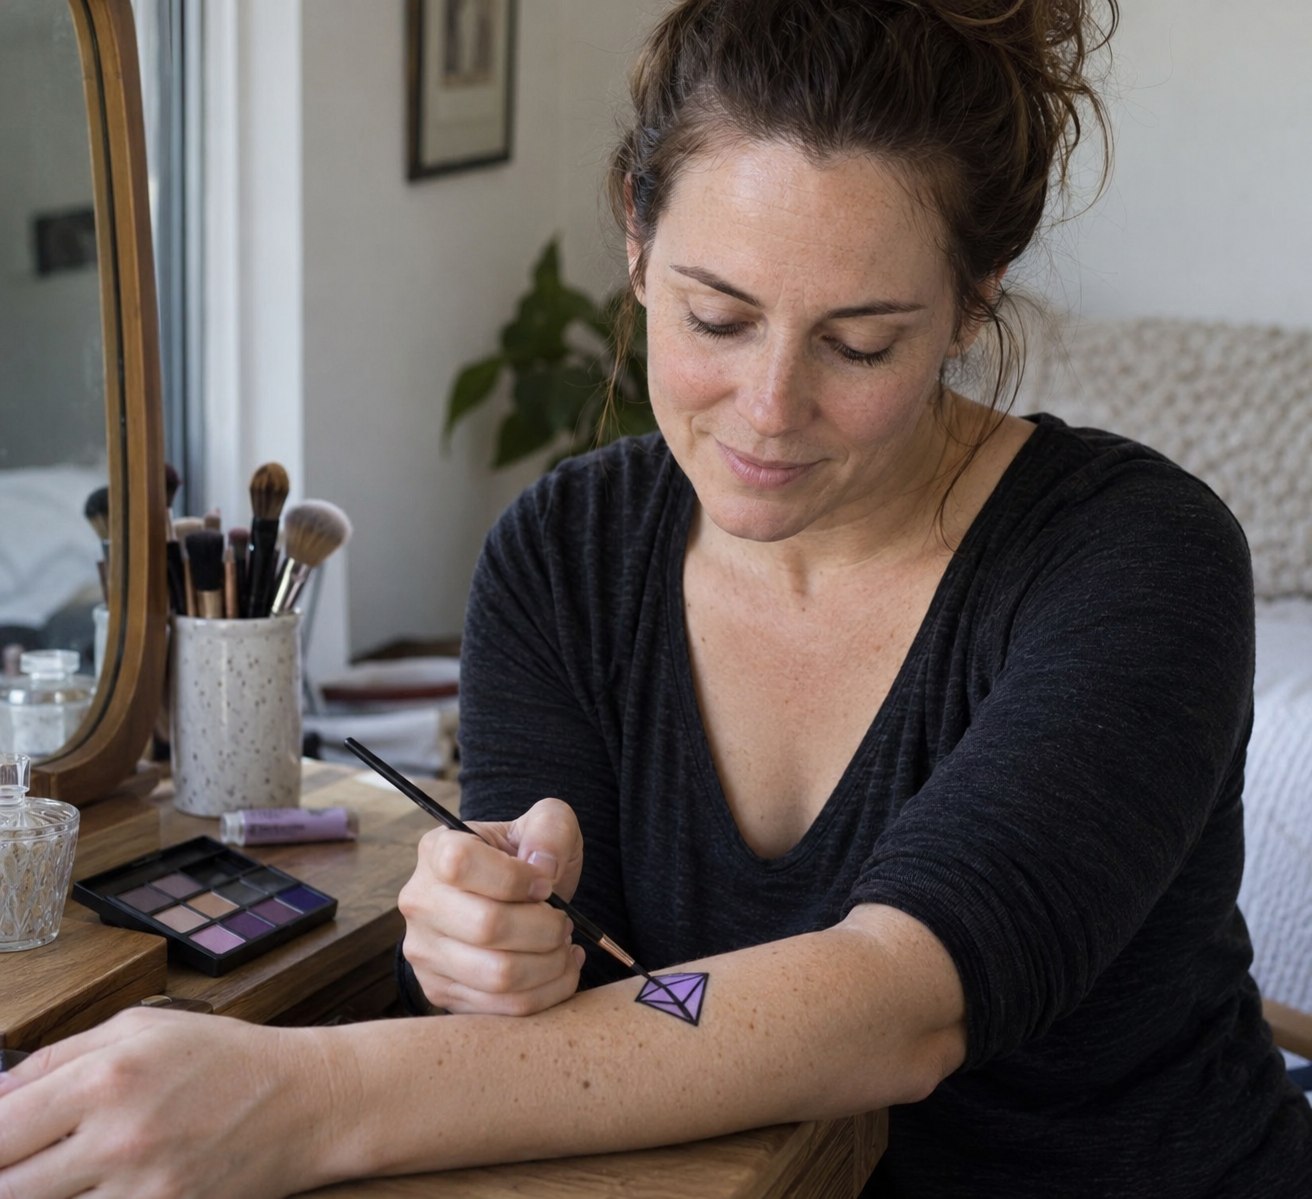
Follow product directions and check where each cosmetic is intended to be used. A face product is not automatically suitable near the eyes. Try unfamiliar products ahead of time, and remove the makeup gently using the method on the label. These novelty-makeup guidelines explain the practical checks.
Pack the one product most likely to need a touch-up and take a photo in normal indoor light. That is the version people will actually see. The makeup should still make sense after you smile, talk and eat something.
One strange detail can haunt the whole room. Start there.
