
Table of Contents
- Introduction
- What Makes Bandanas the Ultimate Hair Accessory
- Master the Fold: Foundation Techniques for Every Style
- Bandana Hairstyles for Long Hair
- Bandana Hairstyles for Short Hair
- Bandana Hairstyles for Curly and Natural Hair
- Updo and Bun Styles with Bandana Accents
- Full-Coverage and Wrap Styles
- Expert Tips for All-Day Hold and Polished Finish
- Styling Bandanas for Different Occasions
- Common Bandana Styling Mistakes and How to Fix Them
- Frequently Asked Questions
- Wrapping Up
Introduction
Your hair is doing that thing again.
You know the one. Where it’s not dirty enough to wash but definitely too greasy to wear down. Or maybe it’s just flat, lifeless, refusing to cooperate no matter how many products you throw at it.
And then you remember: you have a bandana.
One square of fabric—probably shoved in a drawer somewhere between your scrunchies and that lipstick you bought on impulse—can completely transform a bad hair day into a statement look. It works on pixie cuts and waist-length hair. It protects natural curls. It elevates gym ponytails. And it costs less than your morning coffee.
This guide walks you through every fold, every style, and every hair type. You’ll learn how to fake bangs without scissors, which techniques protect your curl pattern, and how to tie a bandana so it actually stays put all day. Whether you’re working with thick curls, fine straight hair, or anything in between, there’s a bandana style that works for you.
Let’s get into it.
Key Takeaways
-
Master three core folding techniques (triangle base, headband roll, bunny ear vs. seamless) that open up dozens of style variations across all hair types
-
Learn texture-specific approaches: silk and satin bandanas protect natural curls and reduce friction, while cotton provides grip for straight or fine hair
-
Discover how to adapt classic styles (Jackie O, Rosie the Riveter, 90s low-forehead) to modern aesthetics using color theory
-
Prevent common frustrations (slipping fabric, flat hair, costume-y looks) with professional securing techniques and strategic bobby pin placement
-
Match bandana styles to specific occasions—from gym-ready high ponytails to formal sleek topknots—using fabric choice and fold width as your guide
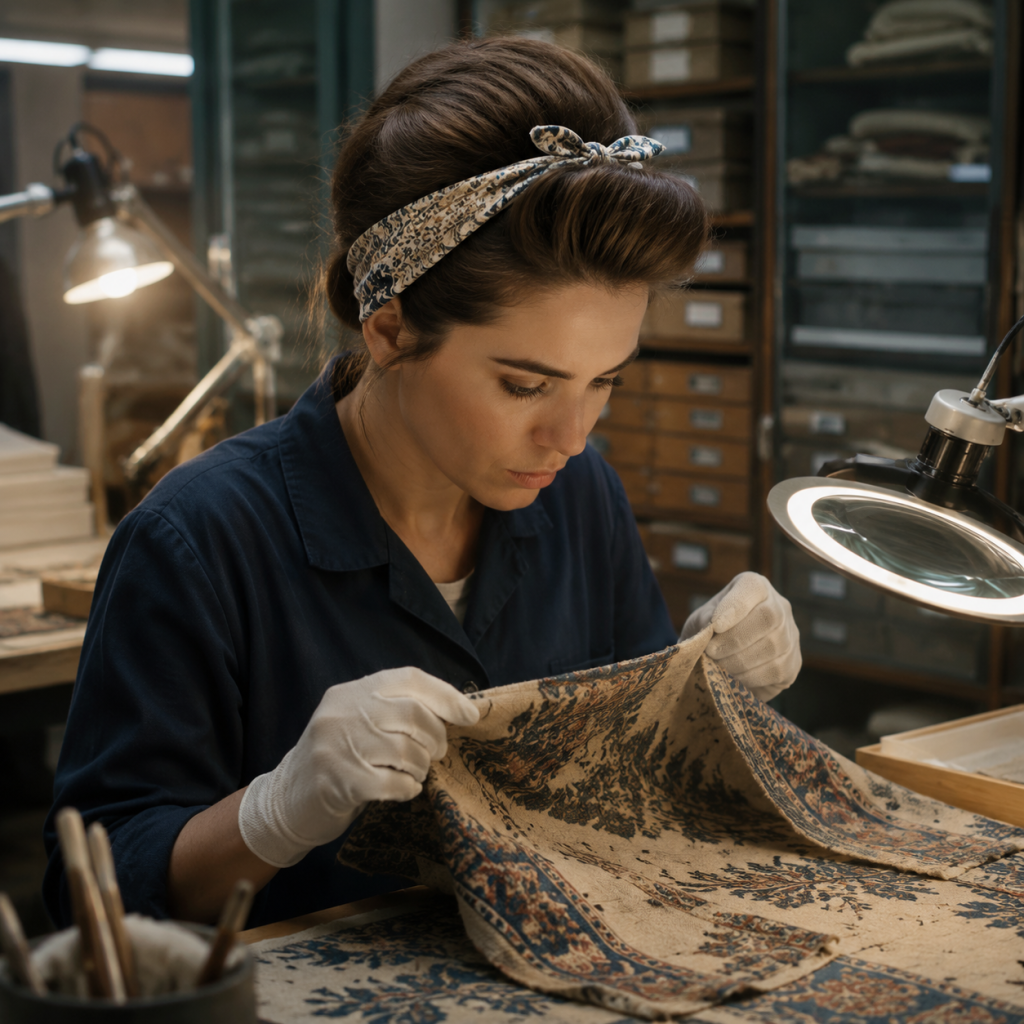
What Makes Bandanas the Ultimate Hair Accessory
Bandanas occupy a different category than your standard hair accessories.
A scrunchie holds your hair. A clip pins it back. A headband keeps it off your face.
A bandana does all of that and becomes part of the look itself. The larger surface area means you’re not just securing hair—you’re adding color, pattern, and texture in one move. It’s the difference between “I threw my hair up” and “I styled my hair.”
According to fashion trend analysis from Business of Fashion, bandanas and scarf accessories saw a 340% increase in social media mentions between 2020 and 2024, driven largely by Gen Z’s Y2K revival — a pattern consistent with broader findings on the 10-year shift: how AI reshaped social media aesthetics and trend cycles from 2014 to 2024. This isn’t a flash-in-the-pan trend. It’s a return to a versatile accessory that’s been working across generations for decades.
The functional advantages are real. Bandanas protect blowouts from humidity. They cover greasy roots on day three of dry shampoo. They shield your scalp from sun damage at the beach. And when the rest of your outfit is unremarkable—sweats, gym clothes, basic jeans and a tee—a printed bandana instantly signals that you put thought into your appearance.
The Bandana vs. Other Hair Accessories
Bandanas win on coverage and visual impact.
A standard headband is maybe an inch wide. A bandana folded into a headband can be three inches, covering significantly more scalp and hair surface. That matters when you’re dealing with roots that need concealing or when you want the accessory to be a focal point rather than an afterthought.
Hold strength varies by fabric. Cotton bandanas grip better than silk, making them ideal for athletic activities or all-day wear when you can’t constantly readjust. Silk and satin, on the other hand, reduce friction—critical for protecting natural curls and preventing breakage.

Clips and barrettes work well for securing specific sections, but they don’t add color or pattern the way fabric does. Scrunchies are gentler on hair than standard elastics, but they’re limited to ponytail and bun applications. Bandanas can wrap, tie, weave, and layer in ways that rigid accessories simply can’t.
The situations where bandanas outperform everything else: covering a bad haircut while it grows out, protecting styled hair from wind or weather, adding a pop of color to monochrome outfits, and managing high-volume hair that overwhelms smaller accessories.
Choosing Your Bandana: Fabric, Size, and Pattern
Fabric choice determines both function and aesthetic.
Cotton bandanas provide grip. They stay put on straight or fine hair without constant adjustment. They’re casual, washable, and work well for everyday wear or athletic activities. The downside: they can cause friction if tied too tightly on textured hair.
Silk and satin are protective fabrics. They reduce friction, making them the go-to choice for natural curls, locs, and braids. They also read as more formal—think Jackie O elegance rather than 90s streetwear. The tradeoff: they slip more easily and require bobby pins for all-day security.
Standard sizing is a 22-inch square. That works for most people and most styles. If you have very thick or very long hair, size up to 27 inches for easier tying and more coverage. Smaller bandanas (around 18 inches) work well for short hair or children.
Pattern selection ties directly to the aesthetic you’re building, and data from the hairstyle survey dataset suggests that color and pattern preferences in hair accessories vary significantly across demographics and style identities. Color theory breaks this down by Gen Z “core” identities: primary colors (red, white, blue) channel Blokette or Sporty Spice energy. Earthy tones (terracotta, sage, mustard) lean cottagecore. Black and white geometric prints fit the minimalist or Eclectic Grandpa vibe.
Budget hack: upcycle old fabric into custom bandanas. Cut a 22-inch square from a vintage skirt, a shirt you never wear, or fabric remnants from a craft store. Hem the edges or leave them raw for a deconstructed look.
Master the Fold: Foundation Techniques for Every Style
Every bandana style starts with how you fold the fabric.
Get these three techniques down, and you open up dozens of variations. The fold determines thickness, stability, and the final silhouette of your look.
Most people skip this step and wonder why their bandana won’t sit right or keeps sliding off. The fold is the foundation. Master it first.
The Triangle Base Fold
This is your starting point for full-coverage styles and wide headbands.
Lay the bandana flat on a hard surface—a table or countertop works better than your lap. Fold it diagonally from one corner to the opposite corner, creating a triangle. Here’s the trick: offset the fold slightly so the two points don’t match perfectly. This makes the fabric easier to manipulate and tie.
The triangle base works best for turban wraps, Jackie O styles, and any look where you need maximum fabric coverage. It’s also the foundation for creating the classic “biker” bandana look—triangle point at the back, long edge across the forehead.
Pro tip: press your bandana with an iron before folding. Crisp lines make the final style look intentional rather than haphazard. Wrinkled fabric reads as messy, even when the style itself is supposed to be casual.
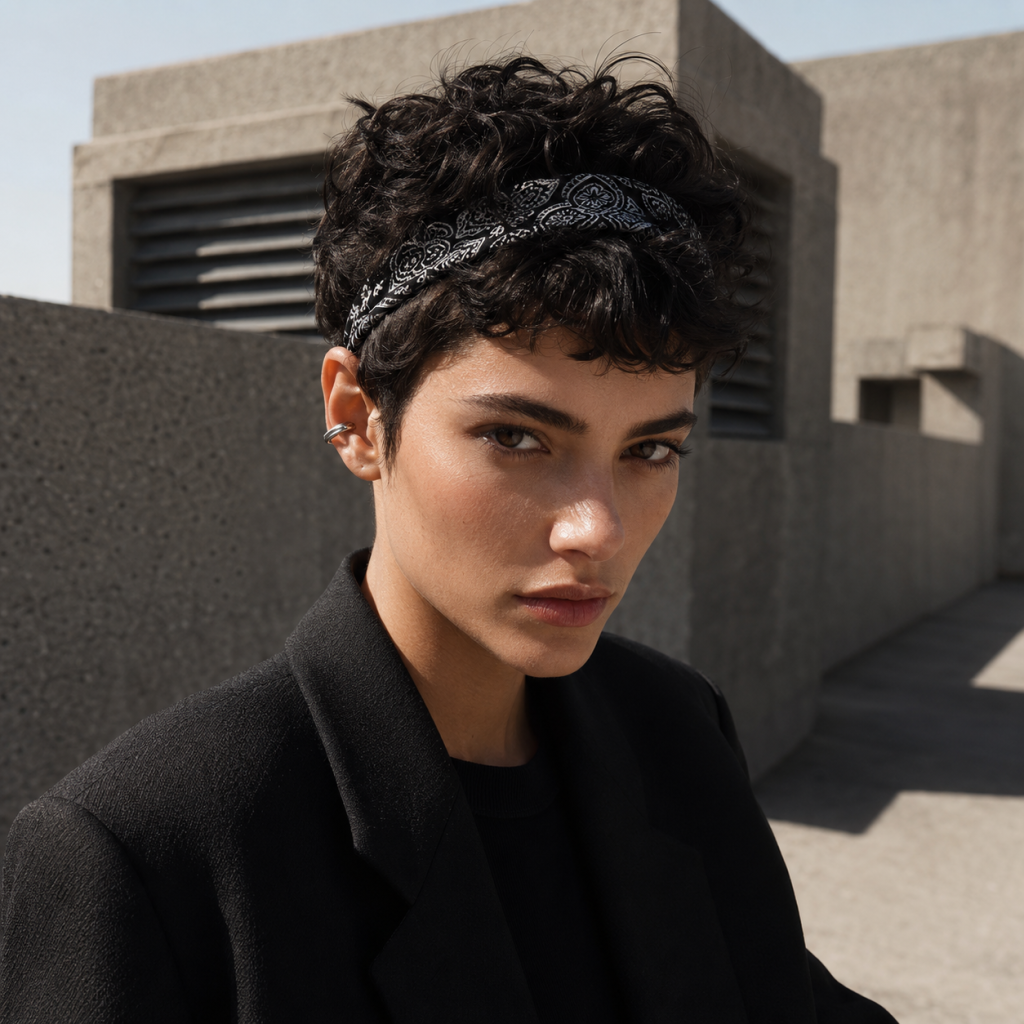
The Headband Roll (Thick vs. Thin)
The width of your roll changes everything.
Start with the triangle base. From the long edge (the base of the triangle), begin rolling or folding the fabric toward the point. How far you roll determines the thickness of your headband.
A thick band—about three inches—gives you retro, bold, 1940s Rosie the Riveter energy. It covers more scalp, which makes it ideal for bad hair days or when you want the bandana to be the dominant visual element. The wider surface also provides more grip, so it’s less likely to slip.
A thin band—one to two inches—looks modern and sleek. It sits more securely on the head because there’s less fabric to shift around. This is your everyday wear option, your gym option, your “I want this to look effortless” option.
Securing trick: use bobby pins that match your bandana color. Place them behind your ears where the fabric naturally wants to slip. This is especially important for silk or satin bandanas, which have less natural grip than cotton.
Creating the Bunny Ear vs. Seamless Finish
The way you tie the final knot controls the vibe.
For bunny ears: tie the bandana once at your desired position (top of head, nape of neck, behind the crown). Then tie it again, but flip the loose ends halfway through the second knot. This creates standing “ears” that give the style a playful, Y2K energy. Think early 2000s pop stars and TikTok revival aesthetics.
For a seamless finish: complete your knot, then tuck the loose ends back into the band itself. This creates an infinity headband effect—clean, polished, minimalist. No visible tails, no bunny ears, just a continuous loop of fabric.
When to choose each: bunny ears work for casual looks, weekend wear, anything where you want to lean into the accessory as a statement piece. Seamless works for professional settings, sleek styles, or when you want the bandana to add to your hair rather than compete with it.
Bandana Hairstyles for Long Hair
Long hair gives you the most styling options with bandanas.
You can weave fabric directly into braids. You can wrap it around ponytails that cascade down your back. You can use it to protect length from damage while still showing off the hair you’ve spent years growing.
The key is choosing styles that work because of your length, not in spite of it.
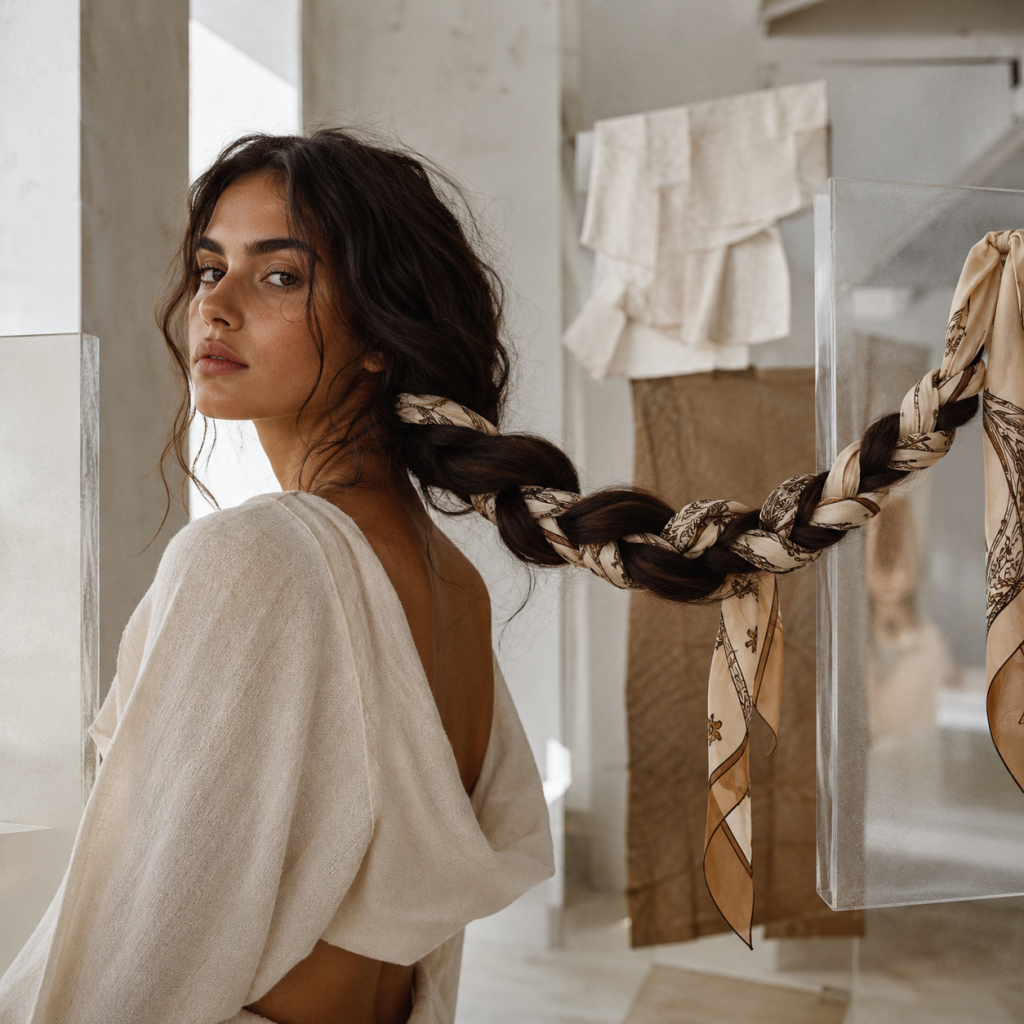
The Bandana-Strand Braid
This technique turns your bandana into a functional part of the braid itself.

Start by securing your hair into a ponytail at whatever height you prefer—high, mid, or low. Tie your bandana around the base of the ponytail, making sure both ends hang down evenly.
Now divide your hair into two sections instead of the usual three. Use the two hanging ends of the bandana as your third braiding strand. Braid as you normally would, incorporating the fabric as if it were hair.
The result is a thicker, more colorful plait that looks like you added extensions without the commitment or expense. This works beautifully on textured or wavy hair, where the fabric blends naturally with your hair’s movement. For a boho aesthetic, leave the braid slightly loose rather than pulling it tight.
Finishing tip: secure the end with a clear elastic and let the bandana tails flow free rather than tucking them in. The fabric becomes part of the braid’s silhouette.
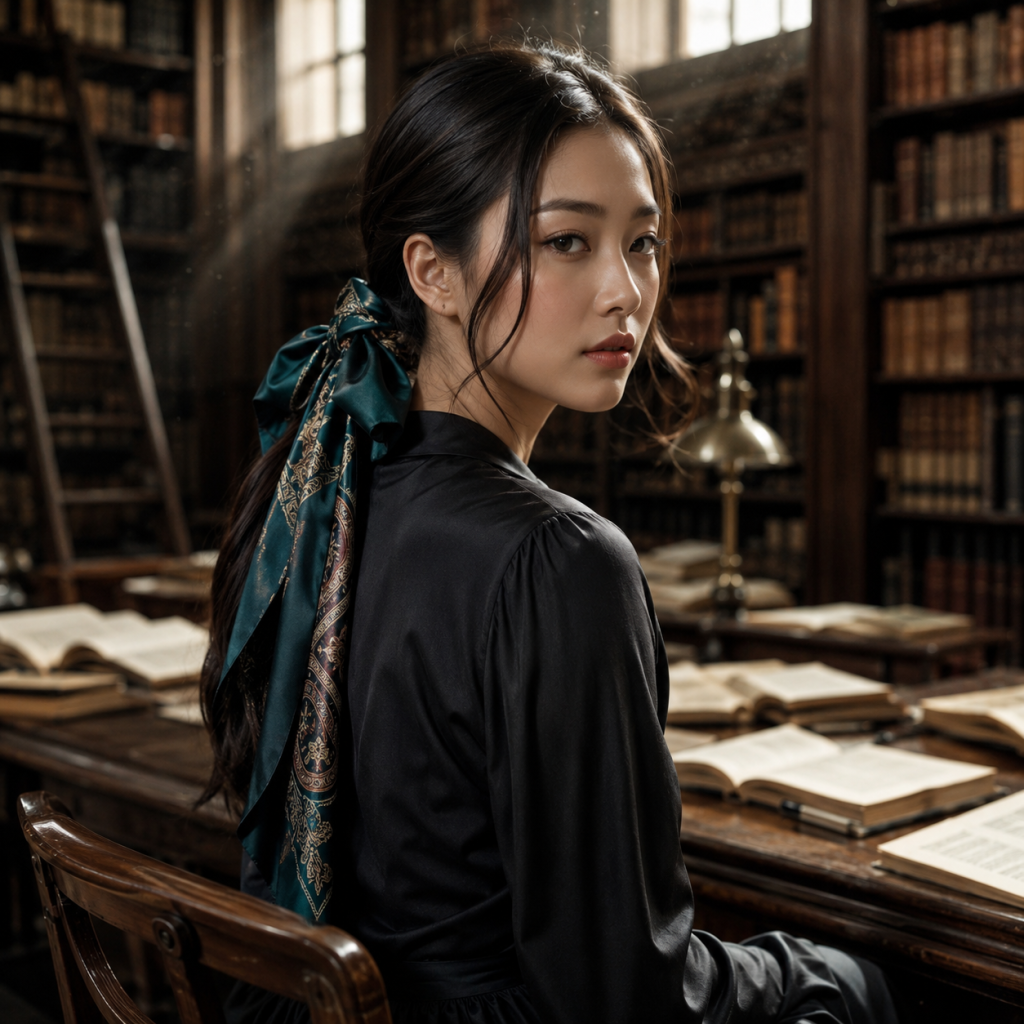
Protective Low Ponytail with Bow Wrap
This is your two-minute elegant option.
Start with a low ponytail secured with a snag-free elastic—the kind without metal clasps that can catch and break hair. Position it at the nape of your neck or slightly to one side for asymmetry.
Fold your bandana into a headband-width strip (use the thin roll technique from earlier). Wrap it over the elastic, concealing it completely. Tie the bandana into a large bow, letting the tails hang down alongside your ponytail.
This style is ideal for second-day hair or when you want to protect a blowout without heat-styling again. The fabric layer between your hair and the elastic prevents the tension damage that comes from wearing ponytails daily.
Variation: leave two face-framing pieces out in front before securing your ponytail. This softens the overall look and works especially well if you have curtain bangs or layers around your face.
Pro tip from hairstylists: apply a protective serum or lightweight oil to your hair before styling. This creates a barrier between your hair and the fabric, maintaining shine and preventing any potential friction damage from the bandana.
Gentle Waves with Swept-Back Bandana
This style showcases your hair while adding vintage glamour.
It works best when you have fresh waves—either from a curling iron, overnight braids, or your natural texture. The bandana becomes a functional headband that keeps hair off your face while letting the length flow freely.
Sweep all your hair straight back from your forehead. Fold your bandana into a thin headband and position it at your crown, about two to three inches back from your hairline. Tie it at the nape of your neck, tucking the ends under for a seamless finish.
Leave face-framing pieces out if you want softness. Pull them out before securing the bandana, then let them fall naturally alongside your face.
This achieves what stylists call the “Positano vacation” aesthetic—that effortless European elegance that suggests you just stepped off a yacht. It’s polished without looking overly styled.

Expert tip from celebrity hairstylist Jason Lee: if you want natural-looking waves to pair with this style, air-dry your hair in two large braids the night before. The larger the braid, the more natural and loose the resulting wave. This technique gives you texture without heat damage.
Bandana Hairstyles for Short Hair
Short hair and bandanas are actually a perfect match.
The misconception is that you need length to make accessories work. The opposite is true. Bandanas add height, frame your face, and create the illusion of more hair when you’re working with a pixie cut or bob.
They also solve the problem of “what do I do with my hair today” when you don’t have enough length for elaborate updos.
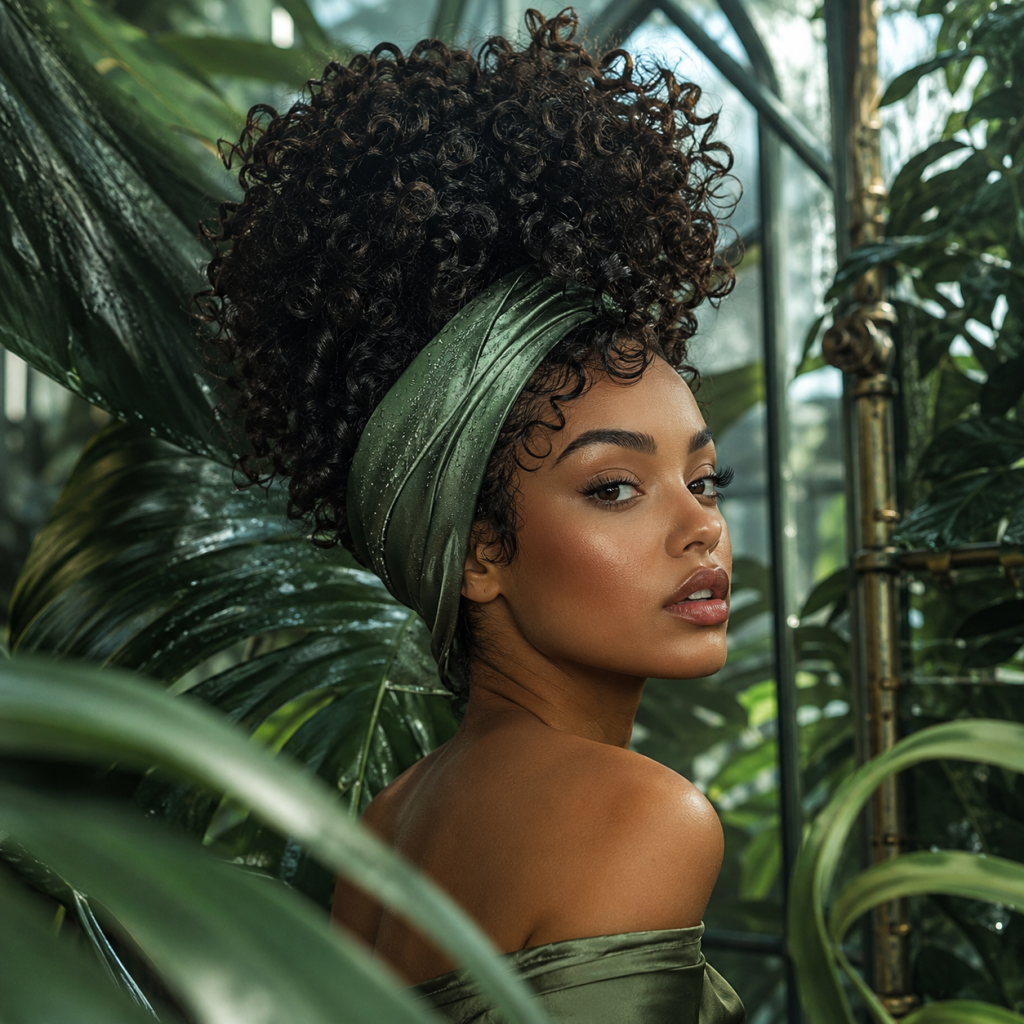
The Classic Headband for Pixies and Bobs
This is the most versatile short-hair bandana style.
Fold your bandana into a thin headband using the roll technique. Position it behind your ears, letting it sit about an inch back from your hairline. You can knot it at the top of your head for added height, or at the nape of your neck for a sleeker look.
This works especially well with curly pixies. Let your curls pop up and over the band, creating volume and texture contrast. The bandana acts as a foundation that lifts your hair rather than flattening it.
Styling trick: if your hair is too short to grip the fabric naturally, use bobby pins. Place them vertically through the band and into your hair at the temples and behind your ears. Choose pins that match your bandana color so they disappear into the fabric.
This style achieves a retro-modern contrast that’s distinctly Gen Z—vintage accessory, contemporary hair texture.
The Ballerina Bun Illusion
Short hair doesn’t mean you can’t do buns.
Gather whatever hair you can into a small bun at your desired height—usually at the crown or slightly back from it. Secure it with a small elastic.
Now tie a long bandana around the base of that bun. Let the fabric ends cascade down the back of your neck like a scarf. The length of the bandana creates the visual impression of a much fuller, more substantial bun.
This works beautifully for formal events when short hair can feel limiting. The bandana adds drama and elegance without requiring extensions or complicated styling.
Curly Bob with Under-Tie
This is a protective style specifically for textured short hair.
Instead of tying the bandana on top of your head or at your crown, tie it underneath your hair at the nape of your neck. Pull your front curls and bangs out to frame your face naturally.
The bandana controls volume in the back while your natural curl pattern maintains its shape in front. This is particularly effective for curly bobs or lobs where you want to manage bulk without flattening your texture.
The under-tie technique also works well for protecting your hair overnight. Use a silk or satin bandana, tie it loosely at the nape, and let your curls rest on top of the fabric rather than against a cotton pillowcase.
Bandana Hairstyles for Curly and Natural Hair
Texture-specific styling matters.
Curly and natural hair has different needs than straight hair—primarily around moisture retention, curl pattern preservation, and friction reduction. The right bandana style works with your texture rather than fighting it.
Fabric choice is critical here. Silk and satin aren’t just aesthetic preferences — they’re protective tools, a distinction supported by product innovation practices of textile-based accessories that highlight how material selection directly affects both functionality and wearer experience.
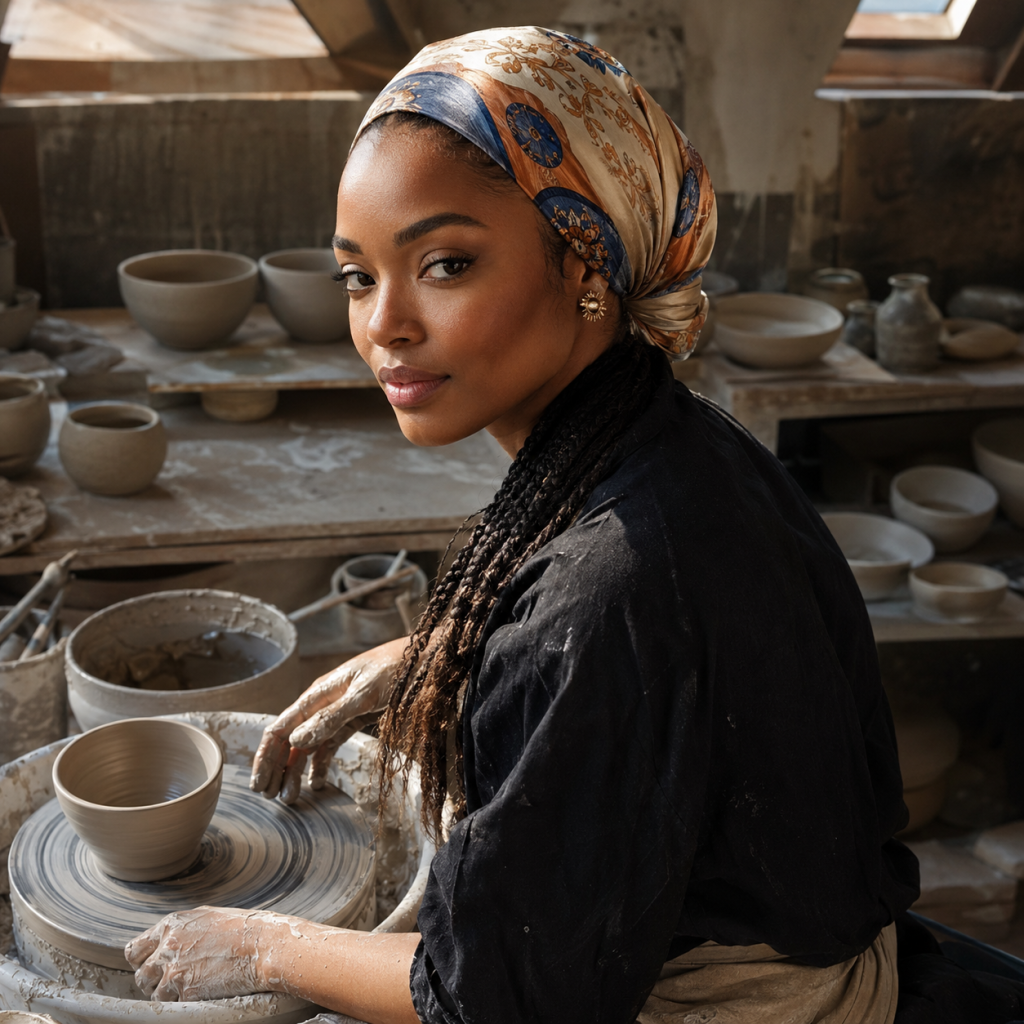
The Protective Turban Wrap
This is full-coverage styling that protects curls, locs, and braids from environmental damage.
Fold your bandana into a large triangle using the triangle base technique. Place the center of the long edge at your hairline. Pull the point of the triangle over the top of your head toward the back. Take the two remaining ends and tie them over that point at the nape of your neck.
You can tuck all your hair inside for complete coverage, or let front curls peek out for a style variation. The choice depends on whether you’re prioritizing protection or aesthetics.
Fabric matters enormously here. Silk or satin is essential for reducing friction and preventing breakage. Cotton can absorb moisture from your hair and cause frizz—fine for straight hair, problematic for curls.
This style balances practicality with high-fashion aesthetic. It’s ideal for beach days when you need to protect your hair from sun, salt, and chlorine damage. It also works for travel, bad weather, or any situation where you want to preserve your curl pattern without constant maintenance.
The Pineapple Style with Bandana Perimeter
The pineapple is a classic protective style for curly hair.
Tie your bandana around the perimeter of your head like a headband, but position it slightly lower—about at ear level. Push your hair upward as you secure the bandana. Let your curls spill over the top in a high, loose formation.
This maintains your curl integrity while controlling volume. The bandana acts as a foundation that holds the weight of your curls without flattening them against your scalp.
It works beautifully for high-density curls that need containment but shouldn’t be compressed. The style also prevents the flattening that happens when you sleep on curls—use this technique overnight with a silk bandana for curl preservation.
Variation: position the bandana lower on your forehead (about an inch above your eyebrows) for a 90s streetwear vibe. This channels early Aaliyah energy and works particularly well with loose, defined curls.
Voluminous Curls with Crown Holding Band
Very large curls need weight support throughout the day.
Fold your bandana in half lengthwise to create a thick band. Tie it just above your hairline, positioning it so it sits at the crown of your head where your curls naturally want to lift.
The thick band helps hold the weight of your curls without flattening them. This prevents the “curl drop” that happens midday when gravity takes over and your volume disappears.
Pro tip: use the thick-fold method (three-inch width) for maximum support. The wider surface distributes weight more evenly across your scalp, reducing the tension on any single section of hair.
Updo and Bun Styles with Bandana Accents
Updos and buns are Gen Z staples.
Adding a bandana transforms them from basic to intentional. You’re not just pulling your hair up—you’re creating a look.
These styles work across formality levels. The same messy bun technique works for the gym and for brunch, depending on your bandana choice and how you tie it.

The Messy Bun Wrap
This upgrades the messy bun you already do every day.
Create your messy bun at whatever height feels natural—high, mid, or low. Don’t overthink the bun itself. The bandana is doing the visual work.
Wrap a folded bandana around the base of your bun instead of using a scrunchie. The fabric adds a pop of floral or geometric pattern to an otherwise simple style.
This works best on medium to long hair where you have enough length to create a substantial bun. The bandana should wrap around the base at least once, with enough fabric left over to tie securely.
Takes under one minute to execute. Perfect for when you’re running late but still want to look like you tried.
The Rosie the Riveter High Bun
This is modern vintage with volume and attitude.
Start by creating a high messy bun at the crown of your head. Before you secure it, part your hair deeply on one side. Take the larger front section and flip it over toward the opposite side, creating a slight pompadour or bump at your hairline.
Now fold your bandana into a headband and tie it at the top of your hairline, directly behind that lifted section. The bandana locks the volume in place while channeling 1940s icon energy.
Securing tip: if your hair is fine or silky, the fabric will slide. Use bobby pins placed vertically through the band and into your hair. Place them at your temples and at the crown where the bandana crosses the bump.
Modern twist: leave two small pieces out in front of the bandana for softness. This prevents the style from looking too costume-y or literal.
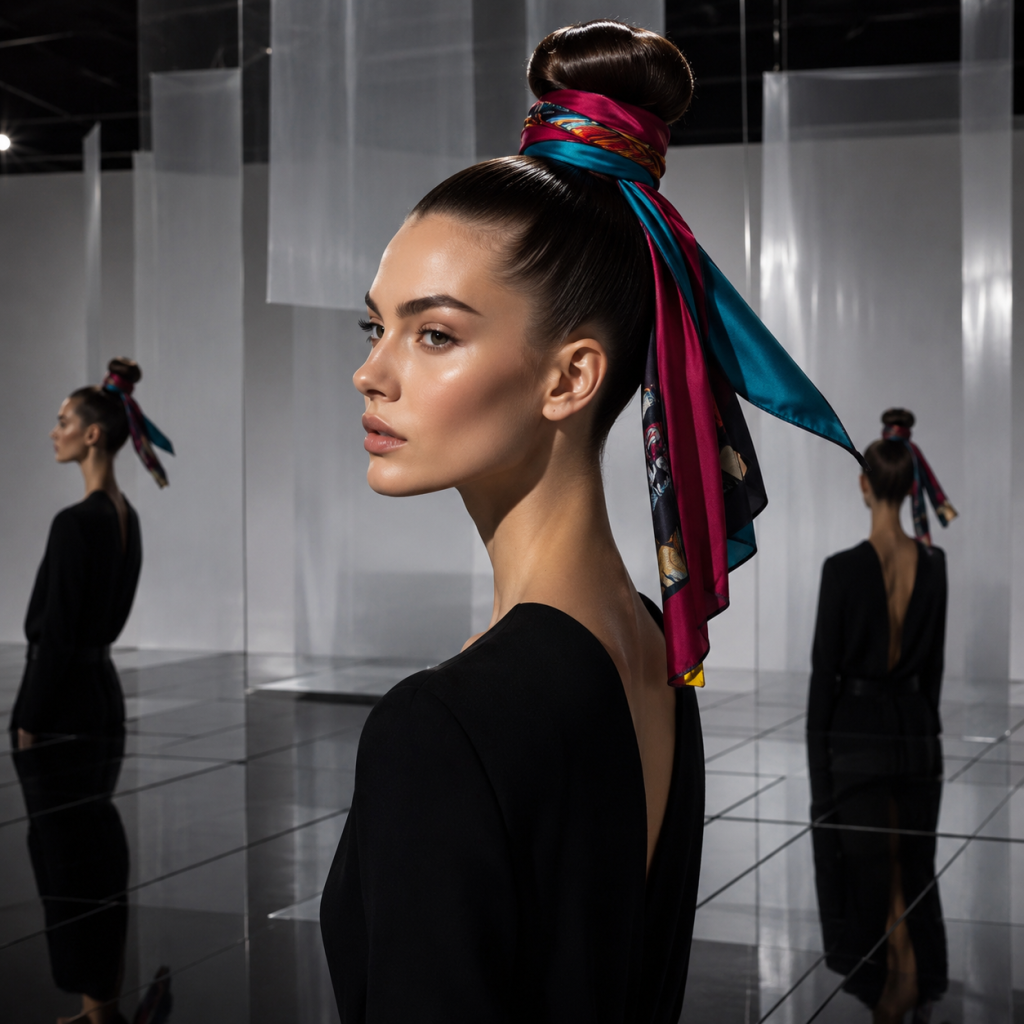
Sleek Topknot Statement
This creates a striking silhouette for events where you want to make an entrance.
Slick your hair into a high topknot using gel or pomade. The key word is slick—this style requires smoothness and shine. Any flyaways or texture undermine the dramatic effect.
Tie a bold designer scarf or bright bandana around the base of the topknot. The color contrast between your hair and the fabric is what makes this work. Black hair with a red bandana. Blonde hair with a cobalt blue scarf.
This is your formal-but-edgy option. It works for gallery openings, fashion events, or any situation where “polished” doesn’t mean “boring.”
Low Ponytail Bow
The quickest feminine transformation for lazy hair days.
Secure a low ponytail at the nape of your neck. Wrap your bandana over the elastic. Tie it into a large bow, letting the tails hang down alongside your ponytail.
Takes under two minutes. Completely transforms a “lazy” look into something that appears intentional and put-together.
Full-Coverage and Wrap Styles
Full-coverage styles serve both fashion and function.
They’re practical options for bad hair days, blowout protection, and scalp sun protection. They’re also fashion statements tied to specific icons and cultural moments.
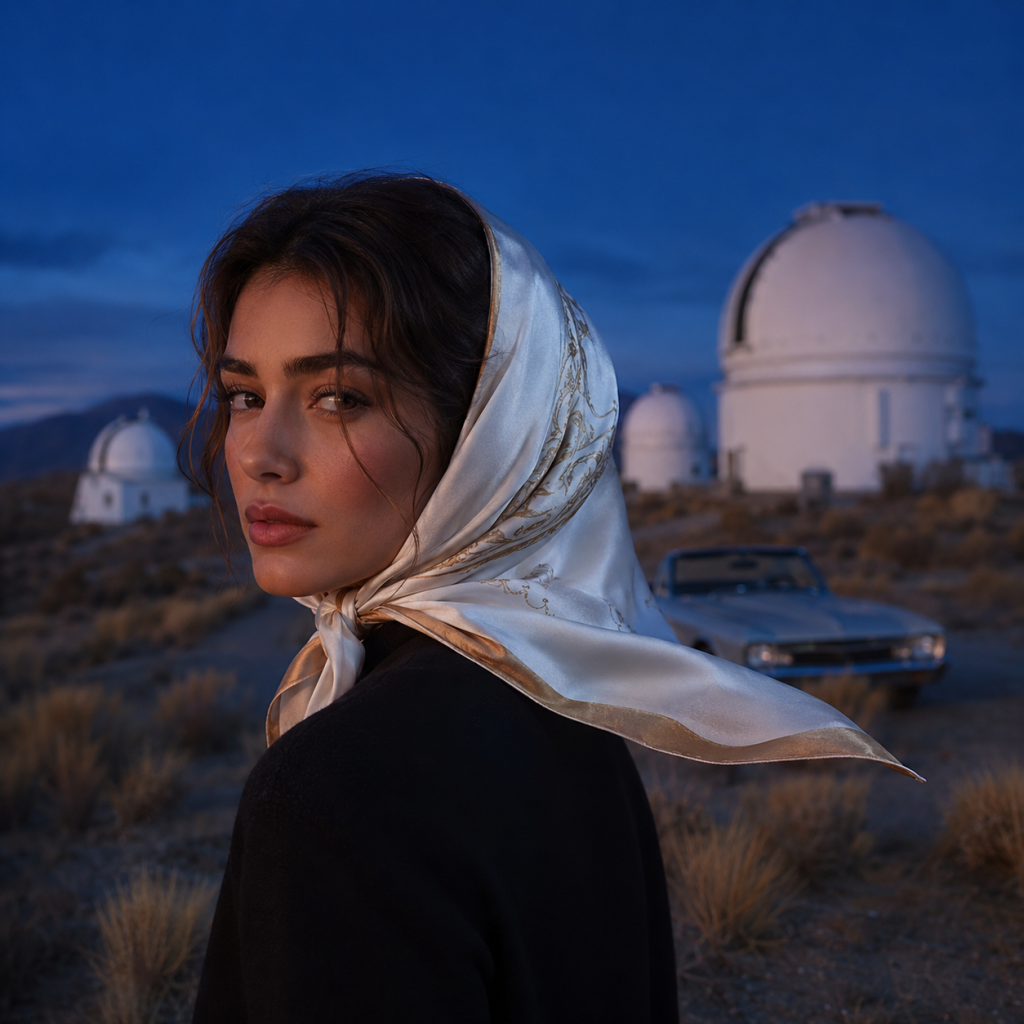
The Jackie O (Under-Chin Tie)
This is the ultimate “old money” elegance look.
Fold your bandana into a triangle using the triangle base technique. Place the long edge at your hairline, letting the point fall toward the back of your head. Take the two side corners and tie them firmly under your chin or behind your neck, beneath your hair.
This conveys timeless sophistication—the “I summer in Positano” aesthetic that suggests European vacations and convertible cars. It’s inspired by style icons like Carolyn Bessette-Kennedy and Jackie Onassis, who made this look synonymous with refined taste.
Practical use: this style protects blowouts from wind and humidity. If you’ve spent time heat-styling your hair, the Jackie O wrap keeps it intact while you’re outside.
Modern variation: leave front pieces out for softer face framing. Pull two small sections out before tying the bandana, then let them fall naturally alongside your cheeks.
The 90s Low-Forehead Bandana
This channels early 2000s streetwear icons.
Wear a white or patterned bandana low across your forehead—about an inch above your eyebrows. Tie it at the back of your head, either at the crown or at the nape depending on how much coverage you want.
Pair this with loose straight hair or a high ponytail. Leave two face-framing tendrils out in front for authenticity—this detail is what separates the look from costume territory.
This channels J.Lo and Aaliyah energy. It’s distinctly Y2K, which means it’s distinctly Gen Z right now.
Works best with a thin-rolled bandana for accurate 90s proportions. A thick band reads more retro 1940s than 2000s hip-hop.
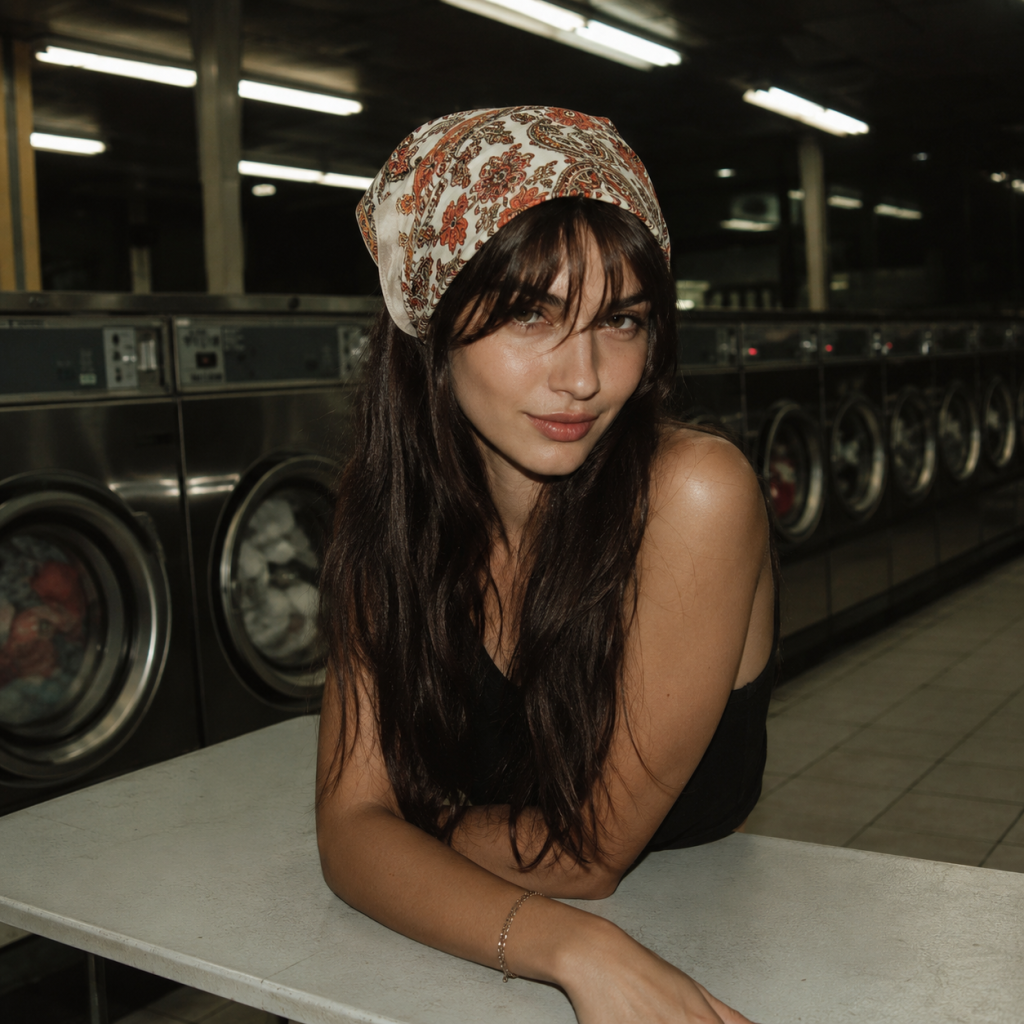
The Faux Bang Effect
This lets you test-drive bangs without committing to scissors.
Tuck the ends of your hair forward under your bandana or head covering. Let the tips fall over your forehead, mimicking the look of “Bardot” bangs—that soft, face-framing fringe that’s perpetually on-trend but requires maintenance.
Adjust the amount of hair you tuck forward to control bang thickness. More hair creates fuller, more dramatic fringe. Less hair gives you wispy, subtle bangs.
This is perfect for anyone who’s curious about bangs but not ready to cut. You can experiment with the look for a day, a week, or until you decide whether to make it permanent.
Expert Tips for All-Day Hold and Polished Finish
Professional techniques prevent the frustrations that make people abandon bandana styling.
These are the tricks hairstylists use to make sure bandanas stay put from morning to night, hair maintains shine, and the final look appears polished rather than haphazard.
Securing slippery fabrics: Silk and satin bandanas slide. Use bobby pins that match your bandana color—place them behind your ears and at the nape of your neck. The pins should go through the fabric and into your hair, anchoring the bandana to your head rather than just to itself.
Building foundation texture: If you want natural beachy waves to pair with your bandana, use celebrity hairstylist Jason Lee’s technique. Air-dry your hair in two large braids. The larger the braid, the more natural and loose the resulting wave. This gives you texture without heat damage.
Heat protection: When straightening hair for sleek bandana looks, always apply a protective serum first. Let your hair air-dry a few times weekly to recover from heat styling. According to research from the Journal of Cosmetic Science, repeated heat exposure above 300°F causes significant protein degradation in hair — and one-day versus 5-day head bandage studies similarly demonstrate how sustained fabric contact and coverage duration meaningfully affect underlying tissue health, underscoring why protective serums and bandana fabric choices both matter.
Creating the vintage bump: Part your hair deeply on one side. Take the larger front section and flip it over toward the opposite side, creating a slight pompadour. Tie your bandana directly behind this lift to lock the volume in place. This is the foundation of the Rosie the Riveter look.
The set technique for face-framing pieces: If you have curtain bangs or face-framing layers, use clips to wrap them into pin curls. Let them set for a few minutes before adding your bandana. This makes sure the hair framing your bandana has a polished, intentional shape rather than falling flat.
Essential tools list: Keep these on hand for bandana styling—freshly pressed bandana, rat-tail comb for clean parting, hidden hair elastics (the kind without metal), curling wand for adding volume to buns, and hairspray for final hold.
Preventing breakage: When sweeping hair straight back under a bandana, apply protective oil first. This maintains shine and prevents stress on strands from the fabric tension. Hairstylists recommend argan or jojoba oil—just a small amount distributed through mid-lengths and ends.
Styling Bandanas for Different Occasions
Context matters.
The same bandana can read casual, athletic, romantic, or formal depending on how you fold it, where you position it, and what fabric you choose.
| Occasion | Recommended Styles | Fabric Choice | Key Details |
|---|---|---|---|
| Casual/Everyday | Thin headband with bunny ears, messy bun wrap, low ponytail bow | Cotton in patterns that complement your usual palette | Under two minutes from start to finish |
| Gym/Athletic | Thick-rolled headband for sweat absorption, high ponytail wrap | Cotton (silk will slip when you sweat) | Position lower on forehead to keep out of eyes |
| Beach/Pool | Full turban wrap, matching bandana to swimsuit | Silk or satin for protection | Shields scalp from sun, salt, and chlorine damage |
| Date Night/Romantic | Low ponytail bow with face-framing pieces, gentle waves with swept-back bandana, sleek topknot | Silk or satin in jewel tones or soft florals | Fabric choice elevates formality level |
| Work/Professional | Seamless headband finish, Jackie O under-chin tie, subtle patterns in neutral tones | Depends on workplace culture | Goal is addition, not distraction |
| Festival/Concert | Boho braids with bandana tie, 90s low-forehead style, bold patterns and bright colors | Any—experiment freely | Maximum creative expression allowed |
| Formal Events | Sleek topknot with designer scarf, ballerina bun illusion | Silk preferred over cotton | Fabric drape and sheen signal elevated styling |
Casual/Everyday: Thin headband with bunny ears, messy bun wrap, low ponytail bow. These are your quick styles—under two minutes from start to finish. Choose cotton bandanas in patterns that complement your usual color palette.
Gym/Athletic: Thick-rolled headband for sweat absorption, high ponytail wrap for secure hold during movement. Cotton is essential here—silk will slip the moment you start sweating. Position the bandana lower on your forehead to keep it out of your eyes during workouts.
Beach/Pool: Full turban wrap for scalp sun protection, matching bandana to swimsuit for a coordinated look. This isn’t just aesthetic—it’s protective covering against salt and chlorine damage. According to dermatological research from the American Academy of Dermatology, scalp sunburn significantly increases skin cancer risk, and fabric coverage provides better protection than sunscreen alone in hair — an insight consistent with broader efforts to use P.110: harnessing social listening and public health data to improve awareness of sun-related scalp protection.
Date Night/Romantic: Low ponytail bow with face-framing pieces, gentle waves with swept-back bandana, sleek topknot statement. Choose silk or satin in jewel tones or soft florals. The fabric choice elevates the formality level.
Work/Professional: Seamless headband finish (no bunny ears), Jackie O under-chin tie for polished elegance, subtle patterns in neutral tones. Avoid bold graphics or very bright colors unless your workplace culture supports it. The goal is addition, not distraction.
Festival/Concert: Boho braids with bandana tie, 90s low-forehead style, bold patterns and bright colors. This is where you can experiment with multiple bandanas, oversized prints, or unconventional tying methods. The setting allows for maximum creative expression.
Formal Events: Sleek topknot with designer scarf, ballerina bun illusion, sophisticated patterns. Silk is preferred over cotton for formal settings. The fabric drape and sheen signal elevated styling.
Common Bandana Styling Mistakes and How to Fix Them
Everyone experiences these frustrations.
The difference between people who give up on bandanas and people who make them work is knowing the specific fixes.
Mistake: Bandana keeps sliding off
Your fabric choice is probably wrong for your hair type, or you’re not securing it properly. Use bobby pins to anchor the fabric—place them vertically through the band and into your hair at the temples and behind your ears. Choose cotton over silk if grip is your primary concern. Tie the initial knot tighter than feels comfortable—it will loosen throughout the day.
Mistake: Hair looks flat and lifeless under the bandana
You’re not creating volume before adding the accessory. Apply dry shampoo at your roots before styling—this adds texture and lift. Try the Rosie bump technique: flip a front section of hair over to create a pompadour before tying your bandana behind it. If you’re doing a bun, tease the hair slightly before wrapping it to maintain volume.
Mistake: Bandana overwhelms your face or looks costume-y
Your fold is too thick, or your pattern is too bold for your features. Choose a thinner fold width—one to two inches instead of three. Leave face-framing pieces out to soften the overall look. Opt for subtle patterns when you’re starting out. Small florals or geometric prints are easier to pull off than large graphics.
Mistake: Can’t get the knot to sit right
Practice the bunny ear versus seamless technique until you understand the mechanics. The knot position changes the entire look—top of head creates height and playfulness, nape of neck reads sleek and polished. Experiment with both to see which suits your face shape and personal style.
Mistake: Bandana clashes with your outfit
Apply the Scale Rule: small print outfit plus large print bandana, or vice versa. Avoid competing patterns of similar scale. Stick to a two-color maximum for cohesive looks—your bandana should either match a color already in your outfit or provide a single contrasting accent.
Mistake: Style falls apart within an hour
You’re not using enough securing tools. Apply hairspray before and after styling—this creates grip and hold. Use more bobby pins than you think necessary, especially if you have fine or silky hair. Choose appropriate fabric for your hair texture—cotton for straight hair, silk for curls.
Frequently Asked Questions
Question: Can you wear a bandana with wet hair?
Yes, but technique matters for hair health. Protective turban wraps using silk or satin work best on wet hair because these fabrics reduce friction. Avoid tight styles on wet hair—this causes breakage since wet hair is more elastic and vulnerable to damage. Cotton bandanas can help absorb excess moisture, but don’t leave them on for extended periods. Let your hair air-dry partially before styling for best results.
Question: What size bandana is best for hair?
Standard 22-inch square works for most people and most styles. Size up to 27 inches if you have very thick or long hair—you’ll need the extra fabric for easier tying and more coverage. Smaller bandanas around 18 inches work well for short hair or children. Rectangular scarves (skinny scarves) create a different aesthetic and work better for thin headband looks. Fabric matters more than size for certain styles—silk drapes differently than cotton regardless of dimensions.
Question: How do you keep a bandana from slipping on fine or silky hair?
Use bobby pins matching your bandana color at strategic points—behind your ears and at the nape of your neck. Choose cotton over silk for better natural grip. Apply dry shampoo or texturizing spray at your roots before styling—this creates a grippier surface. Tie the initial knot tighter than feels comfortable since it will loosen throughout the day. Tease your hair slightly at the crown for added grip surface. Consider using headband-style grips underneath your bandana for extra security.
Question: Are bandanas damaging to hair?
Generally no, but fabric choice matters significantly. Silk and satin are protective fabrics—they reduce friction and prevent breakage, making them ideal for curly and natural hair. Cotton can cause friction if tied too tightly or worn daily in the same position. Avoid wearing bandanas on wet hair in tight styles. Apply protective serum before styling to create a barrier between your hair and the fabric. Rotate styling positions to prevent stress on the same hair sections repeatedly.
Question: Can you sleep in a bandana?
Yes, especially for protective overnight styles. Use silk or satin only—never cotton for sleeping. Cotton absorbs moisture from your hair and can cause friction damage. Turban wraps or loose ties at the nape work best for overnight wear. This protects curls, braids, and blowouts while you sleep. It also prevents friction against your pillowcase. Avoid tight styles that create tension on your hairline—this can lead to traction alopecia over time.
Question: What’s the difference between a bandana and a hair scarf?
Bandanas are typically square cotton, 22 inches standard size, with a more casual aesthetic. Hair scarves are often silk or satin, can be rectangular or square, and are usually larger—sometimes up to 36 inches. Bandanas offer more grip and work better for casual or athletic styles. Scarves are more formal and better suited for protective styles and elegant looks. Both work for hair styling—your choice depends on desired aesthetic and hair type needs.
Wrapping Up
Bandana styling is a skill that improves with practice.
Start with one simple technique—maybe the thin headband or the messy bun wrap—and build from there. Once you understand the basic folds and securing methods, you can adapt them to your hair type, your aesthetic, and your schedule.
There’s no “wrong” way to wear a bandana. Personal style matters more than following rules. If a technique doesn’t work for your hair texture, modify it. If a color doesn’t feel like you, choose something else.
The accessibility is the point. One square of fabric, infinite possibilities.
