
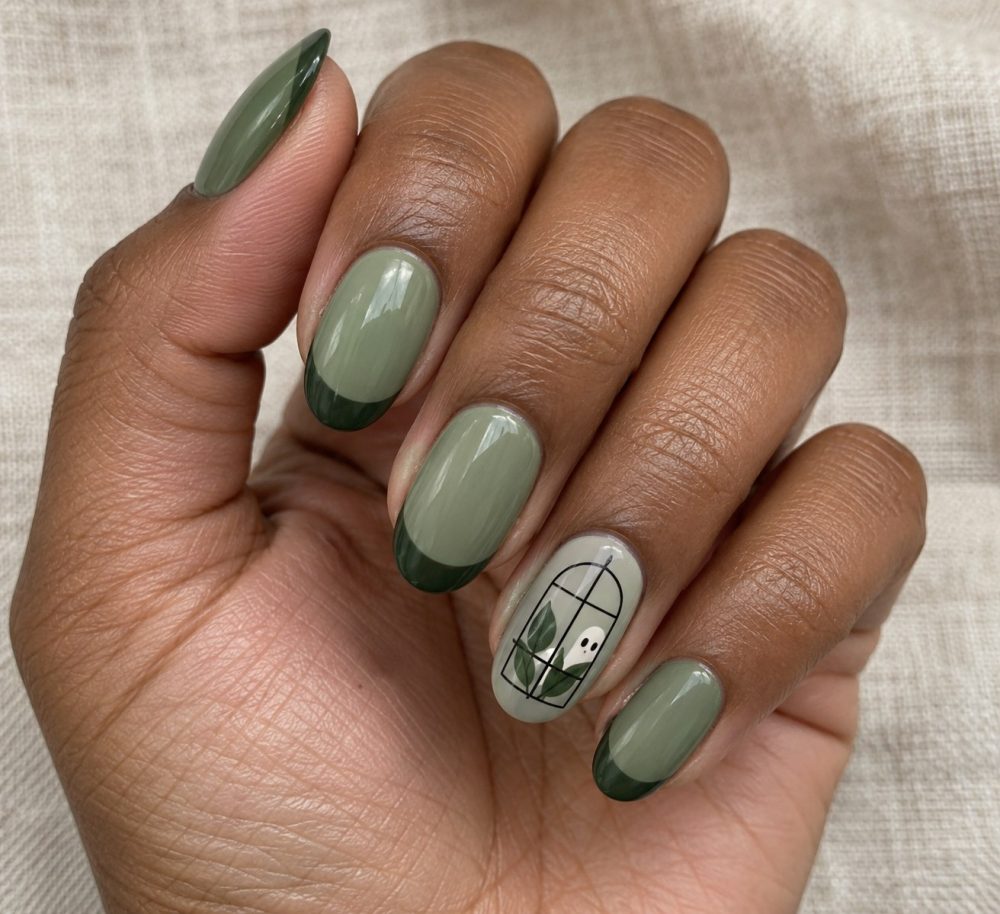
You save the nail photo because of one tiny detail. A ghost hiding behind a leaf. A pumpkin painted like old porcelain. Something so small it feels like a secret.
That is the fun part of Halloween nails: they do not need to shout from across the room. A strange little scene on one finger can carry the entire manicure.
These Halloween themed nail designs give familiar motifs an unexpected setting. That unexpected logic has something in common with surrealism in fashion, where ordinary images are moved into strange, dreamlike settings. Each idea includes a simpler version, because ten miniature paintings are a commitment. Sometimes one very good ghost is plenty.
The haunted greenhouse manicure
A pale ghost peeking through a greenhouse window gives botanical nails a wonderfully odd second life. Keep the palette quiet: gray-green, moss, ivory, and a little black. It should look like a tiny abandoned conservatory rather than a busy garden mural.
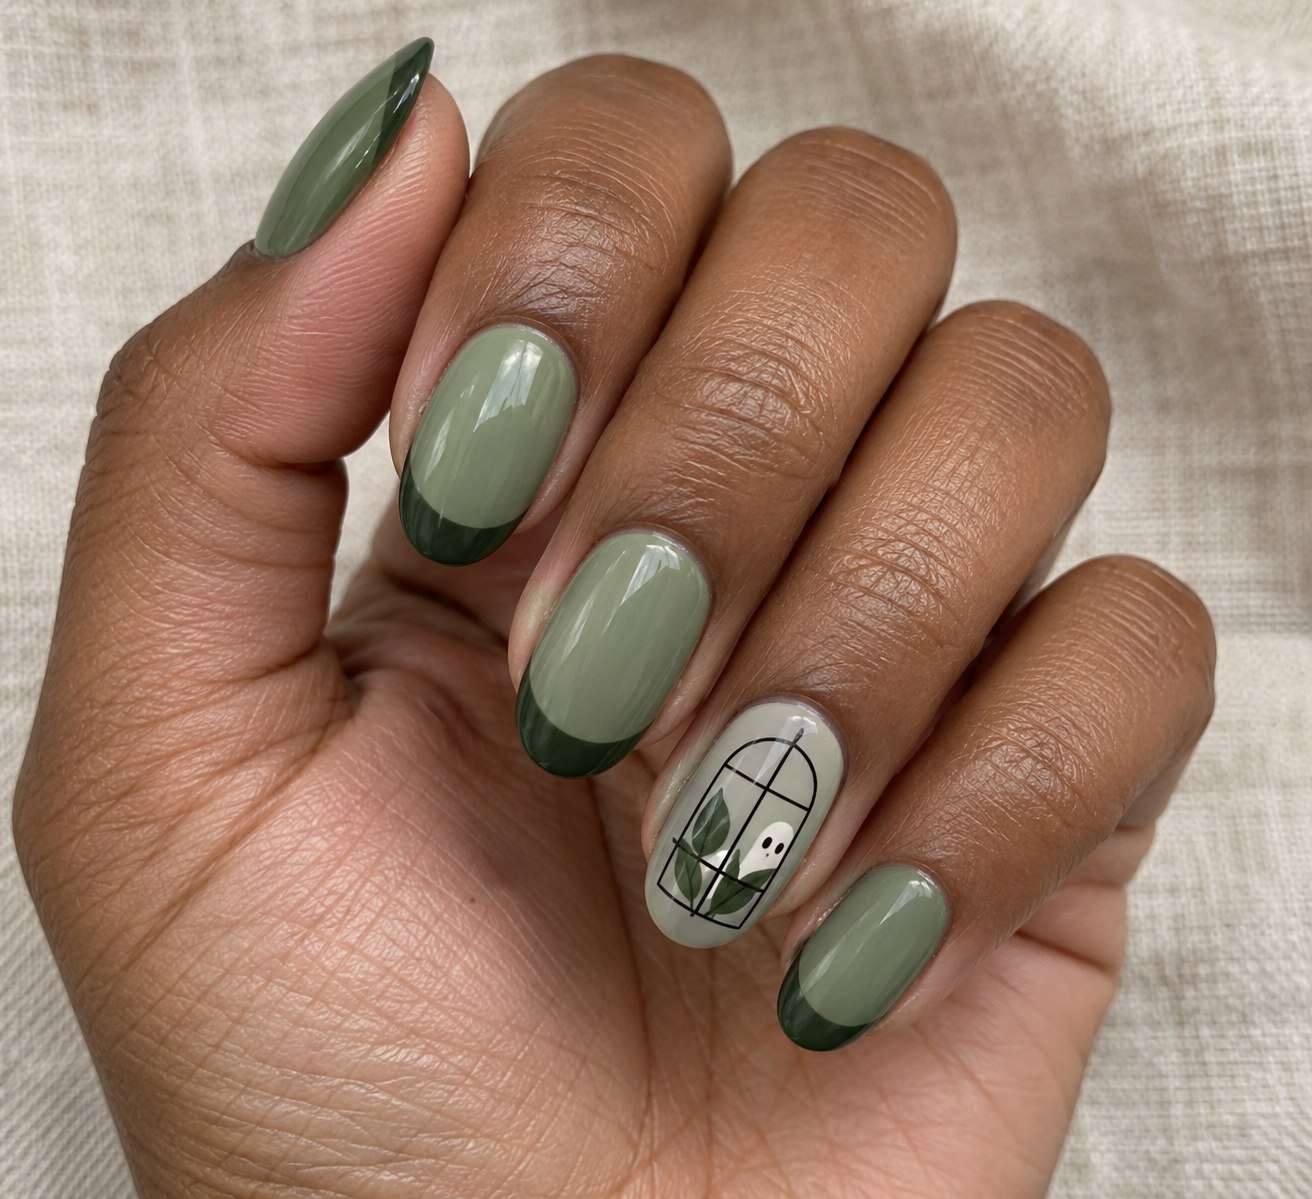
Use a sheer gray-green base on the accent nail. Add one arched black window frame, two small leaves near the bottom, and an ivory ghost tucked behind one leaf. Paint the remaining nails sage with darker green tips. The plain nails make the little scene easier to see.
For a home version, skip the window panes and use a ghost decal beside a leaf. The full framed scene is a good reference for a nail artist, especially on medium oval nails. Ask for the ghost to stay small; the feeling that you almost missed it is what makes the design work.
Midnight moths on smoky cocoa
Moths give Halloween nails a softer kind of darkness. For a darker beauty pairing, explore vampire haircut ideas that carry the same moody, theatrical feeling. A cream wing shape against smoky cocoa feels a little like an old specimen drawing, especially when the rest of the manicure stays spare.
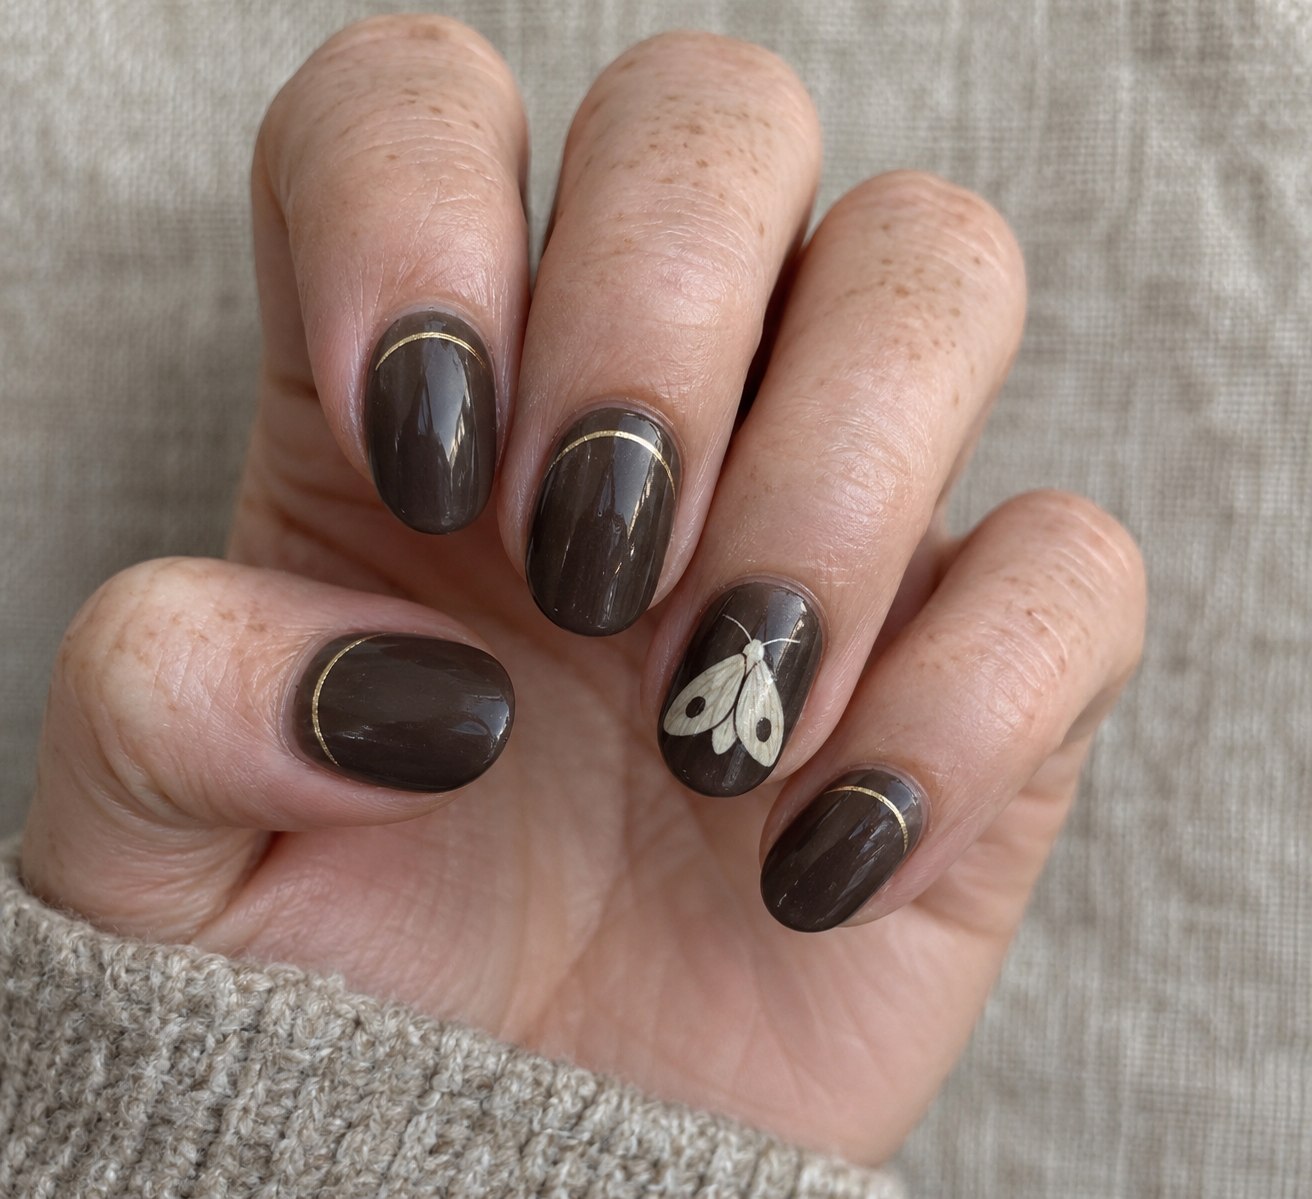
Put one moth on the ring finger, with two broad wings and a narrow body. Two small dark oval markings can suggest the wing pattern without turning the nail into a microscopic drawing exercise. Add a thin muted gold arc near the cuticle of the other nails.
If your nails are short, choose a simple moth silhouette or decal and drop the inner markings. Cocoa, taupe, and cream all sit comfortably together, so you can vary the base shade across the hand. Keep the gold as an accent, not a second main event. The moth deserves the attention.
The ghost laundry line
Even ghosts apparently have laundry day. Two little sheet shapes hanging from a washing line turn a familiar white-ghost manicure into a scene with actual personality. It is cute, slightly absurd, and easy to keep understated.
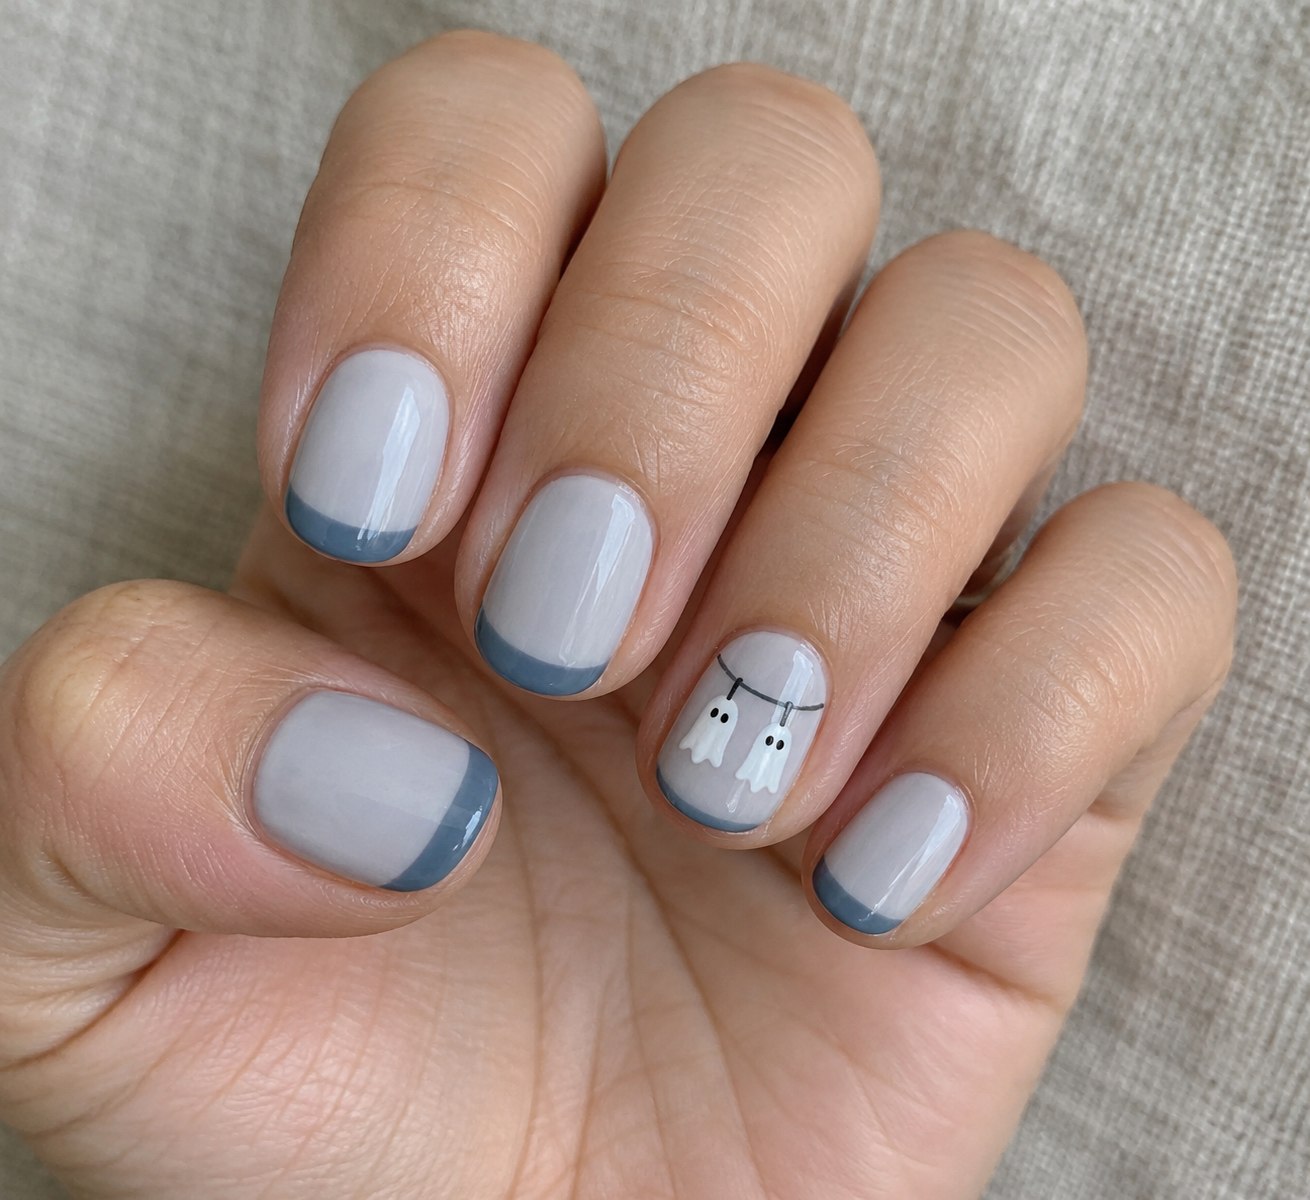
Start with a pale gray base and muted blue-gray French tips. On one accent nail, paint a thin curved line across the upper half, then add two tiny white sheets hanging below it. Give each sheet two dark dot eyes. Small dark dashes can stand in for clothes pegs.
One ghost is enough on a shorter nail. If the line becomes fiddly, use a nail-art sticker for the character and paint only the line yourself. Avoid filling the background with stars or clouds; the empty space helps the hanging sheets read as laundry rather than floating blobs. The same playful precision can carry into colorful eye makeup, especially when you keep one small detail as the focus.
Blue-and-white porcelain pumpkins
Pumpkins do not have to be orange. Painted in cobalt on an ivory base, they look like a tiny pattern borrowed from a much stranger tea set. This is the option for anyone who likes a Halloween reference but still wants a manicure that feels delicate.
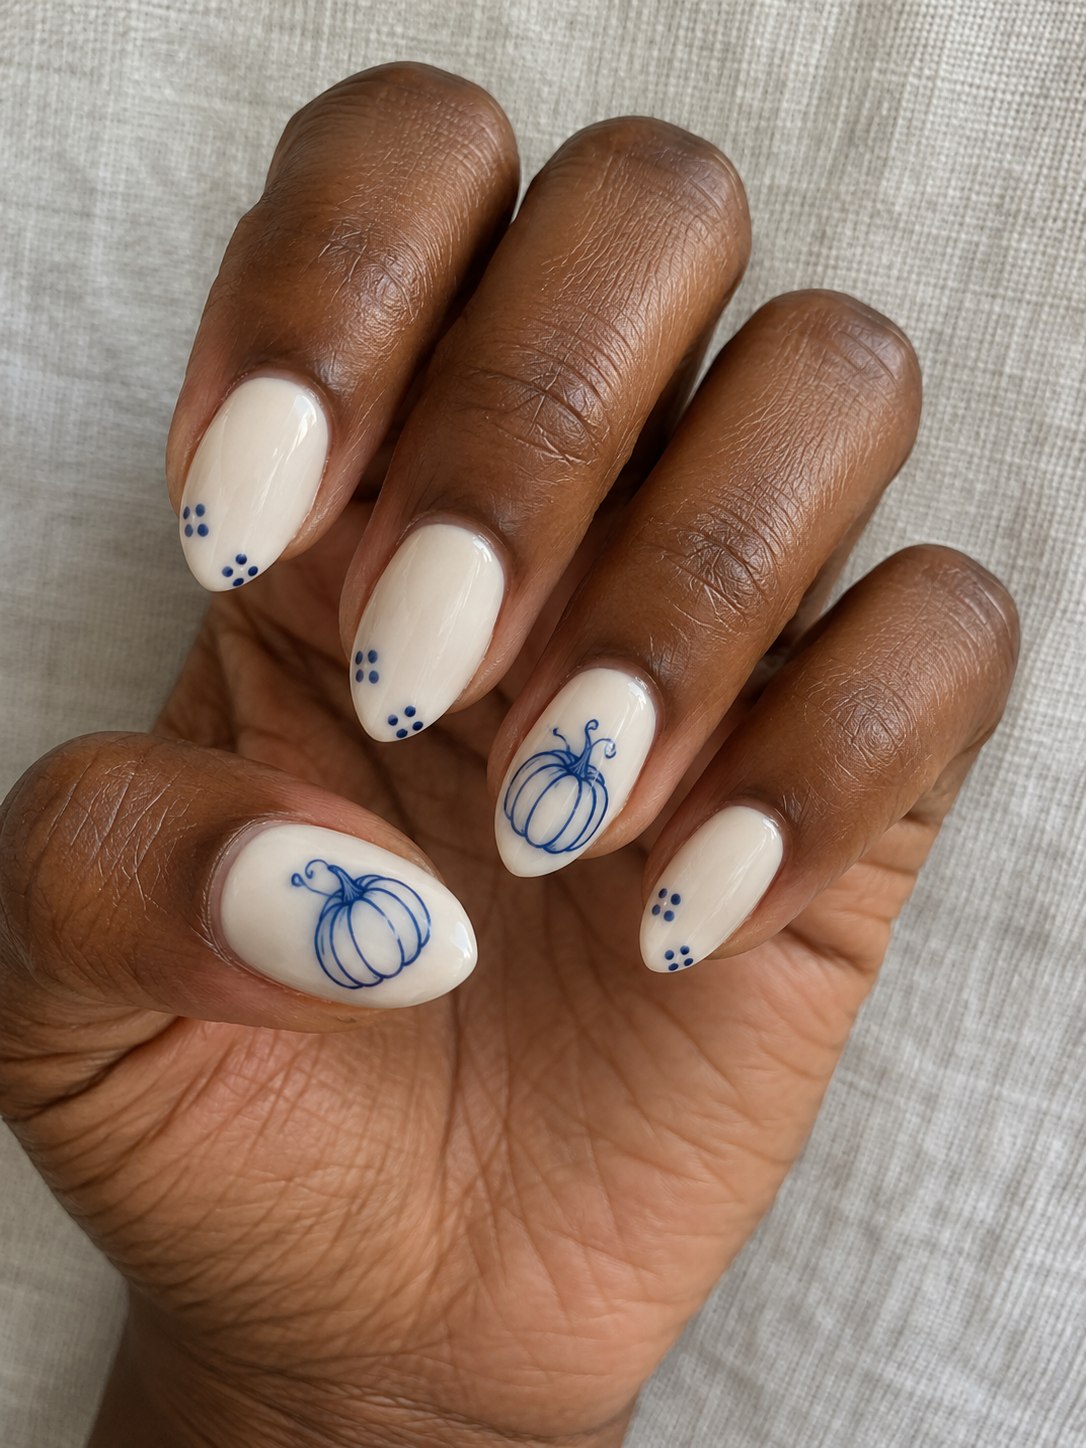
Use one pumpkin on the thumbnail and one on the ring finger. Three or four curved blue lines can suggest the ribs, with a short bent stem above. Add a few tiny blue dots to the remaining nails to connect the set without repeating the whole drawing.
A medium almond shape gives the pumpkin room, but a small oval outline works on shorter nails too. Ask for fine, slightly irregular brushwork rather than a thick cartoon border. The charm comes from the porcelain effect: pale space, crisp blue, and just enough detail to recognize the subject.

The eclipse orchard
A bare branch cutting across a copper eclipse feels like the opening frame of a spooky film. There is no literal monster here. The mood does the haunting.
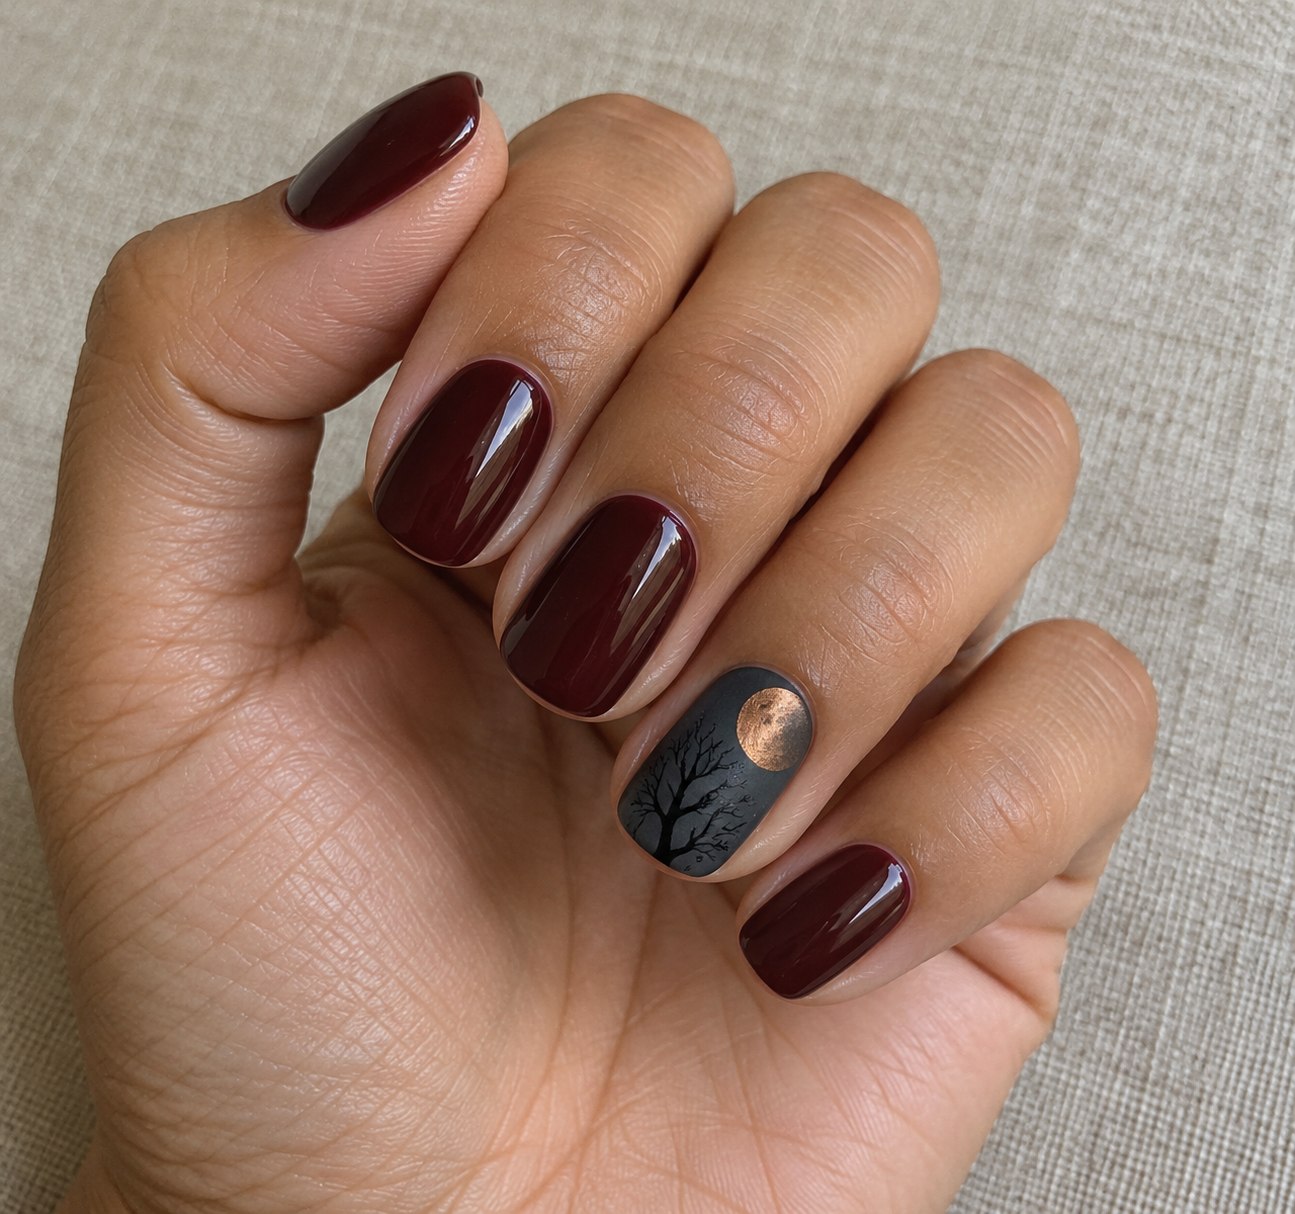
Paint most nails deep burgundy and use charcoal for one accent. Place a small copper circle high on that nail, then cover part of it with the background color to leave a crescent. Add a fine black branch from one lower corner, stopping before it crowds the moon.
This is a forgiving design to simplify: keep only the copper crescent and it still holds together. For the branch, a nail artist can add a few tapered offshoots; a home version can use one curved line with two small forks. Leave the other nails plain so the tiny night scene has somewhere to breathe.
The pocket-size potion cabinet
Potion nails get more interesting when the bottles look like a mismatched collection. Think muted teal and amber against pale lilac, with deep plum on the surrounding fingers. A whole cabinet, reduced to two tiny containers.
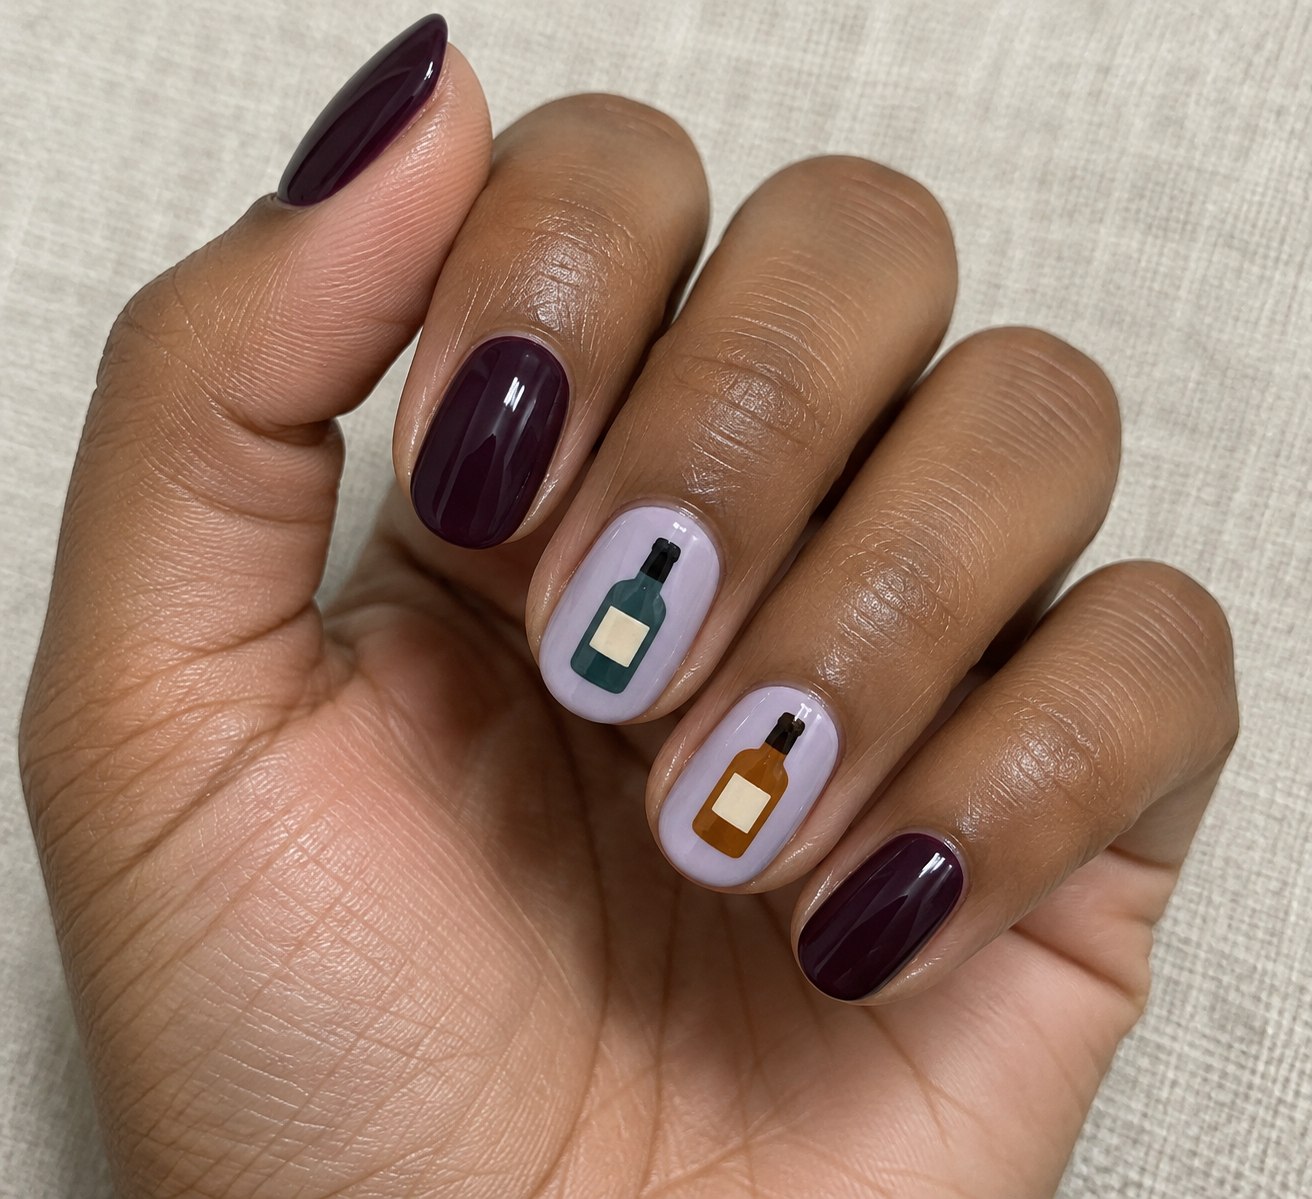
Choose two accent nails and give each one a different bottle silhouette: one round, one tall and narrow. A small ivory rectangle can suggest a label without any lettering. Keep the necks short and the outlines simple so the bottles remain recognizable at actual nail size.
This is a detail-heavy idea, so bring a clear sketch or image to an artist if you want both shapes. For an easier version, use one bottle decal and repeat its color on a plain nail. Skip writing tiny potion names. Nobody should need a magnifying glass to appreciate your manicure.
Postcards from a haunted house
A tiny ghost inside a postage-stamp frame looks as though it has mailed itself from somewhere deeply inconvenient. Warm cream and faded rust keep the idea closer to old correspondence than bright party decorations.
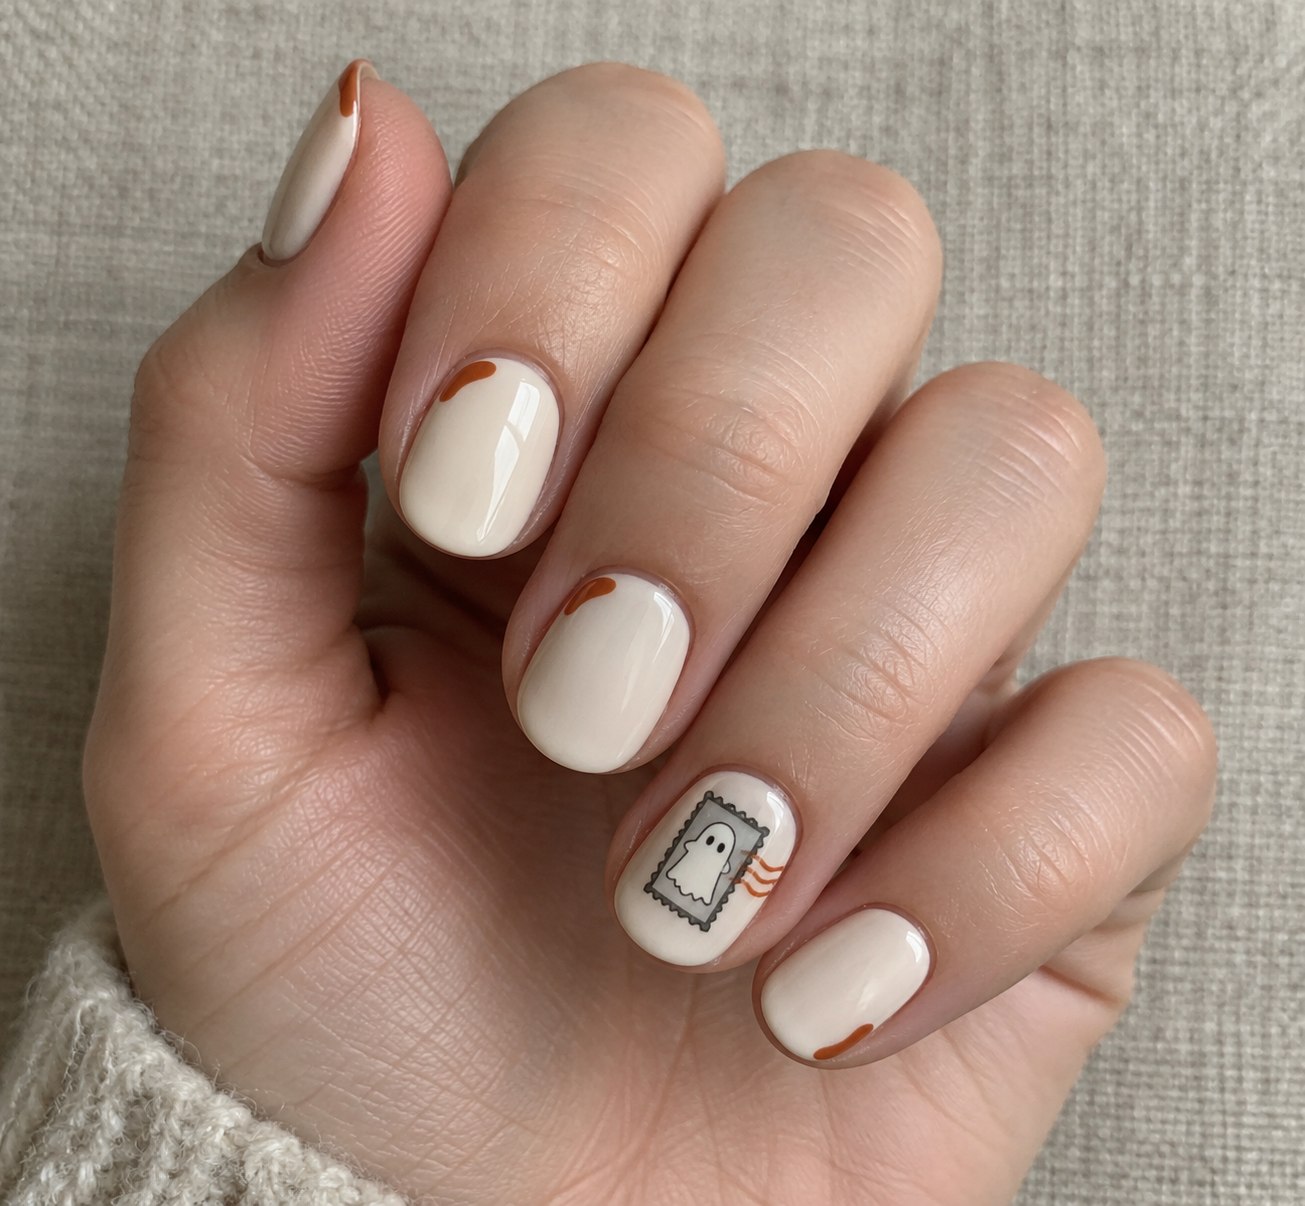
Make the stamp the only complicated element. On the ring finger, frame a small ghost with a thin rectangle and softly scalloped edges. Add two curved rust-colored cancellation marks beside it. Repeat a little rust on the tips or corners of the other nails.
The scallops are optional. A plain rectangular border still reads as a stamp when paired with the cancellation lines. Keep this design flat and graphic; heavy texture can obscure the little ghost. If you like mismatched manicures, put a tiny moon stamp on the opposite hand rather than repeating every detail.
The cat in the attic window
The cat is not doing anything suspicious. It is simply sitting in a very small attic window, watching. Somehow that is enough.
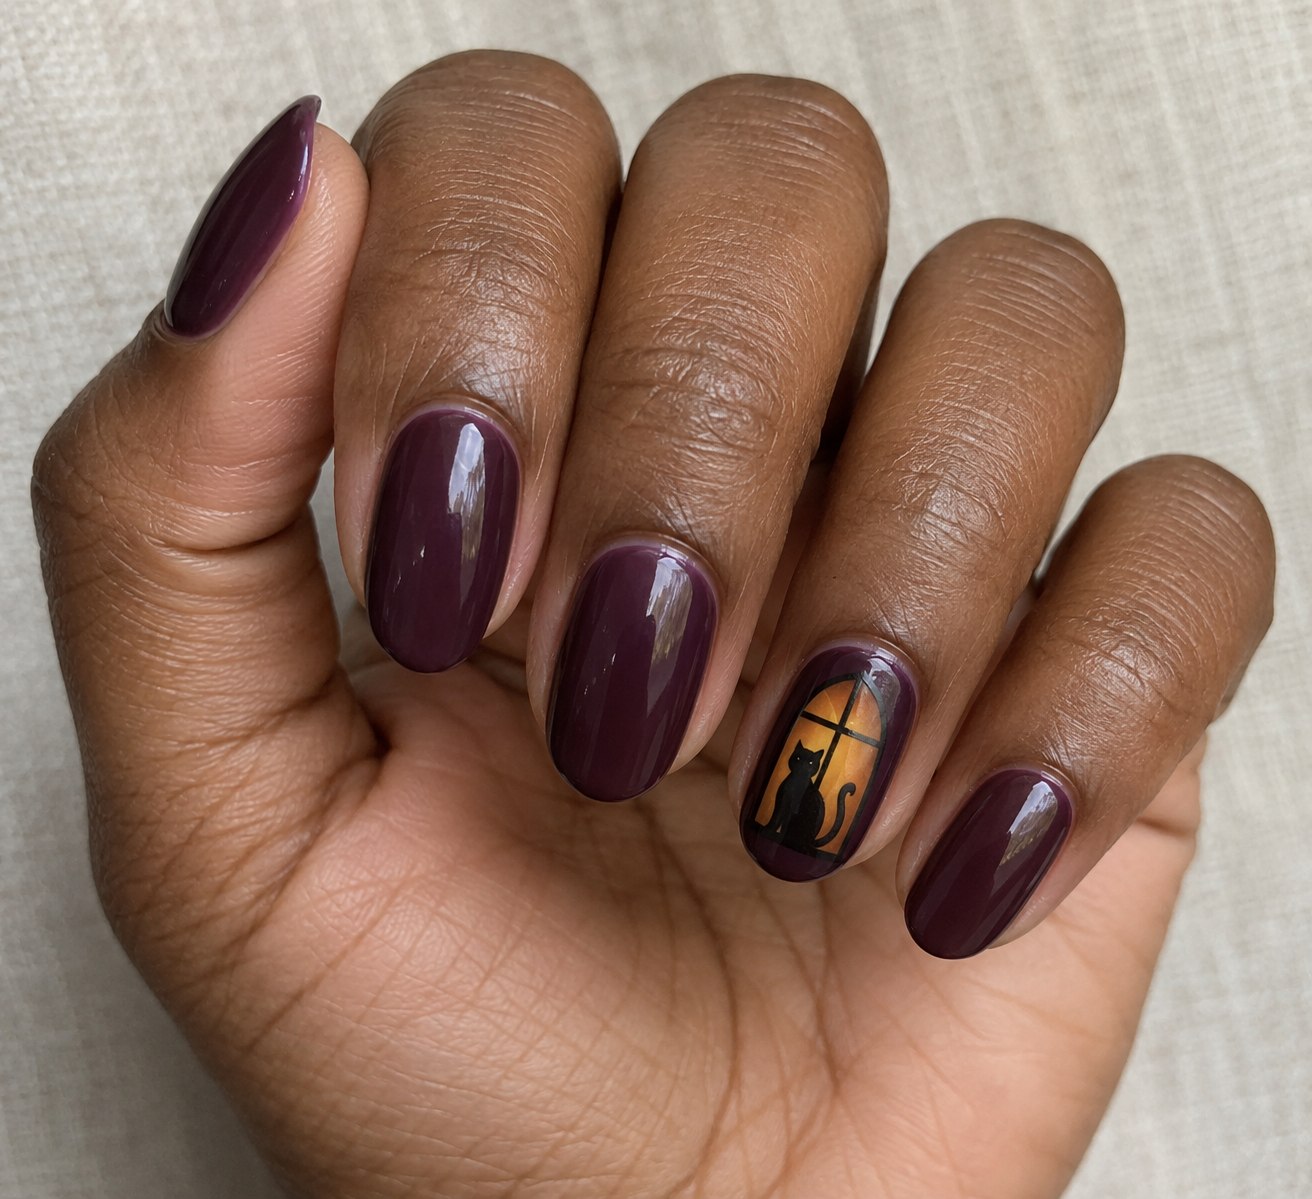
Use a deep plum base and paint one amber window on an accent nail. A rounded cat silhouette needs a body, two pointed ears, and a curved tail; you can leave the face blank. Add a thin dark frame if there is room, but keep the window large enough that the cat does not disappear.
For short nails, reduce the design to a cat head peeking above the bottom of the window. A decal can handle the silhouette while you paint the amber shape underneath. Leave the rest of the manicure dark and glossy. The single lit window should feel like something you noticed on a quiet walk home.
Choose one focal nail before choosing ten details
Save the design you love, then decide what can fit on your actual nails. Length, shape, and how much detail you enjoy matter more than copying every millimeter of a reference image.
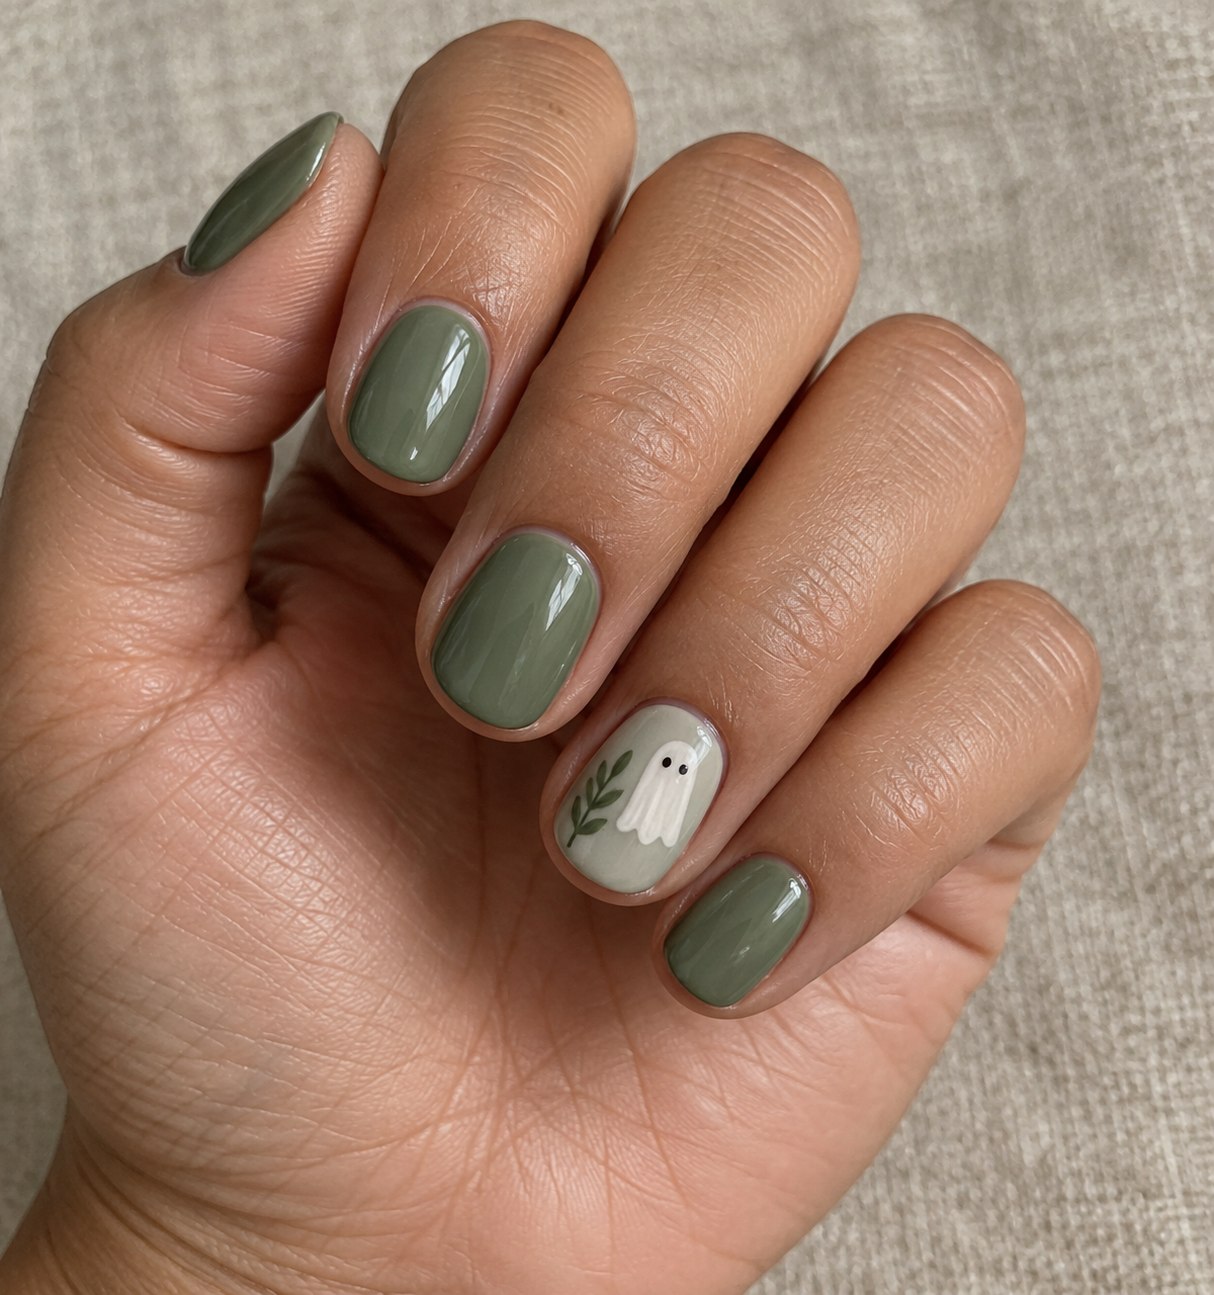
For a salon brief, name the base colors, the focal finger, and the one detail you care about most. “Sage nails with one ghost behind a leaf” is a much clearer request than a collage of twelve unrelated manicures. Ask the artist what they would simplify for your nail length.
At home, start with regular polish and a single decal or dotting-tool motif, following the products’ application and removal directions. Let each layer dry as directed before adding the next. If one ghost lands slightly crooked, let it have a personality. Perfect symmetry has never been a requirement for a good haunting.
Leave one tiny thing on your nails that makes you look twice.
